Sophie's Pi

Mathematical baking

Sophie’s Pi is a record of my adventures in baking, maths and the real world, hoping to make my way to having my own patisserie empire some day. Or just getting to lick the bowl now and again.

  • Blog Search
  • Blog
  • About
  • Images

51. Caramel Choc Chip Cookies

February 22, 2020 by Sophie Faulkner in Recipe

I just wanted to experiment with caramel today after seeing a recipe for caramel blondies in ‘The Violet Bakery Cookbook’ by Claire Ptak, so I made some caramel chocolate chip cookies. Not too hard to do at all, and a little step up from your normal chocolate chip!

Makes 15 - 20 cookies

Ingredients

For caramel shards

  • 80g caster sugar

  • 2 tbsp water

For the cookies

  • 225g flour

  • Pinch of salt

  • 3tsp baking powder

  • 100g butter, cold and diced

  • 120g light brown sugar

  • 100g chocolate chips

  • 2 eggs, beaten

Method

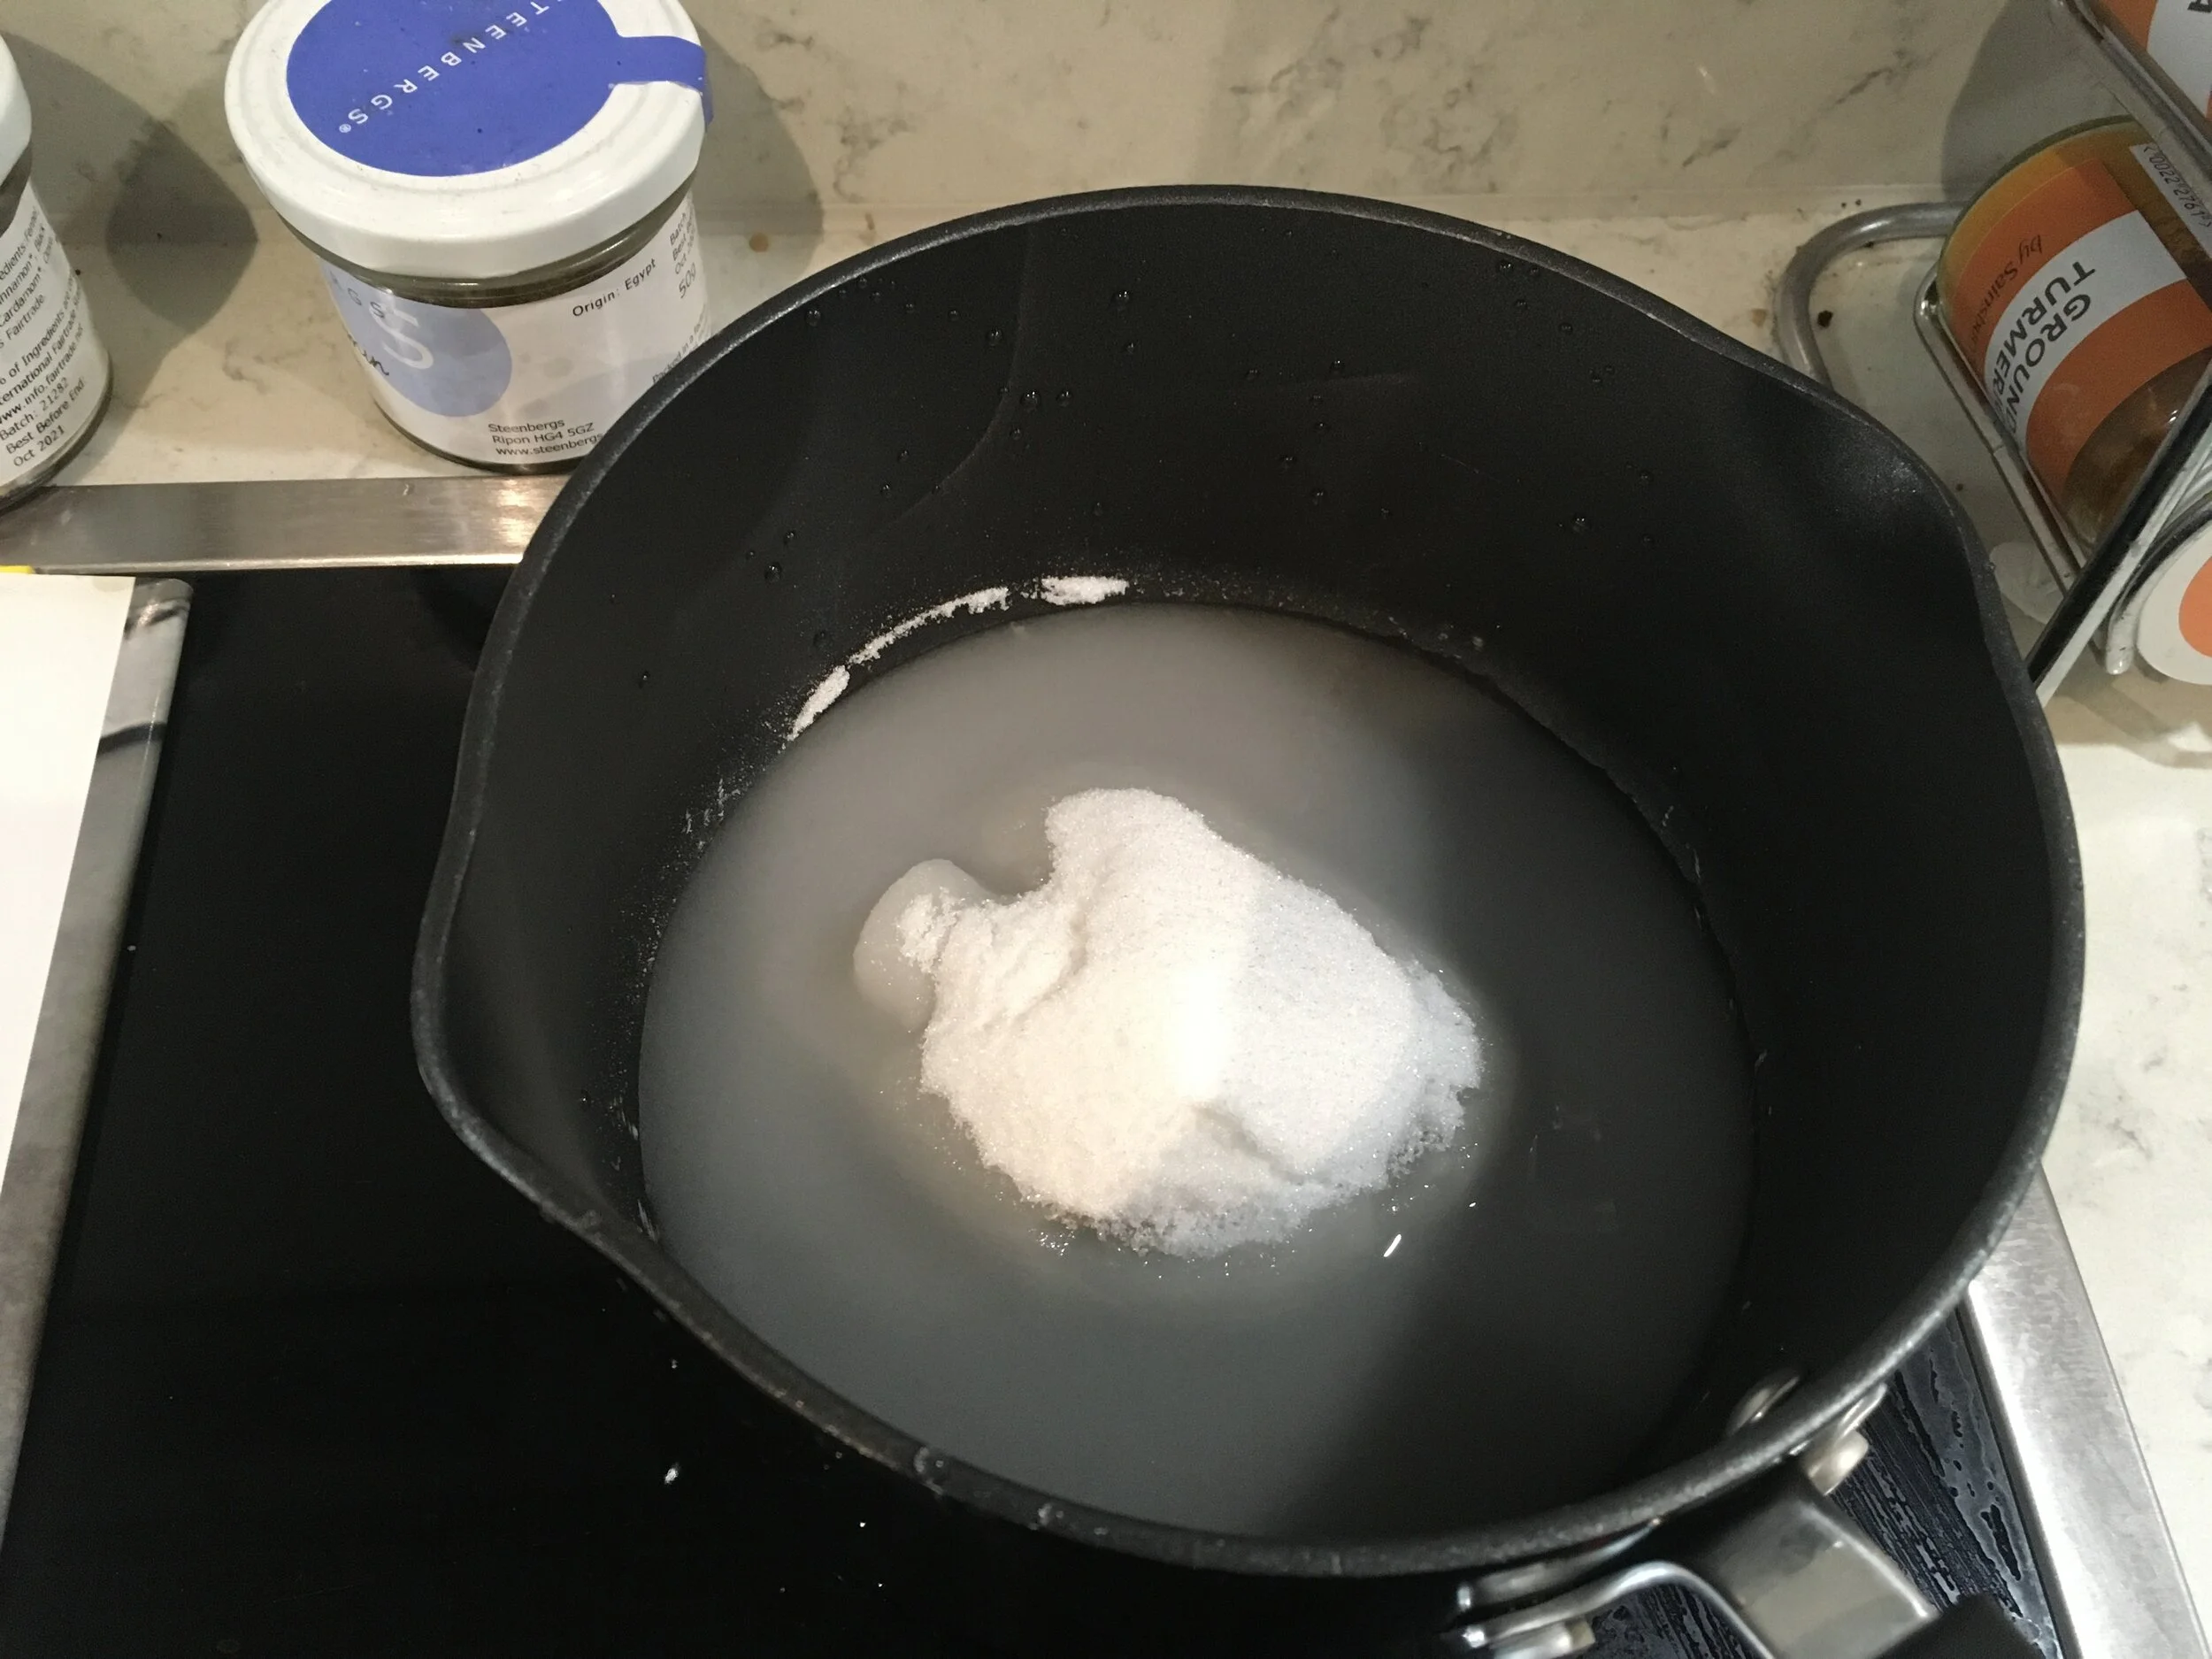
  1. Start with the caramel, as you need to let this cool before you break it into shards to put in your cookies. Put the water in a pan and cover with the sugar. Heat on a low to medium heat until the sugar has dissolved. DO NOT STIR as this may cause the sugar to crystallise.

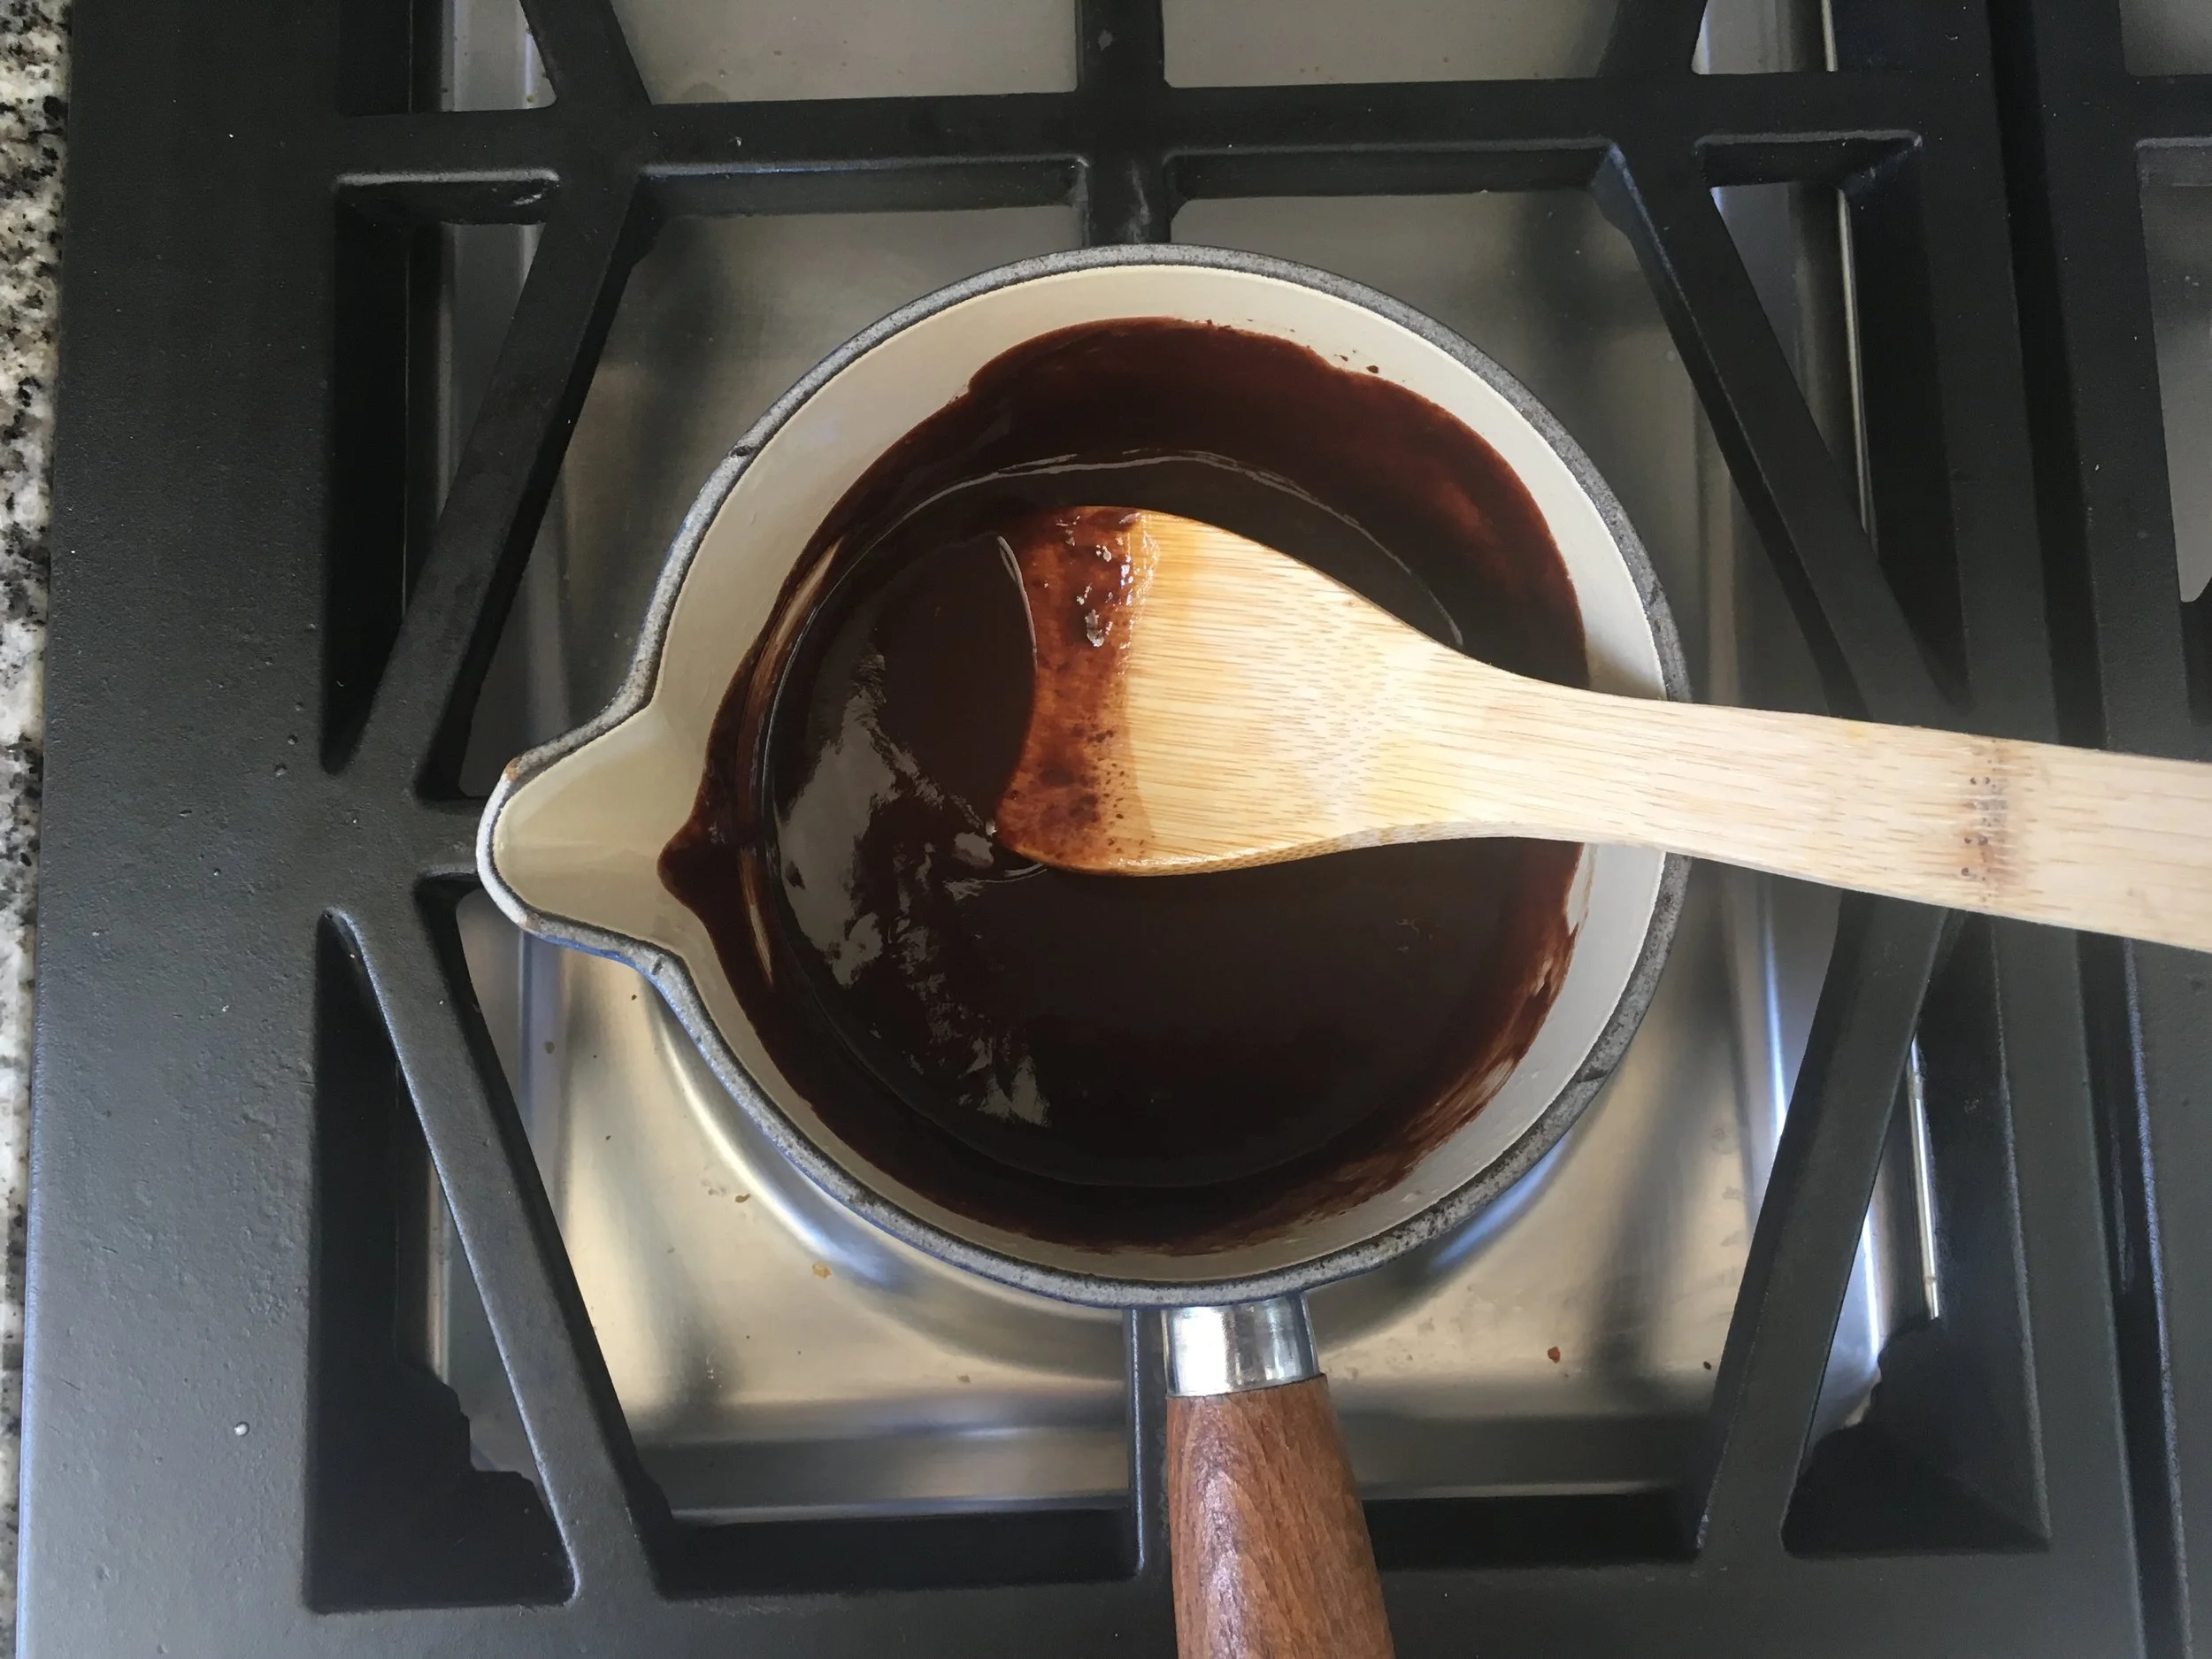
  2. Once the sugar has fully dissolved, turn it up to a high heat and bubble away until it is a deep amber colour (around 170C for those with thermometers who want to be precise). If your sugar crystallises, turn the heat back down to low to medium and add some more water to dissolve the crystals again.

  3. Pour your caramel onto a piece of baking paper (or silicone mat as I did) on a heat proof surface or baking tray. Allow to cool at room temperature.

  4. Preheat the oven to 180C, and line two baking trays.

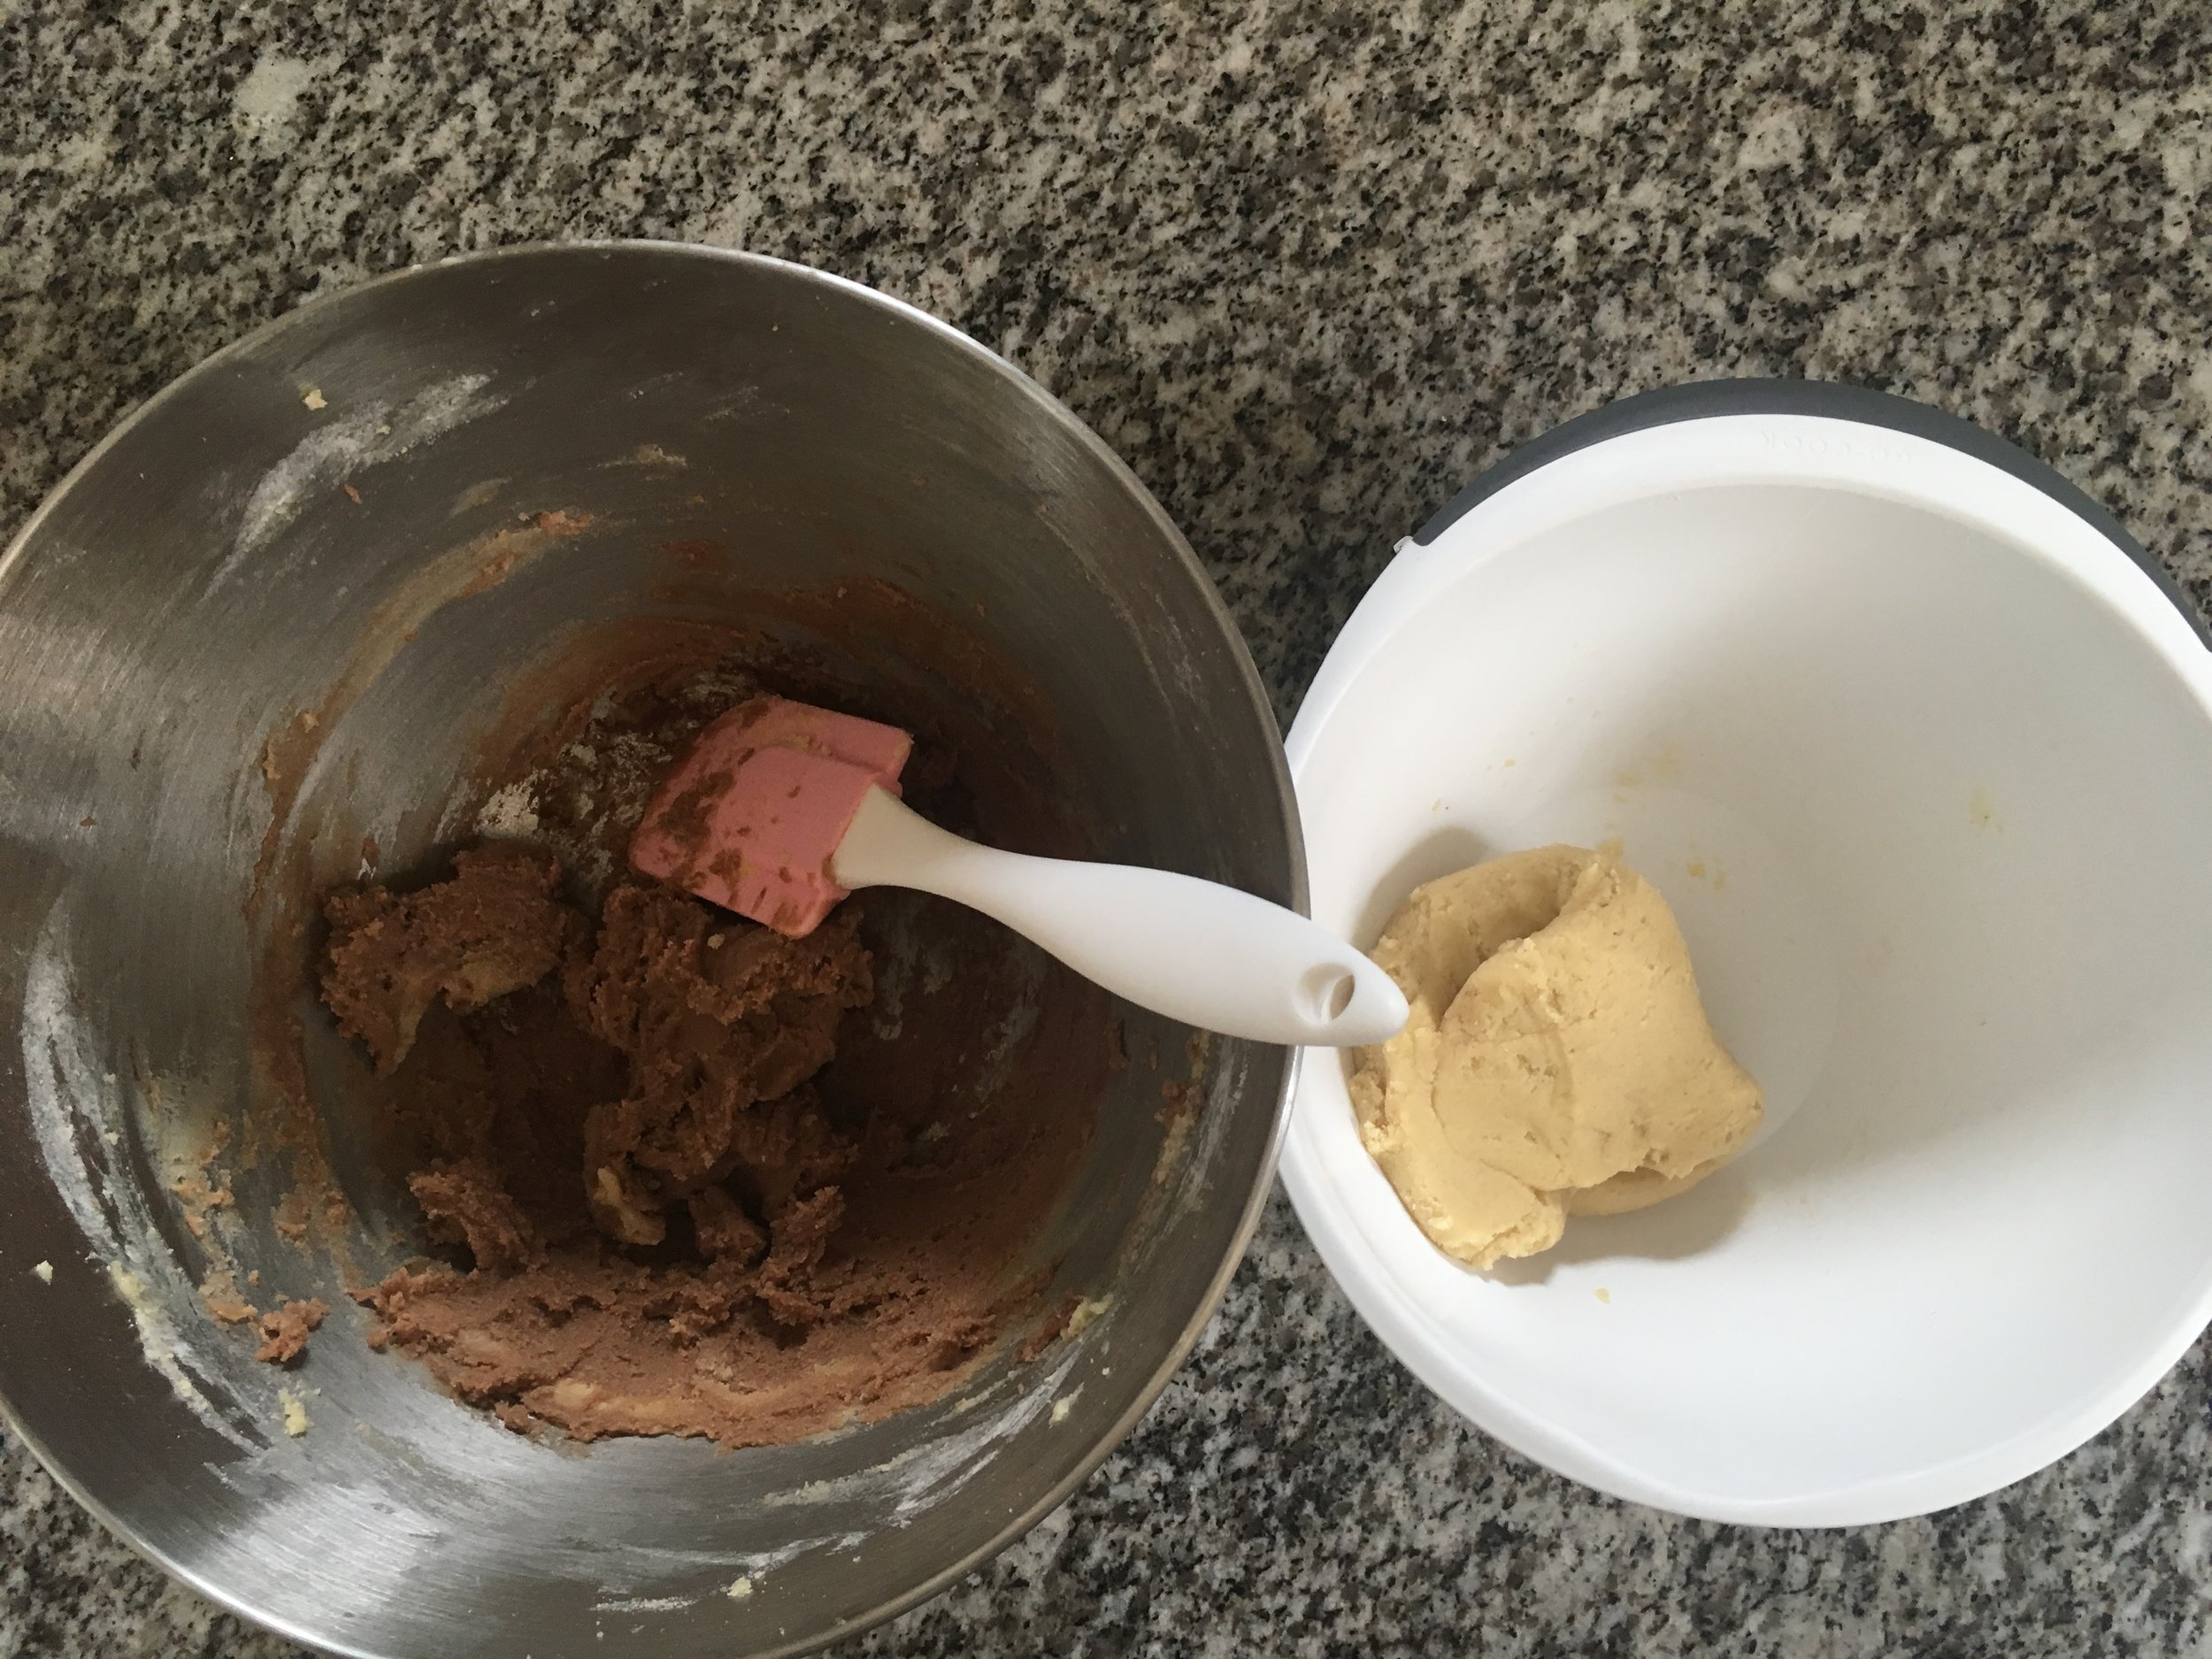
  5. In a large bowl, mix together the flour, salt and baking powder, and then rub in the butter until it is the consistency of bread crumbs, then mix in the sugar and chocolate chips.

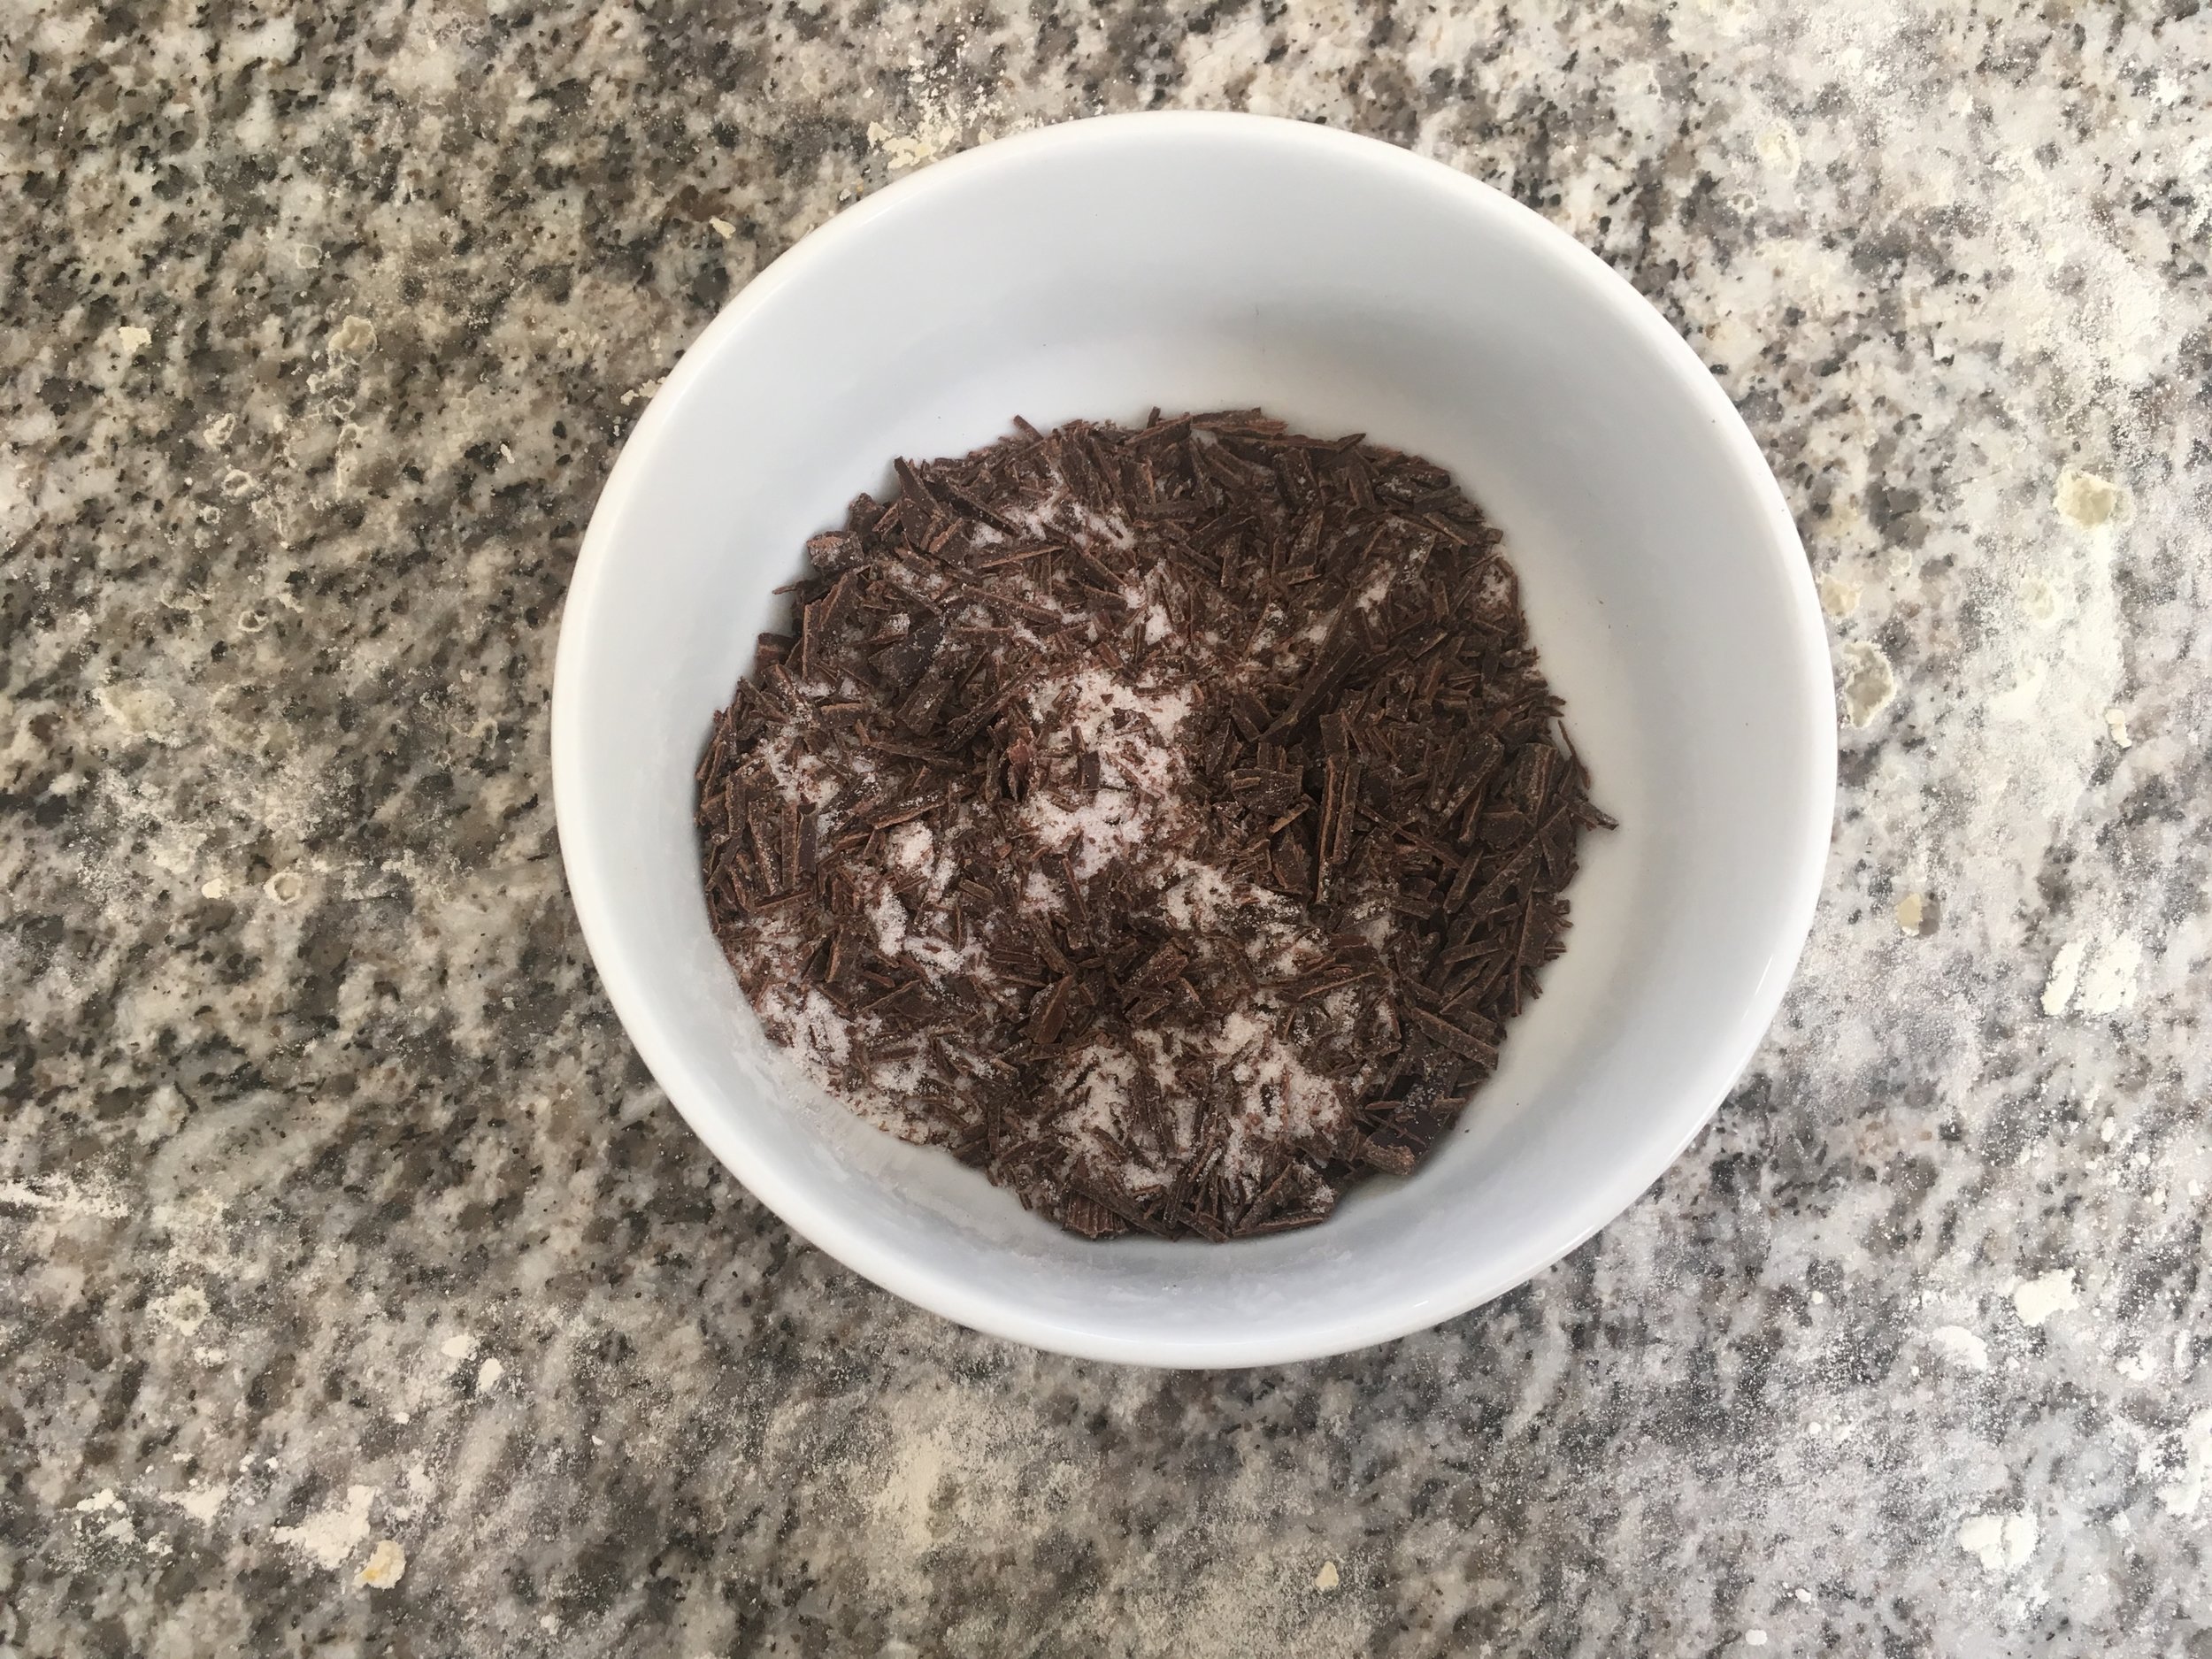
  6. Once the caramel has cooled, use the back of a knife to whack it and create shards. Use your fingers to snap into smaller pieces if necessary, but be careful, as caramel can be quite sharp.

  7. Mix the caramel shards into the cookie mixture, then add the eggs and mix until a sticky dough forms.

  8. Split the dough into little balls (or just hunks, I wasn’t bothered about pretty today) and place on the baking trays spaced apart.

  9. Bake for 10-12 minutes until starting to turn golden.

  10. Allow to cool and enjoy!

View fullsize IMG_5280.JPG
View fullsize IMG_5285.JPG
View fullsize IMG_5288.JPG
View fullsize IMG_5283.JPG
View fullsize IMG_5292.JPG
View fullsize IMG_5293.JPG
View fullsize IMG_5297.JPG
View fullsize IMG_5300.JPG
View fullsize IMG_5298.JPG
View fullsize IMG_5301.JPG
February 22, 2020 /Sophie Faulkner
Cookies, Chocolate, caramel, Recipe
Recipe
Comment
IMG_3457.jpg

34. Cookie Sandwiches

May 11, 2019 by Sophie Faulkner in Recipe

You hungry? I’m hungry. And I have leftover icing. Let’s make cookie sandwiches.

I LOVE making chocolate chip cookies. I mean, they’re a classic for a reason. They’re quick, they’re easy, and they are DELICIOUS. I don’t know if there’s anything more moreish than a good chocolate chip cookie. Did you know that they were a completely happy accident? Someone was trying to make chocolate cookies (or cake, I forget which) and had run out of cocoa powder, so they decided to use chopped up chunks of chocolate, because they would melt and combine with the rest of the dough right? WRONG. The chocolate chip was born. Happy accidents exist!

Whilst cookies are great entirely on their own (don’t feel pressured to make the icing too, just eat these on their own for something just as yummy!), paired with Oreo buttercream icing to make a cookie sandwich? Amazing. Hits that sweet tooth so hard the dentist might suggest braces.

Makes 30 cookies or 15 sandwiches

Ingredients

For the cookies

  • 150g (5.25oz) butter

  • 80g (2.75oz) golden caster sugar

  • 80g (2.75oz) light brown sugar

  • 1 egg

  • 200g (7oz) plain flour

  • 2 tsp vanilla extract

  • 1/2 tsp baking powder

  • Pinch of salt

  • 150g (5.25oz) chocolate chips

For the icing

  • 400g (14oz) icing sugar

  • 200g (7oz) butter

  • 6 Oreos

Method

  1. Preheat the oven to 190C and line two baking trays with baking paper (You need two. Mine merged. I should know better by now.)

  2. Cream together the butter and sugars for the cookies. Add in the egg, flour, salt and baking powder and combine.

  3. Mix in the vanilla and chocolate chips.

  4. Roll a teaspoon worth of dough into a ball at a time, place on the baking tray and slightly flatten. (If you’re slightly more anal, like me, use 22g of dough for each cookie)

  5. Bake for 10-12 minutes until the edges start to go golden, then take out and leave to cool. (OR EAT THEM WARM BECAUSE THEY’RE TOO GOOD TO WAIT)

  6. Cream your butter, then add in the icing sugar a bit at a time, so it won’t go everywhere. If it doesn’t quite all combine, add in a teaspoon of milk or water.

  7. In a ziploc bag or similar, bash your Oreos to a fine crumb, then add in to your buttercream icing.

  8. Take a cooled cookie, and cover the flat side with icing, potentially using a piping bag with a pretty nozzle.

  9. Add another cookie on top for an excellent sandwich.

  10. ENJOY!

IMG_3439.JPG
IMG_3446.JPG
IMG_3448.JPG
IMG_3457.JPG
May 11, 2019 /Sophie Faulkner
sweet, Recipe, Cookies, Chocolate, Vanilla
Recipe
Comment
IMG_1385.JPG

19. Chocolate Rugelach

October 21, 2018 by Sophie Faulkner in Recipe

What on earth is a rugelach? It’s a good question, and to be honest, I had to google them to make sure they were actually a thing. Turns out that rugelach are a type of Jewish pastry made with a cream cheese based dough, that looks kind of like a miniature croissant. I first came across them in Marc Grossman’s book, New York Cult Recipes, and thought they sounded amazing. And then promptly forgot about them. But then I started patisserie school and wanted to start playing around with different types of pastry, so, a cream cheese dough seemed like something fun to try. I found a number of rugelach recipes online, most of them chocolate, some of them jam filled, and came up with this. I hope you enjoy them!

Makes 12 Rugelach

Ingredients

Pastry

  • 100g (3.5oz) plain flour

  • 60g (2oz) cream cheese (I used lactofree. It keeps so much longer if you’re not using the whole pot in one go)

  • 60g (2oz) butter

  • A pinch of salt

Ganache

  • 25ml single cream

  • 50g (1.75oz) dark chocolate

  • 10g (0.5oz) butter

Topping and glaze

  • 50g (1.75oz) dark chocolate, chopped into almost shavings.

  • 50g (1.75oz) caster sugar

  • 1 egg, beaten

Method

  1. Start with the dough. Cream together the butter and cream cheese until smooth, but not fluffy. Fold in the flour and salt until it forms a dough and then wrap in clingfilm and chill in the fridge for at least 3 hours until it is completely chilled.

  2. Next make the ganache, a bit before you take the dough out of the fridge. Heat the butter and cream in a pan over a medium heat until the butter has completely melted and it all just comes to the boil. Then remove it from the heat and throw in the chocolate bit by bit and stir to combine the melting chocolate into the cream. Your ganache should be smooth and glossy.

  3. Preheat the oven to 170C.

  4. Take your dough out of the fridge and on a floured surface, roll it into a roughly round shape that’s just a bit larger than a standard dinner plate. Roughly 11 inches or so in diameter.

  5. Spread the ganache over the dough. (I think I put a bit too much on as it came out the sides a fair bit, I’d try a thinner layer if possible!)

  6. Mix together the chopped chocolate and sugar and then sprinkle about half of it over the ganache until you have a good even covering.

  7. Slice the round into 12 “pizza slices”. Starting from the outside edge of each slice, roll the slices into a croissant type shape. This should be fairly tight, but not so tight all your filling comes spilling out.

  8. Place your rugelachs on a lined baking tray and brush them with the beaten egg. Then sprinkle over the rest of the chopped chocolate and sugar.

  9. Bake for 18-20 minutes until golden brown.

  10. Allow to cool before serving.

IMG_1344.JPG
IMG_1345.JPG
IMG_1348.JPG
IMG_1349.JPG
IMG_1352.JPG
IMG_1359.JPG
IMG_1367.JPG
IMG_1375.JPG
IMG_1386.JPG
October 21, 2018 /Sophie Faulkner
Chocolate, pastry, Cookies, croissant, recipe
Recipe
Comment
IMG_0678.JPG

14. Chocolate and Cinnamon Pinwheels

September 22, 2018 by Sophie Faulkner in Recipe

I’m back!!

After a much needed and long awaited holiday I am finally back in the UK with a decent wifi signal. I had a great time in Florida, but there was no possible way that I could get a blog post up without every photo taking hours to upload and process. Sorry for the radio silence!

I had planned on posting these while I was away and maybe doing a review whilst I was out there too, but all good plans. I made these just before I left and took them along to my most recent match for my team to enjoy. They seemed to go down ok.

Pinwheel cookies are just fun to make and you could do them in so many different flavour combinations, but, let’s be honest. I’ve been on a chocolate and cinnamon kick recently. I promise I’ll do something different soon! I know not everyone likes cinnamon… weirdos…

These are ideal to make with kids, cause they’re fun, easy and make PLENTY. Hope you enjoy!

Makes roughly 48 pinwheels.

Ingredients

  • 125g (4oz) butter

  • 100g (3.5oz) caster sugar

  • 200g (7oz) plain flour

  • 1 egg yolk

  • 40g (1.5oz) plain chocolate, melted

  • 1 tsp ground cinnamon

  • 2 tbsp milk

  • Pinch of salt

Method

  1. Start by making your cookie mixture by creaming together the butter and sugar and then add in the flour, a pinch of salt, an egg yolk and a tablespoon of milk.

  2. Move half of the dough into a new bowl and fold in the melted chocolate. In the original bowl add in the cinnamon.

  3. On a sheet of greaseproof paper roll out one of the doughs to be about 1/8” thick. Mine ended up being about 20cm by 40cm. Might want to try and roll them to be fairly rectangular if possible! Repeat with the other dough on another sheet of greaseproof paper. You want them to be roughly the same size and shape if possible.

  4. Brush the top of the cinnamon dough with a tablespoon of milk and then lay the chocolate dough on top. Use your rolling pin to roll with a gentle pressure a couple of times to get the doughs to adhere, but not so that you lose the definition of the divide.

  5. Roll the dough into a long sausage, starting at one of the longer sides. Once you have your roll, chill it in the fridge for half an hour. This will make it a lot easier to cut it into rounds.

  6. Preheat the oven to 180C.

  7. Slice your log into rounds, slightly thicker than a pound coin and place your pinwheels on a lined baking tray.

  8. Bake for 8-10 minutes.

  9. Allow to cool and enjoy!

View fullsize
View fullsize
View fullsize
View fullsize
View fullsize
View fullsize
View fullsize
View fullsize
IMG_0677.JPG

You could try all sorts of flavour combinations if chocolate and cinnamon aren’t your thing, e.g. peppermint and chocolate, vanilla and lemon or ginger and cinnamon. If you want to get the pinwheel effect using two similarly coloured doughs, why not try using a little bit of food colouring to keep the fun?

Let me know if you enjoy them! Give them a share on Twitter or Instagram (where I’m @sophiespiblog) or on the Facebook page (https://www.facebook.com/sophiespiblog). I love hearing from you guys and whether it went well!

September 22, 2018 /Sophie Faulkner
Chocolate, Cookies, Biscuit, Pinwheel, cinnamon, Recipe
Recipe
Comment
IMG_0197.JPG

2. Chocolate Espresso Snowcaps

July 25, 2018 by Sophie Faulkner in Recipe

To keep me occupied for the summer (and to make a bit of dollar) I’m temping in London. My current office is air conditioned, the people are good and it’s keeping me busy. During my first couple of days my coworkers asked me about my hobbies and I told them about baking. I may have gushed a little, because baking became a buzz word. The hints for me to bring stuff in became less and less subtle, eventually ending with my manager finishing off the weekly round up email saying: 

 “We are all a little disappointed we have yet to experience any of your famous baked goods... maybe next week?” 

 Alright. Hint taken.

My office has a reasonable age range, so I wanted something that’d appeal to the older crowd as well as satisfy the sweet tooth of, well, me. I also didn’t want to make just cookies, so I thought about snowcaps. I have been using the same recipe for snowcaps for ages, I have no idea where I got it from now, but it would do as a base for this modified recipe. I just had to make them more grown up. And what’s more grown up than coffee? 

These went down a storm at the office, with my favourite review coming in email form. Just one sentence.

 “Fuck me that is glorious” 

I’ll take that. 

Makes 24-30 cookies

Ingredients 

  • 1/2 cup (65g) self-raising flour

  • 1/4 cup (30g) cocoa

  • 4 tsp instant coffee/espresso powder

  • pinch of salt

  • 4 tbsp (55g) butter

  • 2/3 cup (130g) light brown sugar

  • 1 egg

  • 4 oz (115g) dark chocolate, melted and cooled

  • 1 tbsp milk

  • Icing sugar for rolling

Method 

  1. Cream together the butter and sugar until light and fluffy.

  2. Beat in the egg and milk.

  3. Fold in the flour, cocoa, coffee powder and salt. Once combined, fold in the melted chocolate.

  4. Turn your dough out onto a clingfilmed chopping board and smooth into a rectangle about 1/2” thick.

  5. Put your dough in the freezer for at least 45 minutes.

  6. Preheat oven to 175C

  7. Using a sharp knife, slice your dough into 24-30 squares and roll each square into a ball. (colder hands will get less messy! Marginally.)

  8. Roll each of your balls in icing sugar, making sure to get a thick covering, and place on a baking tray about 2 inches apart.

  9. Bake for 12-13 minutes.

  10. Allow to cool slightly before transferring to a cooling rack as they will be soft straight out of the oven.

Well. It’s roughly rectangular...

Well. It’s roughly rectangular...

IMG_0195.JPG
FullSizeRender.jpg

Hope you enjoy these as much as my office did! 

July 25, 2018 /Sophie Faulkner
Chocolate, Biscuit, Cookies, sweet, espresso, coffee, Recipe
Recipe
Comment

Powered by Squarespace