Sophie's Pi

Mathematical baking

Sophie’s Pi is a record of my adventures in baking, maths and the real world, hoping to make my way to having my own patisserie empire some day. Or just getting to lick the bowl now and again.

  • Blog Search
  • Blog
  • About
  • Images
IMG_7240.JPG

59. Roast Plum French Toast

February 14, 2021 by Sophie Faulkner in Recipe

Well, here we are nearly half a year later. Things have massively changed in my life, and it’s been a pretty rough couple of months. But, I’m back on the blog, hopefully mostly due to this brunch I made myself. It was frankly too good not to share, and hopefully you’ll enjoy it too. It was easy to do, and the results were amazing. the balance of the roast plum and the decadence of the french toast and cream, balanced by the slight acidity of the lime zest will transform your brunch.

This recipe is for one, but you can double up or triple up the recipe very easily! The bread I used was some homemade Challah, using this recipe from Georgia’s Cakes, which you should definitely give a go, and I mentioned in a previous blog post here. It worked really well, but you could use any good bread!

Makes brunch for 1

Ingredients

  • 1 firm ripe plum

  • 2 tsp sugar

  • 1 knob of butter

  • 2 thick slices of bread

  • 1 egg

  • 2-3 tbsp milk

  • A splash of cream

  • Zest of 1/2 a lime

Method

  1. Halve and pit your plum and place each half in an unlined muffin tray, cut side up. Sprinkle over 1/2 a teaspoon of sugar over each half and leave to macerate for 15 minutes.

  2. Preheat the oven to 200C.

  3. Put a splash of water in each of the plum’s cupcake holes so that it comes about halfway up the plum. This will stop it burning and sticking to the cupcake tray.

  4. Roast for 25-30 minutes until soft.

  5. When the plums are almost done, start the French toast. Melt the knob of butter in a frying pan over a medium heat. While melting, in a shallow bowl, whisk together the egg, milk and remaining teaspoon of sugar. Dip the bread in this for a few seconds on each side so that it soaks up as much as possible without falling apart.

  6. Fry the bread for a couple of minutes on each side until golden.

  7. Plate the bread, with half a plum on each side, a splash of cream over the top and a sprinkling of lime zest.

IMG_7252.JPG
IMG_7255.JPG
IMG_7258.JPG
IMG_7259.JPG
IMG_7261.JPG
IMG_7262.JPG
February 14, 2021 /Sophie Faulkner
Recipe, bread, brunch, plum, fruit, sweet
Recipe
1 Comment
IMG_6466.JPG

58. Coconut Choc Chunk Cupcakes

July 11, 2020 by Sophie Faulkner in Recipe

These were made to fill a complete and utter craving I had for chocolatey goodness without just eating the whole bar in one go. They’re so quick and easy to make, I made them on my work from home lunch break! They went down pretty well and didn’t exactly last long!

Makes 12 cupcakes

Ingredients

  • (6oz) butter, room temperature

  • (6oz) golden caster sugar

  • (6oz) self-raising flour

  • 3 eggs

  • (2oz) desiccated coconut

  • (4oz) dark chocolate chunks

  • pinch of salt

  • 1/2 tsp vanilla extract

Method

  1. Preheat the oven to 180C and line a cupcake tray.

  2. Cream together the butter and sugar until light and fluffy.

  3. Add in the flour and then the eggs until well combined.

  4. Mix in the coconut, chocolate, pinch of salt and vanilla and mix until well distributed.

  5. Divide evenly into the cupcake cases (I found a heaped tablespoon was about right).

  6. Bake for 22-25 minutes until risen, golden and a skewer comes out clean.

  7. Leave to cool and enjoy!

View fullsize IMG_6458.JPG
View fullsize IMG_6462.JPG
July 11, 2020 /Sophie Faulkner
Recipe, cake, cupcake, coconut, Chocolate, sweet
Recipe
Comment

56. Choux Pastry Swans

May 24, 2020 by Sophie Faulkner in Recipe

Well. Lockdown’s been a funny old time.

I’ve just spent the last two months at my Dad’s house and got back to London this weekend. It’s nice to be home and back in my own kitchen. Part of the issue of me not uploading over the last month has been I didn’t want to test recipes too much at my Dad’s, a) because I didn’t want to waste ingredients and b) because they have an AGA not a normal oven. In the last month I have had some real baking disasters, including undercooked croissants and burnt bread.

But I’m back now, so provided I can get my hands on ingredients, the baking is back on.

choux swan.jpg

My rugby club are doing a sweet challenge, where we each have to make a sweet dish that is linked to a happy memory for us. Mine was always going to be choux pastry swans. I first made these for a family dinner party my parents were having when I was about 10? Possibly? I’m not entirely sure. However, my portion control was completely wrong and the book I was baking from didn’t have reference pictures. So When I presented my family with one of these on a full sized dinner plate each after dinner, there was a bit of laughter. It always makes me smile remembering the blunder, but I was just so happy I had made them!

I have now made them a much more reasonable size, and while I would normally use chantilly cream to fill them, I had to use lemon buttercream as I am not about to go out in this to buy just cream!

Makes 9-12 swans

Ingredients

For the choux pastry

  • 62ml milk

  • 62ml water

  • 1/2 tsp sugar

  • 1/4 tsp salt

  • 62g (2.2oz) butter

  • 125g (4.4oz) flour

  • 2-3 large eggs, lightly beaten

For the buttercream

  • 150g butter, room temperature

  • 225g icing sugar

  • pinch of salt

  • zest of 1 lemon

Method

  1. Place the milk, water and butter in a pan and place on a gentle heat, stirring until the butter has all melted. Once melted bring to a rapid boil over a high heat and remove from the heat immediately.

  2. Pour in the flour and beat with a spatula until well combined and then return to the heat. Beat the mixture on the heat for about 10-15 seconds until the mixture all comes away from the side of the pan and forms one ball. This is to dry out the dough.

  3. Place the dough in a bowl to stop it from cooking any further and spread up the sides of the bowl to cool.

  4. Add in the eggs a bit at a time, beating with the spatula until fully incorporated. This should take at least 3 separate additions. If you add it all at once your pastry will not be able to handle all the gg and won’t combine smoothly.

  5. Keep adding egg until your pastry is smooth and glossy. If you draw a line through it with your spatula, your pastry should slowly start to fill in the gap.

  6. Preheat the oven and line 1 or 2 baking trays.

  7. Fill a piping bag with your pastry and a medium circular nozzle. Pipe 9-12 profiteroles by holding the bag almost vertically about 1.5 cm from the tray and let the dough come out and form a mound, there is no need to move your piping bag. Your mounds should be about 4-5cm in diameter. Leave space between as they will puff up.

  8. Replace the medium circular nozzle with a smaller one (in a new piping bag, or by using the piping nozzle attachment if you have one) and pipe 9-12 swan necks. Similarly to the profiteroles, let a small mound form for the head and then draw and S shape for the neck. The smaller the nozzle you use the better for these. You may wish to do these on a separate tray if there is a large size difference between your nozzles, as thin necks will bake much faster.

  9. Dab the tops of each profiterole and neck with some cold water and then brush over any leftover egg for a nice shine.

  10. Bake the profiteroles and necks for 20-25 minutes until golden and sounding hollow when tapped. Take out and leave to cool

  11. Make the buttercream by beating the butter until light and fluffy and then incorporating the sugar, salt and lemon zest. Fill a piping bag with a star shaped nozzle and your buttercream.

  12. Cut the top off each profiterole and slice the removed top in half to form wings. Fill the base with buttercream and place a neck and the wings in. Top with further buttercream if not structurally sound.

  13. Serve as they are, or ‘swimming’ on some melted chocolate.

View fullsize IMG_6175.JPG
View fullsize IMG_6182.JPG
View fullsize IMG_6187.JPG
View fullsize IMG_6193.JPG
View fullsize IMG_6199.JPG
View fullsize IMG_6202.JPG
IMG_6219.JPG
May 24, 2020 /Sophie Faulkner
sweet, Recipe, choux pastry, swan, dessert
Recipe
1 Comment
IMG_5411.JPG

53. Flapjack

March 14, 2020 by Sophie Faulkner in Recipe

Sorry for skipping a week! Work have banished me to Southampton for the past two weeks, and I’ll be having my third week there this week. It’s hard to bake when you’re stuck in a hotel… It’s also hard to upload when you’re on a family weekend in the Lake District. It was so lovely seeing everyone and going for walks, we even got to play in some snow at the tops of the hills.

In aid of the hill walking energy provisions, I decided to make some flapjack, a classic, easy and full of energy snack. I drizzled mine with a little melted chocolate, but they’re still tasty just as they come! You can easily scale this 4 ingredient recipe to make however many you want, the ratios are just 1:1:1:2 of butter : golden syrup : sugar : porridge oats.

Makes 20

Ingredients

  • 225g (8oz) butter

  • 225g (8oz) golden syrup

  • 225g (8oz) light brown sugar

  • 450g (16oz) porridge oats

  • 1 tsp cinnamon

Method

  1. Preheat the oven to 150C. Line and grease a baking tin (at least 3cm deep). If you don’t have a suitable baking tray, or it’s too big, like mine, line it with baking paper and fill the part you don’t want to use with baking beans/rice/pennies. This will make your tin smaller, so you can still get good thick flapjacks. (See picture)

  2. Melt the butter in a large pan over a medium heat.

  3. Add the golden syrup and sugar and keep heating until the sugar has fully dissolved, mixing once in a while.

  4. Remove from the heat and add the porridge oats and the cinnamon. Mix together until evenly combined.

  5. Fill your baking tin with the mix and press down to make it nice and compact, or else it may fall apart.

  6. Bake for 35-40 minutes, until golden and the edges are firm.

  7. Allow to cool in the tin, and then turn out and chop into squares.

  8. If you want to fancy them up, you could drizzle on some melted chocolate, or a small amount of icing, or just eat as they are.

View fullsize IMG_5400.JPG
View fullsize IMG_5404.JPG
View fullsize IMG_5405.JPG
View fullsize IMG_5409.JPG
March 14, 2020 /Sophie Faulkner
Recipe, flapjack, sweet
Recipe
1 Comment
Tiffin.jpg

50. Tiffin

February 16, 2020 by Sophie Faulkner in Recipe

As my rugby match today was cancelled AGAIN today, thanks to Storms Ciara and Dennis, I asked my Instagram followers what they’d like me to bake. An old friend suggested ‘best ever fridge cake’, which could only mean making some good old tiffin. Thanks Louisa (@loukdavis) for the suggestion! Mum used to make tiffin when I was younger and honestly it is the best fridge cake in my opinion, and very easy to do. Extremely doable for kids!

If you want a step by step with pictures/videos, I instagrammed the full recipe process and have it as a highlight on my Insta page. Have a look and a follow if you don’t already!

Makes 9 squares

Ingredients

  • 100g butter, cubed

  • 250g chocolate

  • 3 tbsp sugar

  • 3 tbsp golden syrup

  • 200g digestives

  • Handful of raisins, or sultanas

Method

  1. Line a small baking tin with clingfilm. This will make getting your tiffin out REALLY easy.

  2. Melt your butter, 50g of the chocolate, the sugar and golden syrup in a pan or bain marie (bowl over a pan of simmering water).

  3. Bash up your digestives until you have some bite size pieces of biscuit and lots of crumbs.

  4. Add the biscuits and raisins/sultanas to the melted chocolate/butter and mix until well combined.

  5. Press the biscuit mixture into your lined tin as flat as possible.

  6. Melt the remaining 200g of chocolate in the microwave or on a bain marie, then pour and spread over the biscuit layer.

  7. Put in the fridge to set for at least 2 hours.

  8. Take out of the tin and cut with a large sharp knife into squares and enjoy!

View fullsize IMG_5249.JPG
View fullsize IMG_5251.JPG
View fullsize IMG_5254.JPG
View fullsize IMG_5257.JPG
February 16, 2020 /Sophie Faulkner
Recipe, sweet, Chocolate, Biscuit, tiffin, raisins
Recipe
Comment
IMG_5226.JPG

49. Valentine's Rose Cupcakes

February 11, 2020 by Sophie Faulkner in Recipe

Not into cookies? No worries, I’ve got the Valentine’s cupcake angle sorted too! Flowers and chocolates are always nice, but why not just combine the two and make these chocolate cupcakes with vanilla buttercream roses?

Makes 12 rose cupcakes

Ingredients

For the cupcakes

  • 170g (6 oz) butter, room temp

  • 140g (5 oz) caster sugar

  • 3 eggs

  • 140g (5 oz) dark chocolate, melted

  • 1 tsp vanilla extract

  • 170g (6 oz) self-raising flour

  • Pinch of salt

For the buttercream

  • 300g (10.5 oz) butter, room temp

  • 450g (15.75 oz) icing sugar

  • 1 tbsp vanilla extract

  • 1-2 tbsp milk

  • a few drops red food colouring

Method

  1. Preheat oven to 160C and line a cupcake tray

  2. Cream together the butter and caster sugar for the cupcakes until light and fluffy.

  3. Add in the eggs, melted chocolate and vanilla extract, with a tablespoon of the flour to help it not split.

  4. Mix in the flour and salt, until well combined.

  5. Place a heaped tablespoon of mixture in each cupcake case.

  6. Bake for 25-30 minutes until a skewer comes out clean. Allow to cool to room temperature before icing

  7. Cream the butter for the icing until light and fluffy. Add in the icing sugar in three portions, beating between each, until light and fluffy, then add in the vanilla extract and milk (as much as needed). Keep beating if not light and easily spreadable.

  8. Split half the buttercream into a separate bowl. Colour half with red food colouring until pink. Add a few drops at a time and beat until you get your desired colour.

  9. Prepare a piping bag with a star shaped nozzle. Fill with the pink icing first, and then create a hole down the centre and fill with the remaining white icing.

  10. Pipe from the centre of the cupcake outwards, until you have created a rose. DO NOT twist the cupcake as you pipe, as this will lose the rose effect. Your first couple of roses may be purely pink, depending on how successful the piping filling has gone, but you should get some nice two tone roses in the bouquet!

  11. Give to a loved one, or just to yourself. You deserve flowers.

View fullsize IMG_5212.JPG
View fullsize IMG_5220.JPG
View fullsize IMG_5217.JPG
View fullsize IMG_5219.JPG
IMG_5228.JPG
February 11, 2020 /Sophie Faulkner
valentine, Rose, cupcake, Chocolate, Vanilla, buttercream, sweet, Recipe
Recipe
Comment

48. Mocha Shortbread Hearts

February 08, 2020 by Sophie Faulkner in Recipe

Valentine’s Day is coming up, so I thought I’d post some themed recipes. It’s almost like I thought ahead and planned! They say that the way to a man’s heart is through his stomach, so I thought I’d test that theory with these mocha shortbread hearts as he’s a big shortbread fan. I know my boyfriend loves me anyway, but I don’t think they hurt!

These are REALLY easy to make, so if you’re stuck for something to do for your valentine, why not give these a go this week? Or look out for my cupcake recipe going up early next week in time for V day.

Makes 15-20 cookies (depending on cookie cutter size)

Ingredients

  • 180g butter, room temperature

  • 70g light brown sugar

  • 1 tsp instant coffee granules

  • 180g flour

  • 30g cocoa powder

  • 100g chocolate chips

Method

  1. Mix the butter and sugar together until smooth and combined.

  2. Mix the coffee granules together with a tbsp hot water until dissolved.

  3. Mix the flour, cocoa powder and coffee into the butter and sugar, using your hands to bring it all together into one cohesive dough.

  4. Wrap your dough in clingfilm and chill in the fridge for at least 20 minutes

  5. Preheat the oven to 180C and line a baking tray.

  6. Roll out your dough on a lightly floured surface until about 1cm thick and start cutting out hearts (or whatever shape cookie cutters you have). Transfer the cut outs to the baking tray.

  7. Squeeze the leftover scraps into one ball and reroll out and cut again. Repeat until all the dough is used.

  8. Bake for 10-12 minutes until the cookies are just firm and allow to cool.

View fullsize IMG_5150.JPG
View fullsize IMG_5152.JPG
View fullsize IMG_5157.JPG
View fullsize IMG_5166.JPG
February 08, 2020 /Sophie Faulkner
Shortbread, Recipe, valentine, coffee, Chocolate, mocha, sweet
Recipe
Comment
IMG_5064.JPG

46. Doughnuts

January 25, 2020 by Sophie Faulkner in Recipe

Who knew you could make doughnuts at home?? WITH OR WITHOUT A DEEP FAT FRYER!

This week I made doughnuts for the very first time and they were delicious. I would HIGHLY recommend giving them a go yourself. They are delicious as they are, rolled in a bit of sugar, or extremely messily filled with jam (shout out to Eszter (Instagram: @eszterpinter98) for the lovely jar of jam she sent me).

I was inspired by the recipe book ‘Made in London’ by Leah Hyslop. I read this cookbook cover to cover, as it wasn’t just DELICIOUS recipes, but also has so much about the history of food in London and how it shaped London. It was genuinely a really good read, full of great recipes to try yourself, so I would highly recommend it as a gift for the London foodie in your life.

Have to say they are best eaten quickly, as stale doughnuts are OK, but no one would choose one. So eat them while they’re hot!!

Makes about 35 - 40 small doughnuts

Ingredients

  • 100g butter

  • 170ml milk

  • 500g plain white flour

  • 7g sachet of fast action dried yeast

  • 50g caster sugar, plus more for rolling the doughnuts in

  • 1 tsp salt

  • 2 eggs + 2 egg yolks

  • zest of 1 lemon

  • sunflower oil for frying and greasing (I used 1.5 litres, it will depend on the size of your pan/fryer)

Method

  1. Gently melt the butter in a saucepan with the milk until all melted and the mixture is warm, NOT boiling.

  2. Mix together the flour, yeast, sugar and salt, then add in the butter and milk, eggs, yolks and lemon zest. Stir until it forms one dough.

  3. Knead the dough for 10-12 minutes by hand, or for 8-10 minutes on a low speed in a stand mixer with dough hook attachment. You want to achieve a glossy and smooth dough.

  4. Place the dough in a lightly oiled bowl, cover with clingfilm or a damp tea towel, and leave for an hour until doubled in size.

  5. Grease two baking trays with oil.

  6. Roll the dough out on a lightly floured surface, to about 1cm thickness. Cut out rounds using a 5cm straight edged cookie cutter and transfer the rounds to the baking trays. Gather the scraps and roll out again until the majority of your dough is used.

  7. Cover the baking trays and leave your rounds to rise for about 45 minutes, so they have puffed up a bit.

  8. Fill a deep pan with oil and heat to 165C. A cube of bread will sizzle and turn golden in about 60 seconds if you don’t have a thermometer to hand.

  9. Cook your doughnuts in batches, not overcrowding the pan, for about 2/2.5 minutes on each side. Drain for a minute or two on kitchen paper and then roll in a shallow dish of sugar.

  10. Enjoy while hot!

IMG_5037.JPG
IMG_5039.JPG
IMG_5042.JPG
IMG_5049.JPG
IMG_5052.JPG
IMG_5053.JPG
IMG_5063.JPG
IMG_5066.JPG
IMG_5070.JPG
January 25, 2020 /Sophie Faulkner
doughnut, sweet, Recipe
Recipe
Comment

45. Espresso Chocolate Cake

January 16, 2020 by Sophie Faulkner in Recipe

I have the week off work!!! It has honestly been so nice to just chill out this week, as Christmas felt really hectic and not like a rest. To make full use of this I went to visit my Dad for a couple of days, and while there, decided that, you know, baking was required. And as Dad and my step-mum love coffee, an espresso cake that was definitely not too sweet was the right way to go.

This cake is really easy and the perfect afternoon snack for coffee time. I hope you enjoy!

Makes 1 cake

Ingredients

For the cake

  • 170g (6 oz) butter

  • 85g (3 oz) demerara

  • 85g (3 oz) light brown sugar

  • 170g (6 oz) self raising flour

  • 2 eggs

  • 75g (2.5 oz) dark chocolate, melted

  • 1 espresso (1 oz = ~30ml)

For the buttercream

  • 200g (7 oz) butter, room temp

  • 300g (10.5 oz) icing sugar

  • 50g (1.75 oz) dark chocolate, melted (+ some for grating to sprinkle)

  • 1 espresso (1 oz = ~30ml)

  • a pinch of salt

Method

  1. Preheat the oven to 170C and line a square cake tin with greaseproof paper.

  2. Cream together the butter and all the sugars until light and fluffy.

  3. Add in the eggs one at a time and combine, adding in the flour if the mixture starts to curdle.

  4. Add in the flour, and then the melted chocolate, and espresso. Mix until well combined.

  5. Scrape all the cake mix into the cake tin, and spread evenly into all the corners.

  6. Bake for 30-35 minutes until a skewer comes out clean and it bounces back.

  7. Leave to cool in the tin for at least 10 minutes and then allow to cool on a cooling rack to room temperature.

  8. For the icing, beat the butter until light and fluffy on its own, and then add the icing sugar in a bit at a time until fully combined. Add in a pinch of salt and mix.

  9. Split the buttercream base into two and move half of it into another bowl. Add the melted chocolate to the first half and beat until well combined. Add the half of the espresso to the second half and beat until well combined. Taste to see how strong the coffee flavour is and add more espresso as needed.

  10. Fill two piping bags with your two buttercreams and decorate the cake in your desired pattern (I chose diagonal lines). If you choose to sprinkle the shaved chocolate on, I chose to sprinkle it only on the chocolate buttercream to maintain the contrast between the two icings.

  11. Enjoy!

IMG_4988.JPG
IMG_4993.JPG
IMG_4996.JPG
IMG_5008.JPG
January 16, 2020 /Sophie Faulkner
Recipe, coffee, cake, espresso, buttercream, sweet
Recipe
Comment
IMG_4972.JPG

44. Coconut Choc Chip Cake with Best Chocolate Buttercream

January 11, 2020 by Sophie Faulkner in Recipe

It was a colleague’s birthday at work this week, so I offered to make him a birthday cake. When asked what he would like, he ummed and ahhed, until I elicited the words chocolate and coconut fro him. That was as good a place to start as any.

But then he said white chocolate.

I don’t really like white chocolate in large quantities, as its REALLY sweet, and its not all that easy to bake with. So I made a white chocolate and coconut cake. This is not the cake pictured here. I was so embarrassed by not only the fact that the cake was ridiculously sweet (my boyfriend said he just pretended he was eating a white chocolate bar), but it was also hideous. I really messed up my ratios on the white chocolate ganache, and had been impatient when turning the cakes out and frosting so it was all crumbling and not smooth. It was not good.

So I made another cake. This one. Learning from my previous errors to make a cake that went down EXTREMELY well at work. Why not give it, or similar, a go this weekend?

Makes 1 cake and buttercream for 1 cake/12 cupcakes

Ingredients

For the cake

  • 170g (6 oz) butter

  • 130g (4.5 oz) caster sugar

  • 85g (3 oz) desiccated coconut (+ some for sprinkling)

  • 140g (5 oz) self raising flour

  • 3 eggs

  • 100g (3.5 oz) chocolate chips (I used white choc chips)

For the buttercream

  • 100g (3.5 oz) dark chocolate, melted (+ some for grating to sprinkle)

  • 200g (7 oz) butter, room temp

  • 300g (10.5 oz) icing sugar

  • 2 tbsp milk

  • a pinch of salt.

Method

  1. Preheat the oven to 160C. Line two sandwich tins with greaseproof paper and grease the sides.

  2. Cream together the butter and sugar until well combined.

  3. Add in the eggs, desiccated coconut and self raising flour, and beat until smooth.

  4. Mix in the chocolate chips until distributed throughout the cake mix, then divide into your sandwich tins. (roughly 13oz in each tine if you want to be precise)

  5. Bake for 20-25 minutes until slightly golden, and a knife comes out clean.

  6. Allow the cakes to cool in their tins until the tins are cool enough to hold. Tip out your cakes and allow to cool further on a cooling rack. Place in the fridge to cool down further if you intend to spread rather than pipe your icing as this will make it less likely to crumble.

  7. Beat the butter for your buttercream until light and fluffy.

  8. Add in your icing sugar in two gos (or else it tends to go everywhere), and beat until light and smooth.

  9. Beat in your melted chocolate and a pinch of salt.

  10. Fill a piping bag and pipe a border around the edge of your bottom cake, then fill the middle with icing and spread to your border. This will keep it neat.

  11. Place your top cake on top and decorate (piping or spreading) however you like! Sprinkle on a little grated chocolate and desiccated coconut and enjoy!

View fullsize IMG_4961.JPG
View fullsize IMG_4963.JPG
View fullsize IMG_4967.JPG
View fullsize IMG_4969.JPG
IMG_4977.JPG
January 11, 2020 /Sophie Faulkner
cake, Chocolate, coconut, buttercream, icing, sweet, Recipe
Recipe
Comment

43. Use-it-up berry jam! (tarts optional)

January 02, 2020 by Sophie Faulkner in Recipe

2020, let’s go! One of my new year’s resolutions is to actually maintain this blog. One post a week, without fail. Let’s see how long that lasts…]

As its a New Year, Callum and I decided it was time to have a tidy out, to start the new year fresh. This meant not only the cupboards, but the fridge and freezer. In the dark recesses of the freezer drawer there was a bag of frozen summer fruits, looking forlorn and forgotten that needed using or getting rid really. So I used them to make these mini jam tarts, using the left over pastry from our New Year’s Eve chocolate tart, made using this recipe. I didn’t have much pastry, so I only made 8 mini tarts, and have a big 500ml jar full of jam to be used with toast, or cake, or biscuits, or eaten within a spoon… so many options!

If you don’t fancy a mix, give my fresh strawberry jam tarts recipe a go!

This recipe makes roughly 550ml of jam.

Ingredients

For the jam

  • 500g (17.5oz) frozen mixed summer berries, defrosted in the microwave

  • 500g (17.5oz) caster sugar

  • 1 tbsp lemon juice

For the pastry (optional)

  • 200g (7oz) plain flour

  • 125g (4.5oz) butter

  • 50g (1.75oz) caster sugar

  • 1 medium egg

  • a pinch of salt

    OR about 400g ready made shortcrust pastry

Method

  1. (TARTS) If making your own pastry, start by creaming together the pastry sugar and butter, before adding in the egg a bit at a time so that it doesn’t split. Then add in the flour and the salt and mix until it all comes together and there are no lumps of butter. Wrap in clingfilm and put in the fridge to rest for 20-30 minutes.

  2. Sterilise your jam jar(s).

  3. Place a plate in the freezer. This is to do your jam test later. Important step. Don’t miss it.

  4. Place your defrosted berries in a saucepan over a medium heat with the lemon juice and stir in the sugar until it has all dissolved. Your berries should be soft from being defrosted.

  5. Boil steadily for about 8-9 minutes. Remove from the heat and spoon a little onto your chilled plate and leave for a minute. Run a finger through your jam and if it crinkles and doesn’t flood back into the gap you have just created, it’s ready. As the berries have been frozen, they will likely contain more water than fresh berries and so will take longer to reduce into jam.

  6. If your jam fails the plate test, put it back on the heat and boil for another minute then try again. If it passes, skim off any froth and leave to the side to cool for 10-15 minutes, before filling your jam jar(s).

  7. (TARTS) Grease a muffin tin. Preheat the oven to 180C.

  8. (TARTS) Take your dough out of the fridge and on a floured surface roll it to about 8mm thick. If your dough is too cold and stiff, let it warm up a little at room temperature until it’s easier to roll. Don’t leave it too long or it’ll go soft.

  9. (TARTS) Cut your dough using a large circular cookie cutter. Place your twelve dough circles into your muffin tin and press down gently with your fingers, making sure it sinks to the bottom and fills in the bottom corners. You want the sides to come about halfway up the muffin tin.

  10. (TARTS) Spoon the cooled jam into each case not quite to the brim.

  11. (TARTS) Bake for 12-15 minutes until the pastry has turned a light golden brown.

  12. Leave to cool.

  13. Enjoy!

View fullsize IMG_4906.JPG
View fullsize IMG_4912.JPG
View fullsize IMG_4913.JPG
View fullsize IMG_4915.JPG
View fullsize IMG_4916.JPG
View fullsize IMG_4918.JPG
View fullsize IMG_4924.JPG
View fullsize IMG_4927.JPG
January 02, 2020 /Sophie Faulkner
Recipe, jam, berry, Tart, sweet
Recipe
Comment
IMG_4337.jpg

42. Banana Cupcakes

September 28, 2019 by Sophie Faulkner in Recipe

Some people really don’t like banana. I don’t understand those people.

Banana bread/cake/muffins are some of my favourites. The flavour of banana is just so unique, you don’t really get anything else like it, at least not normally. I mean, apples taste kinda like pears, oranges and lemons can give pretty similar citrus flavours, but bananas? In a class of their own.

Here’s an extremely easy recipe for if you have a banana left over that’s gone just s bit too ripe for you to want to eat straight out of the fruit bowl.

Makes 12 cupcakes

Ingredients:

  • 1 overripe banana, mashed

  • 100g (3.5oz) butter, room temperature

  • 30g (1oz) golden syrup

  • 140g (5oz) light brown sugar

  • 170g (6oz) self-raising flour

  • 2 eggs

  • pinch of salt

  • 1 tsp ground cinnamon

  • 1 tsp ground ginger

Method

  1. Preheat the oven to 180C and line a muffin tray

  2. Cream the butter and sugar until light and fluffy

  3. Add in the mashed banana and golden syrup and mix until combined

  4. Sift in the flour, salt, cinnamon and ginger and combine.

  5. Add in the eggs and mix until batter has fully combined together.

  6. Split your mixture evenly between 12 cases

  7. Bake for 20-25 minutes until golden and risen.

  8. Enjoy!

IMG_4323.JPG
IMG_4325.JPG
IMG_4329.JPG
IMG_4341.JPG
September 28, 2019 /Sophie Faulkner
Recipe, sweet, banana, cupcake
Recipe
Comment
IMG_4135.JPG

40. Whole Orange Cake

September 04, 2019 by Sophie Faulkner in Recipe

2 months??? Oops.

I really have no real excuse. I’ve been busy with exams and I did go on holiday, but 2 months is pretty inexcusable! I’m sorry, I’ll try not to let it happen again.

This week I decided to get back into baking with something I had never even heard of before, that I saw on Sortedfood, link to the inspiration video here. They put a WHOLE orange into their batter. Not just the juice, not just the zest. The whole orange, pith and all (well, except for the little stem bit).

I decided to take it to the next level and do a whole cake rather than muffins, and top it with some italian meringue and candied orange peel. Let’s get stuck in.

Makes 1 cake, serves 8.

Ingredients

For the cake

  • 1 orange

  • 4 oz butter

  • 6oz caster sugar

  • 6oz self-raising flour

  • Pinch of salt

  • 2 eggs

  • 2-3 tbsp milk

For the Italian Meringue/Candied Peel

  • 4oz caster sugar

  • 2 egg whites

  • Peel of one orange

Method

Cake:

  1. Boil the whole orange for an hour. Pop the telly on and have a cuppa.

  2. Take the orange out of the water and remove the little stem at the top, this should pop right off. Drop your orange into a blender, or use a hand held blender, and puree the whole thing.

  3. Preheat the oven to 180C.

  4. In a bowl, cream together the butter and sugar for the cake.

  5. Add in the flour and a pinch of salt and mix in.

  6. Mix in the eggs and the pureed orange and mix until fully incorporated, then mix in the milk until it is a reasonable consistency.

  7. Line a cake tin with greaseproof paper or butter it, and pour your mixture in.

  8. Bake for 40-45 minutes until golden on top and when skewered with a knife, the knife comes out clean.

  9. Allow to cool.

Candied Peel:

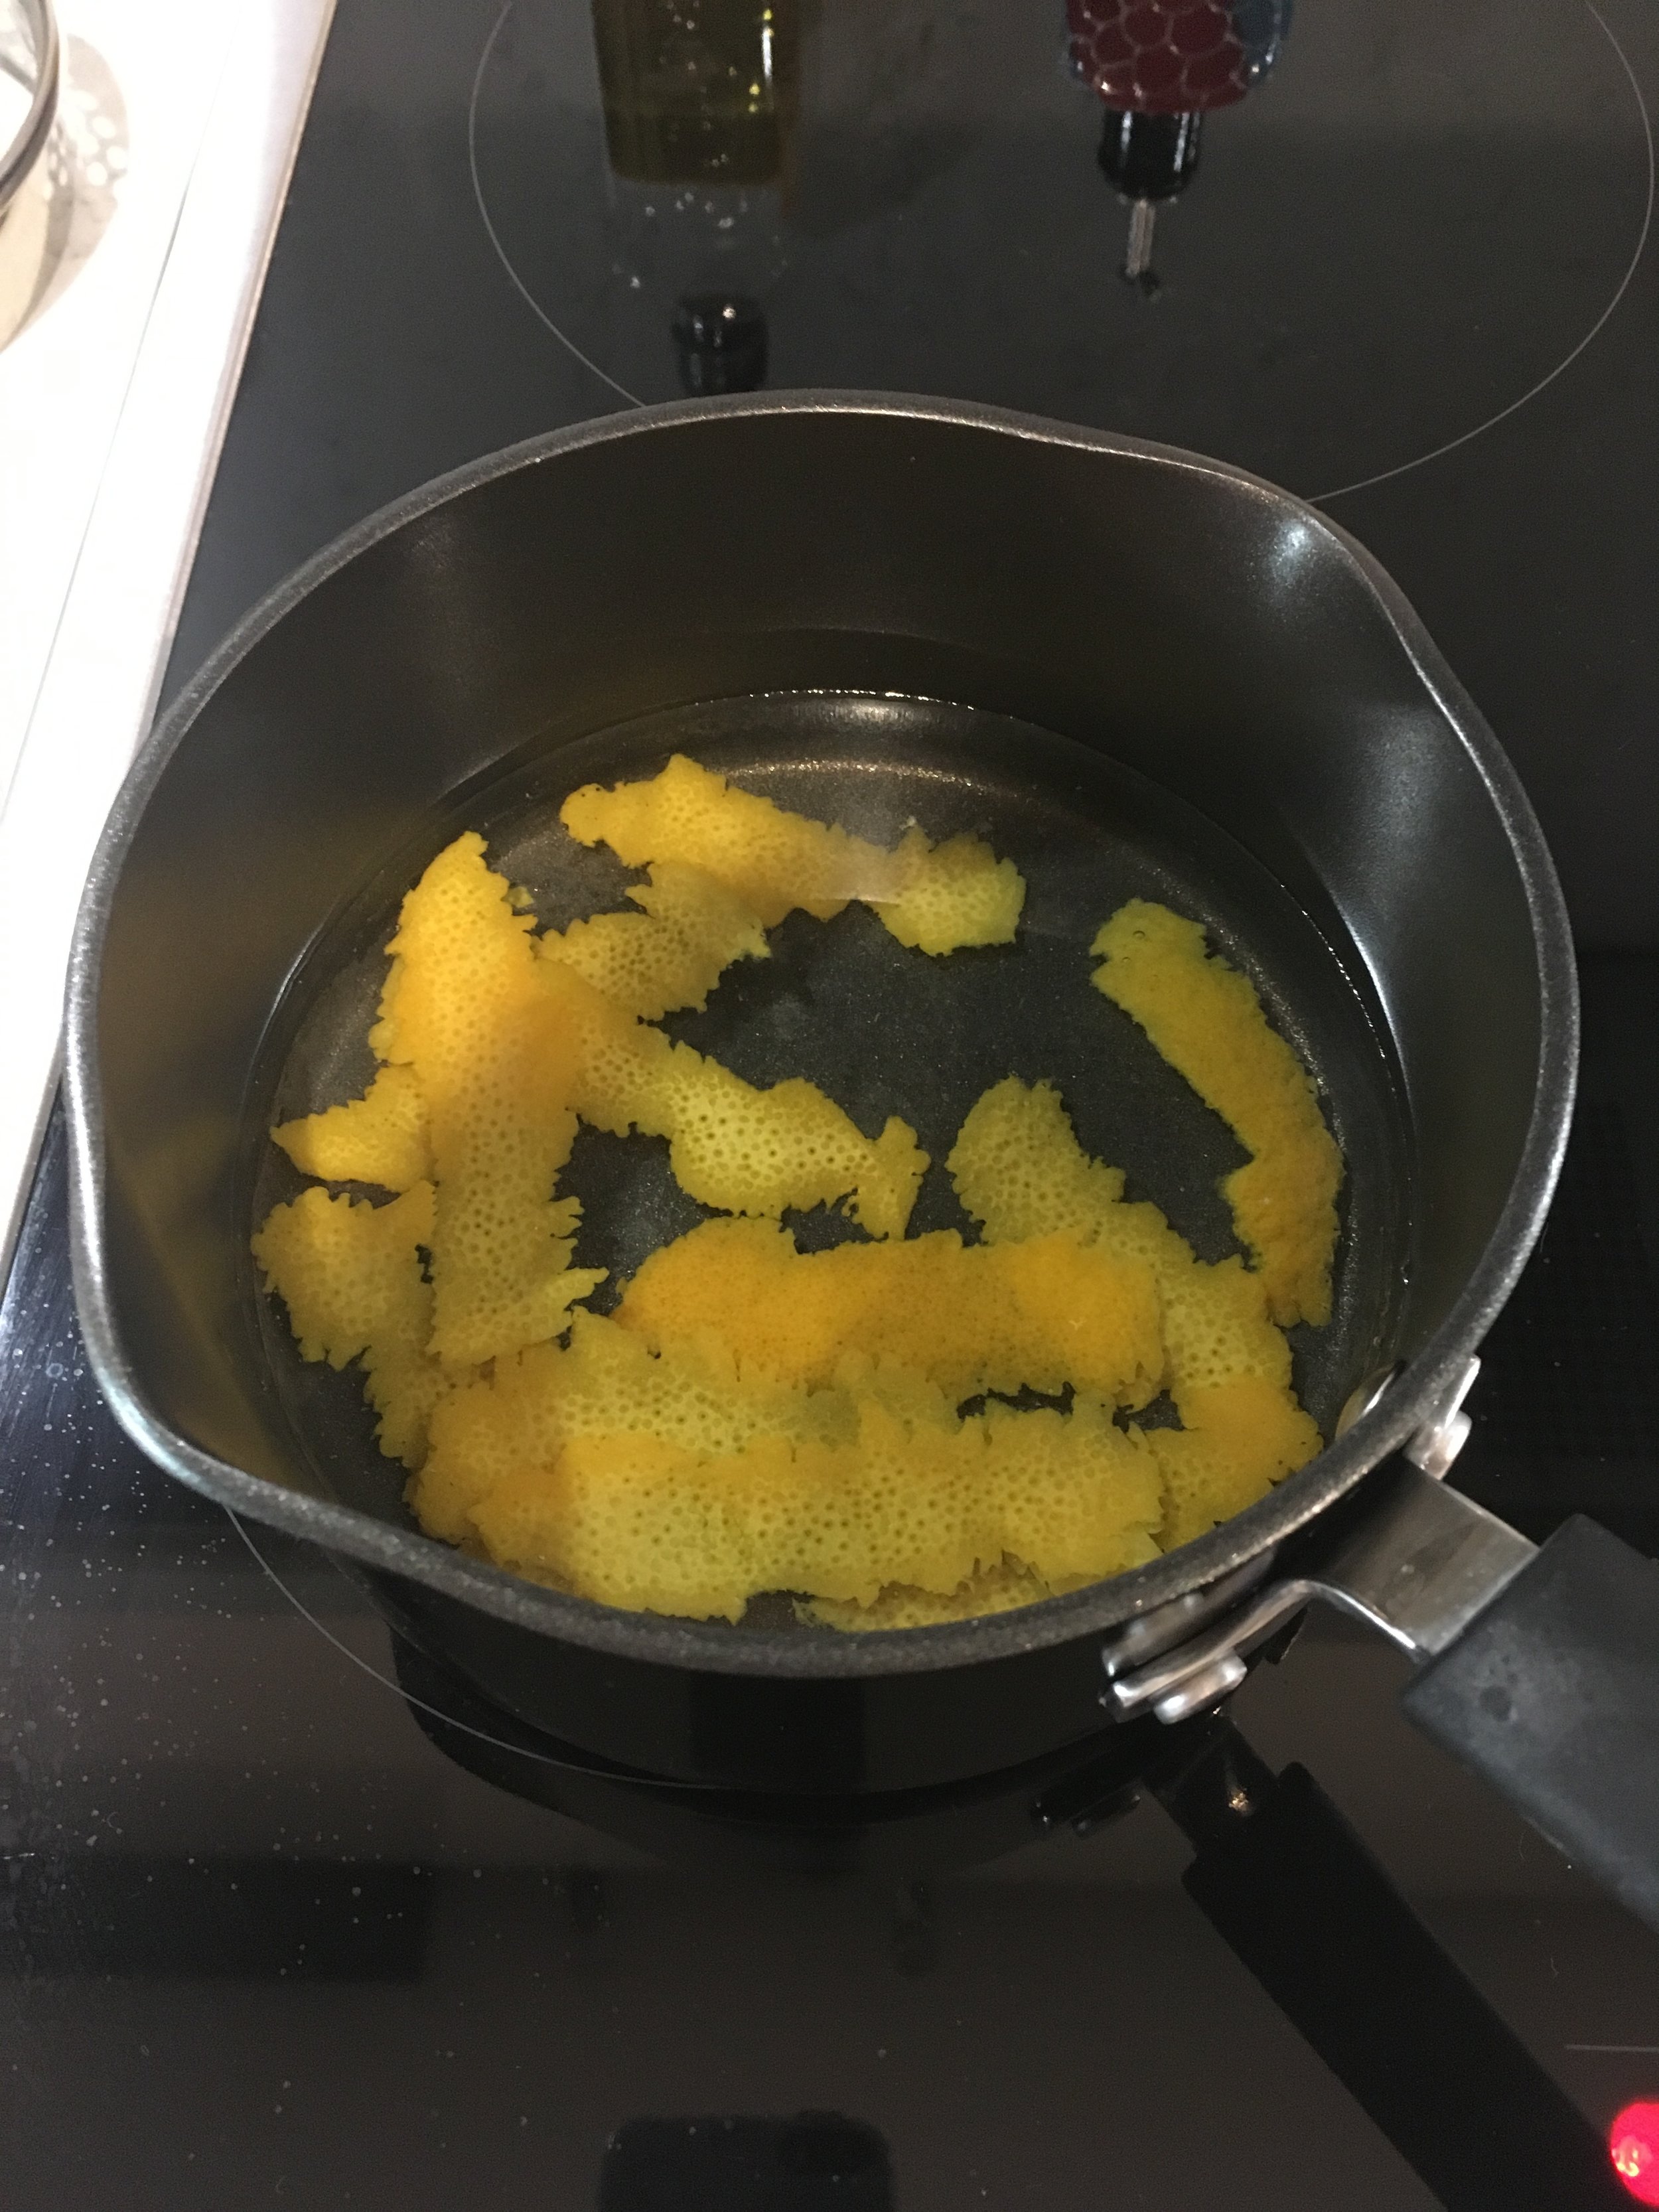
  1. Use a potato peeler to peel strips of zest off the orange, trying to get as little of the pith with it as possible. If any pith comes with your strips, scrape it off with the back of a knife or with the peeler itself.

  2. Place your strips in a pan of cold water and bring to the boil. Once boiling, drain the water out and replace with cold water. Do this a further 3 times. It will remove the bitterness from the orange peel.

  3. Place the strips to the side.

  4. In a pan, combine the 4oz caster sugar with 4oz water and bring to the boil. Boil until the sugar has completely dissolved and the water is clear again. Put your peel strips back in and let stand for 10-20 minutes.

  5. Take your strips out with a fork and allow to drain on some kitchen roll.

Italian Meringue:

  1. Whisk the egg whites to medium stiff peaks.

  2. Bring your sugar syrup mixture (what you have just removed your peel from) back to the boil and keep heating until it reaches 114C.

  3. Pour the sugar syrup into your egg whites WHILE WHISKING, and keep whisking for another 7-10 minutes until your egg white mixture has cooled completely

Assembly:

  1. Preheat your grill to high setting (unnecessary if you have a blowtorch)

  2. If your cake has risen a lot and created a dome, consider slicing the top off to make it level.

  3. Pipe your Italian meringue onto your cake using a star shaped nozzle to get lots of ridges.

  4. Place your cake under the grill for about a minute to get the edges of your Italian meringue to brown. If you have a blowtorch, use this so you can control where it is browning.

  5. Decorate the cake with your candied peel.

Enjoy!

View fullsize IMG_4119.JPG
View fullsize IMG_4124.JPG
View fullsize IMG_4126.JPG
View fullsize IMG_4127.JPG
IMG_4136.JPG
September 04, 2019 /Sophie Faulkner
cake, orange, italian meringue, Recipe, sweet
Recipe
Comment
IMG_3734.JPG

39. Shortbread (Lavender optional)

July 03, 2019 by Sophie Faulkner in Recipe

I think it goes without saying that I love shortbread. You can find a link to my chocolate chip shortbread here. The recipe is all but the same, except this time, I decided to use LAVENDER SUGAR. *audience oooohhh*. I know! That’s what I thought too when I saw it. I have had good experiences and bad experiences when it comes to lavender in food, but as Mum and I were staying extremely close to the Norfolk Lavender Farm on our holiday, it seemed rude not to give it a go.

IMG_3706.JPG

My first experience of lavender in food was a lavender muffin in a cafe in Poland. I was utterly confused by the concept, but thought I might as well try it. It was unforgettably good. I wanted more, but they’d sold out by the time I had finished my first! Every time I went back to that cafe they had sold out. They were so good I dreamt about them.

My second experience with lavender in food was a lavender macaron that tasted like soap and old people. I promptly dropped the idea of lavender in baked goods all together.

Until now anyway.

Now shortbread, shortbread has never done me wrong, so if there was something to try out my lavender sugar on it was shortbread. That simple 1:2:3 ratio of sugar, butter and flour was strong enough to withhold any flavour I through at it, and these turned out great! Would recommend.

Makes around 15 biscuits

Ingredients

  • 50g (1.75oz) sugar (lavender optional)

  • 100g (3.5oz) butter (cold and diced)

  • 150g (5.25oz) plain flour

  • a pinch of salt

Method

  1. In a bowl, rub together the flour sugar and butter with your hands until all rubbed in and you have no lumps of butter remaining. You may have lumps of dough, but you can tell whether they are lumps of butter or dough by the colour. Once there are no more lumps of butter, stop.

  2. Squeeze the dough together into a ball and roll out on a lightly sugared or floured surface ( I like to sugar mine) to about 6mm thick.

  3. Use a cookie cutter to cut out your biscuits and transfer to a lined baking tray. Stab with a fork to create a nice shortbread pattern.

  4. Cool in the fridge for 20 minutes so that the dough will keep its form.

  5. Preheat the oven to 180C.

  6. Bake for 12-15 minutes until golden.

  7. Enjoy!

View fullsize IMG_3708.JPG
View fullsize IMG_3710.JPG
View fullsize IMG_3712.JPG
View fullsize IMG_3713.JPG
July 03, 2019 /Sophie Faulkner
Recipe, sweet, Shortbread, Biscuit
Recipe
Comment
IMG_3727.JPG

38. Triple Chocolate Chelsea Buns

June 30, 2019 by Sophie Faulkner in Recipe

You know, I’m not sure these are even technically a chelsea bun. Chelsea buns are a type of currant bun, and I don’t think these buns would know a currant if they saw one.

BUT they are tasty. And use my previous chelsea bun recipe as a base for it’s chocolatey goodness.

I don’t really know why I was in the mood for baking these, but I was definitely craving chocolate, so that was a good starting point. After a couple of weeks of very little baking (bit hard to bake on holiday unfortunately!), I went all out this weekend, so you can expect a midweek recipe and plenty more coming up.

I hope the chocoholic in your life enjoys these as much as I did!

Makes 9 chelsea buns

Ingredients

For the dough

  • 400g (14oz) plain or strong white flour

  • 50g (1.75oz) cocoa powder

  • 14g (0.5oz) dried yeast (2 sachets)

  • 50g (1.75oz) caster sugar

  • Pinch of salt

  • 150ml warm milk

  • 1 egg

  • 50g (1.75oz) butter, melted

For the filling

  • 25g (1oz) butter, room temperature

  • 150g (5.25oz) assorted chocolate chips

  • 1 tsp cinnamon

  • 1 tsp nutmeg

  • 25g (1oz) caster sugar (or light brown sugar)

Method

  1. Mix all the dry ingredients for the dough together in a bowl. Make a well in the middle and add in the milk, butter and egg. Mix it together well, until it starts to form a dough and then use your hands. If once it has formed a dough it feels a bit dry, add a little splash of water, or if it feels too wet add a bit more flour.

  2. Knead the dough on a lightly floured surface until it starts to feel smooth and elastic. When done, form into a ball and set in a lightly oiled or greased bowl to prove. Cover with cling film and leave in a warm spot for an hour until it doubles in size.

  3. Knead the dough a couple of times to knock out the air and then form into a rectangle, about 30cm by 20cm. Spread over the butter and then sprinkle on the chocolate chips. In a bowl mic together the sugar and spices and then sprinkle that over the dough too.

  4. Roll the dough starting at the long edge to get a 30cm long sausage. Slice this into 9 equal sized rounds. Grease an 8”x8” square tin and arrange the slices in the tin. Cover with a damp tea towel and leave to prove for half an hour. Preheat the oven to 180C during the prove.

  5. Bake the buns for 10 minutes at 180C and then decrease to 160C and bake for another ten minutes.

  6. Allow to cool slightly before removing from the tin and serving warm or cold.

IMG_3704.JPG
IMG_3717.JPG
IMG_3718.JPG
IMG_3719.JPG
IMG_3720.JPG
IMG_3723.JPG
June 30, 2019 /Sophie Faulkner
Recipe, sweet, chelsea buns, Chocolate
Recipe
Comment
IMG_3522.JPG

36. Summer Berry Muffins

May 25, 2019 by Sophie Faulkner in Recipe

Summer is well and truly on its way. Its been warm and sunny basically all week with blue skies most days. It has been absolutely gorgeous. Just a shame we’ve been stuck at work! Hopefully these muffins will help you bring a little bit of summer inside even if you, like me, end up stuck inside unable to enjoy the weather. Thanks to Susie for the inspiration, she made some summer berry muffins last week and they just looked so good I couldn’t resist having a go.

These are a ridiculously easy make. No fancy techniques involved, nothing complicated here. Just some good tasty muffins to enjoy the British summer time with. Summer berries are great aren’t they? For this recipe you can either select your own mix of your favourite berries, or cheat like I did and go to the frozen aisle and get a bag of mixed summer berries and just defrost the amount I need. There’s still half a bag left if I want to make these again or just have them with some yoghurt or something. Tasty.

These are so easy you basically have no excuse not to give them a go this weekend. Let me know how you get on and I hope you enjoy!

Makes 12 muffins

Ingredients

  • 120g butter, melted

  • 150g golden caster sugar

  • 240g self raising flour

  • 2 eggs

  • 140ml buttermilk (or 140ml milk and a tbsp of lemon juice mixed and left to stand for 15 minutes)

  • 160g mixed summer berries

  • 100g white chocolate chips/chopped white chocolate

  • 2-3 tbsp lemon juice

  • 70g icing sugar

Method

  1. Preheat the oven to 190C. Line or grease a muffin tray.

  2. In a bowl mix together the buttermilk and eggs. Add in the melted butter (cooled, don’t scramble your eggs with really hot butter!)

  3. Sift the flour and fold it into your wet ingredients. Fold in the sugar too.

  4. Gently fold in your berries and white chocolate chips.

  5. Fill your muffin tray evenly with your mixture and sprinkle a little extra sugar on the top of each.

  6. Bake for 25-30 minutes until golden brown.

  7. Allow to cool.

  8. Mix together the icing sugar and just enough lemon juice that it becomes drizzlable (is that a word?), but still a bit thick.

  9. Drizzle your icing over your cooled muffins and allow to set before you pick one up and get immensely sticky fingers!

  10. Enjoy!

IMG_3506.JPG
IMG_3515.JPG
May 25, 2019 /Sophie Faulkner
sweet, cake, Muffins, berry, summer, easy, Recipe
Recipe
Comment
IMG_3457.jpg

34. Cookie Sandwiches

May 11, 2019 by Sophie Faulkner in Recipe

You hungry? I’m hungry. And I have leftover icing. Let’s make cookie sandwiches.

I LOVE making chocolate chip cookies. I mean, they’re a classic for a reason. They’re quick, they’re easy, and they are DELICIOUS. I don’t know if there’s anything more moreish than a good chocolate chip cookie. Did you know that they were a completely happy accident? Someone was trying to make chocolate cookies (or cake, I forget which) and had run out of cocoa powder, so they decided to use chopped up chunks of chocolate, because they would melt and combine with the rest of the dough right? WRONG. The chocolate chip was born. Happy accidents exist!

Whilst cookies are great entirely on their own (don’t feel pressured to make the icing too, just eat these on their own for something just as yummy!), paired with Oreo buttercream icing to make a cookie sandwich? Amazing. Hits that sweet tooth so hard the dentist might suggest braces.

Makes 30 cookies or 15 sandwiches

Ingredients

For the cookies

  • 150g (5.25oz) butter

  • 80g (2.75oz) golden caster sugar

  • 80g (2.75oz) light brown sugar

  • 1 egg

  • 200g (7oz) plain flour

  • 2 tsp vanilla extract

  • 1/2 tsp baking powder

  • Pinch of salt

  • 150g (5.25oz) chocolate chips

For the icing

  • 400g (14oz) icing sugar

  • 200g (7oz) butter

  • 6 Oreos

Method

  1. Preheat the oven to 190C and line two baking trays with baking paper (You need two. Mine merged. I should know better by now.)

  2. Cream together the butter and sugars for the cookies. Add in the egg, flour, salt and baking powder and combine.

  3. Mix in the vanilla and chocolate chips.

  4. Roll a teaspoon worth of dough into a ball at a time, place on the baking tray and slightly flatten. (If you’re slightly more anal, like me, use 22g of dough for each cookie)

  5. Bake for 10-12 minutes until the edges start to go golden, then take out and leave to cool. (OR EAT THEM WARM BECAUSE THEY’RE TOO GOOD TO WAIT)

  6. Cream your butter, then add in the icing sugar a bit at a time, so it won’t go everywhere. If it doesn’t quite all combine, add in a teaspoon of milk or water.

  7. In a ziploc bag or similar, bash your Oreos to a fine crumb, then add in to your buttercream icing.

  8. Take a cooled cookie, and cover the flat side with icing, potentially using a piping bag with a pretty nozzle.

  9. Add another cookie on top for an excellent sandwich.

  10. ENJOY!

IMG_3439.JPG
IMG_3446.JPG
IMG_3448.JPG
IMG_3457.JPG
May 11, 2019 /Sophie Faulkner
sweet, Recipe, Cookies, Chocolate, Vanilla
Recipe
Comment
IMG_3033.JPG

32. (Not Very) Red Velvet Cupcakes

March 08, 2019 by Sophie Faulkner in Recipe

I don’t often think about red velvet when making cakes. It’s not my go to in any way shape or form. If I was at a cupcake shop and had to choose what I wanted, I would most likely not choose red velvet.

BUT turns out that other people don’t feel the same way. When I asked my coworker if he had a preference what I baked and brought in, he almost immediately said red velvet. I am just a little torn as to why. It’s neither chocolate nor vanilla, just a sort of halfway point between the two. Based on flavour alone, why wouldn’t you go full chocolate or vanilla?

HOWEVER, red velvet gets its name from its velvety texture, created by using buttermilk and oil to make a smooth batter that stays moist and rich. And when paired with a vanilla cream cheese icing? Yeah, I guess I can kinda see why someone MIGHT pick a red velvet cupcake.

So I gave them a go. Unfortunately my red food colouring didn’t really do the trick and they turned out pretty brown, but they still tasted pretty great. Hopefully yours will be redder.

So with that in mind, for all you red velvet lovers out there, here’s your recipe.

Makes 12 cupcakes

Ingredients

For the cupcakes

  • 120g (4 1/4oz) butter

  • 300g (10 1/2oz) caster sugar

  • 2  eggs

  • 60ml olive/vegetable oil

  • 1 tbsp cocoa powder

  • 2 1/2 tbsp red food colouring

  • 1 tbsp vanilla extract

  • 350g (12oz) plain flour

  • 1 tsp bicarbonate of soda

  • Pinch of salt

  • 250ml buttermilk (OR 250ml milk with a tbsp lemon juice left for ten minutes)

For the cream cheese icing

  • 200g (7oz) cream cheese

  • 60g (2oz) butter

  • 250g (9oz) icing sugar

  • 1 tsp vanilla extract

Method

  1. Preheat oven to 175C and prep your cupcake tray.

  2. Cream the butter and sugar together until light and fluffy. Add the eggs.

  3. In another bowl, mix together the eggs, oil, cocoa powder, vanilla and red food colouring. Mix until well combined.

  4. Add the oil mixture to creamed butter and mix.

  5. Add the dry ingredients to the butter along with half the buttermilk and mix well. Once well combined, add in the remaining buttermilk.

  6. Transfer your batter to a jug and fill your cupcake cases about 3/4 full.

  7. Bake for 25-30 minutes and allow to cool on a wire rack.

  8. Beat together the cream cheese and butter until light and fluffy.

  9. Add in the vanilla and a third of the icing sugar and beat well.

  10. Add in another third of the icing sugar, mix and then add the final third in and beat until well combined.

  11. Fill a piping bag with your icing and ice your cooled cakes however you like.

  12. Enjoy!

IMG_3004.JPG
IMG_3010.JPG
IMG_3011.JPG
IMG_3024.JPG
IMG_3038.JPG
March 08, 2019 /Sophie Faulkner
Recipe, sweet, Vanilla, Chocolate, cupcake
Recipe
Comment
IMG_2710.JPG

28. Coconut Orange Genoise Cupcakes

January 31, 2019 by Sophie Faulkner in Recipe

Who’s ready for an upper arm workout?!

Oh, no one? That’s a shame. Better hope you have an electric whisk then.

This week I decided to put it to an Instagram poll as to what to make. The categories were light/fruity vs spiced/chocolate, something big to share vs bitesized treats and vegan vs dairy. I slightly jumped the gun on the first poll which eventually had a close win with spiced/chocolate, but let’s be honest, I’ll likely do that soon anyway! So I though with light/fruity that I would veer away from my usual lemon based things and go a bit more exotic and combine coconut and orange as my flavours. Ooh it worked well. Would recommend.

I was also out of self raising flour this week, and rather slog to the shops to get some, I decided to make a genoise sponge mix instead, which made my arm very very sore from the whisking. Why I didn’t decide to use an electric whisk I do not know. I should hit the gym more. Genoise sponges only get their raise and lightness from the air trapped inside from whisking, which is why it is so important to whisk A LOT. Worth it though. They’re gooooood.

Makes 12 cupcakes

Ingredients

For the genoise sponge

  • 4 eggs

  • 125g (4.5 oz) caster sugar

  • 110g (4oz) plain flour

  • 50g (1.75oz) butter, melted

  • 20g (0.75oz) dessicated coconut

For the orange sugar syrup

  • 50g (1.75oz) caster sugar

  • 30ml water

  • juice of one orange

For the chantilly cream

  • 300ml double cream

  • 15g (0.5oz) icing sugar

  • zest of one orange

  • dessicated coconut to sprinkle

Method

  1. Preheat the oven to 180C

  2. On a simmering bain marie, whisk your eggs and sugar together until pale and thick, almost mousse like. Once thickened, take off the bain marie and whisk until the ribbon stage is reached and the mixture has cooled. (The ribbon stage is where if you take the whisk out and dribble a figure of 8 onto the mix, the 8 stays there for a couple of seconds before sinking back in).

  3. Sieve and fold in the flour a bit at a time. Be careful not to knock out too much air when folding! Fold in the dessicated coconut too.

  4. Pour in the melted butter around the edges of the bowl and fold that in gently.

  5. Line a cupcake tin and fill with your mixture.

  6. Bake at 180C for 18-20 minutes until golden and they spring back.

  7. Leave to cool.

  8. Put all the ingredients for the sugar syrup in a pan and bring to a boil, then remove from the heat, providing that the sugar has all dissolved.

  9. Brush the sugar syrup onto the cupcakes while still in the tin and liners so they can really soak in the syrup.

  10. Whisk the cream and sugar together until it forms soft peaks, then add in the orange zest.

  11. Remove the cupcakes from the tin and liners, if so desired.

  12. Pipe the cream onto the cupcakes and sprinkle over the dessicated coconut.

  13. Enjoy!

IMG_2686.JPG
IMG_2688.JPG
IMG_2691.JPG
IMG_2695.JPG
IMG_2699.JPG
IMG_2705.JPG
IMG_2706.JPG
IMG_2711.JPG
January 31, 2019 /Sophie Faulkner
cupcake, Recipe, sweet, orange, coconut, genoise sponge
Recipe
Comment
IMG_2393.jpg

25. Gingerbread Sleigh

December 22, 2018 by Sophie Faulkner in Recipe

What is a more quintessentially Christmassy bake than a gingerbread house? With all the windows and roof tiles piped on with care, the roof dusted with icing sugar snow, chocolate fingers lining the doorway, maybe even some sweets as Christmas decorations.

I didn’t do that.

Who has time to make a house? Why not a sleigh that I could fill with “presents” (read, chocolates) instead? I cut out my own stencils from sheets of A5 paper, so it wasn’t huge, but I didn’t really want it to be, as I had to transport it up North.

Honestly, was pretty pleased with how this turned out, and the gingerbread is thoroughly tasty. Even after a few days sat holding chocolates. My only issue was that it was so pretty I didn’t want to break into it!

Merry Christmas!

Makes 1 gingerbread… whatever you like really. Only a small one though!

Ingredients

  • 125g butter

  • 100g demerara sugar (or other brown)

  • 4 tbsp golden syrup

  • 300g plain flour

  • 1 tsp bicarbonate of soda

  • 3 tsp ground ginger

  • 1 tsp cinnamon

  • 1 egg white

  • 200g icing sugar

  • 50g cocoa powder

  • 100g white chocolate, melted (optional)

Method

  1. Preheat the oven to 180C.

  2. In a pan, melt the butter, demerara sugar and golden syrup together.

  3. Mix the flour, bicarb, ginger and cinnamon together in a large bowl.

  4. Pour the melted wet ingredients into the flour bowl and mix well. If it doesn’t come together, add a splash of water. It should be quite a firm dough.

  5. Make/cut out your stencils while the dough firms up a little and cools down.

  6. On a piece of greaseproof/baking paper, roll out the dough to about 6-8mm thick. Cut your shapes out and remove the excess dough from the paper. Transfer the sheet of baking paper onto a baking tray.

  7. Bake for 12-14 minutes until firm and the edges have darkened a little.

  8. Allow to cool and firm up for a few minutes, and then using your stencil, cut around the edges again to make them neat. (I left this a little too long, so my sleigh wasn’t as neat as I would have liked.)

  9. Allow to cool completely.

  10. Prepare an icing bag with a medium nozzle, star shaped or plain, for the “cement”.

  11. Mix together the egg white, icing sugar and cocoa powder in a bowl, to a smooth paste. Fill your piping bag with this and pipe down the edges of your gingerbread pieces to stick them together.

  12. As you assemble your gingerbread house/sleigh/city, use a bowl or kitchen utensils to prop up the pieces as you go, as the icing will not set immediately.

  13. Once your house/sleigh/whatever is completely set, you can decorate with melted chocolate or anything else you like!

IMG_2376.JPG
IMG_2377.JPG
IMG_2383.JPG
IMG_2385.JPG
IMG_2389.JPG
December 22, 2018 /Sophie Faulkner
Ginger, gingerbread, Biscuit, Christmas, sweet, Recipe
Recipe
Comment
  • Newer
  • Older

Powered by Squarespace