Sophie's Pi

Mathematical baking

Sophie’s Pi is a record of my adventures in baking, maths and the real world, hoping to make my way to having my own patisserie empire some day. Or just getting to lick the bowl now and again.

  • Blog Search
  • Blog
  • About
  • Images
IMG_4135.JPG

40. Whole Orange Cake

September 04, 2019 by Sophie Faulkner in Recipe

2 months??? Oops.

I really have no real excuse. I’ve been busy with exams and I did go on holiday, but 2 months is pretty inexcusable! I’m sorry, I’ll try not to let it happen again.

This week I decided to get back into baking with something I had never even heard of before, that I saw on Sortedfood, link to the inspiration video here. They put a WHOLE orange into their batter. Not just the juice, not just the zest. The whole orange, pith and all (well, except for the little stem bit).

I decided to take it to the next level and do a whole cake rather than muffins, and top it with some italian meringue and candied orange peel. Let’s get stuck in.

Makes 1 cake, serves 8.

Ingredients

For the cake

  • 1 orange

  • 4 oz butter

  • 6oz caster sugar

  • 6oz self-raising flour

  • Pinch of salt

  • 2 eggs

  • 2-3 tbsp milk

For the Italian Meringue/Candied Peel

  • 4oz caster sugar

  • 2 egg whites

  • Peel of one orange

Method

Cake:

  1. Boil the whole orange for an hour. Pop the telly on and have a cuppa.

  2. Take the orange out of the water and remove the little stem at the top, this should pop right off. Drop your orange into a blender, or use a hand held blender, and puree the whole thing.

  3. Preheat the oven to 180C.

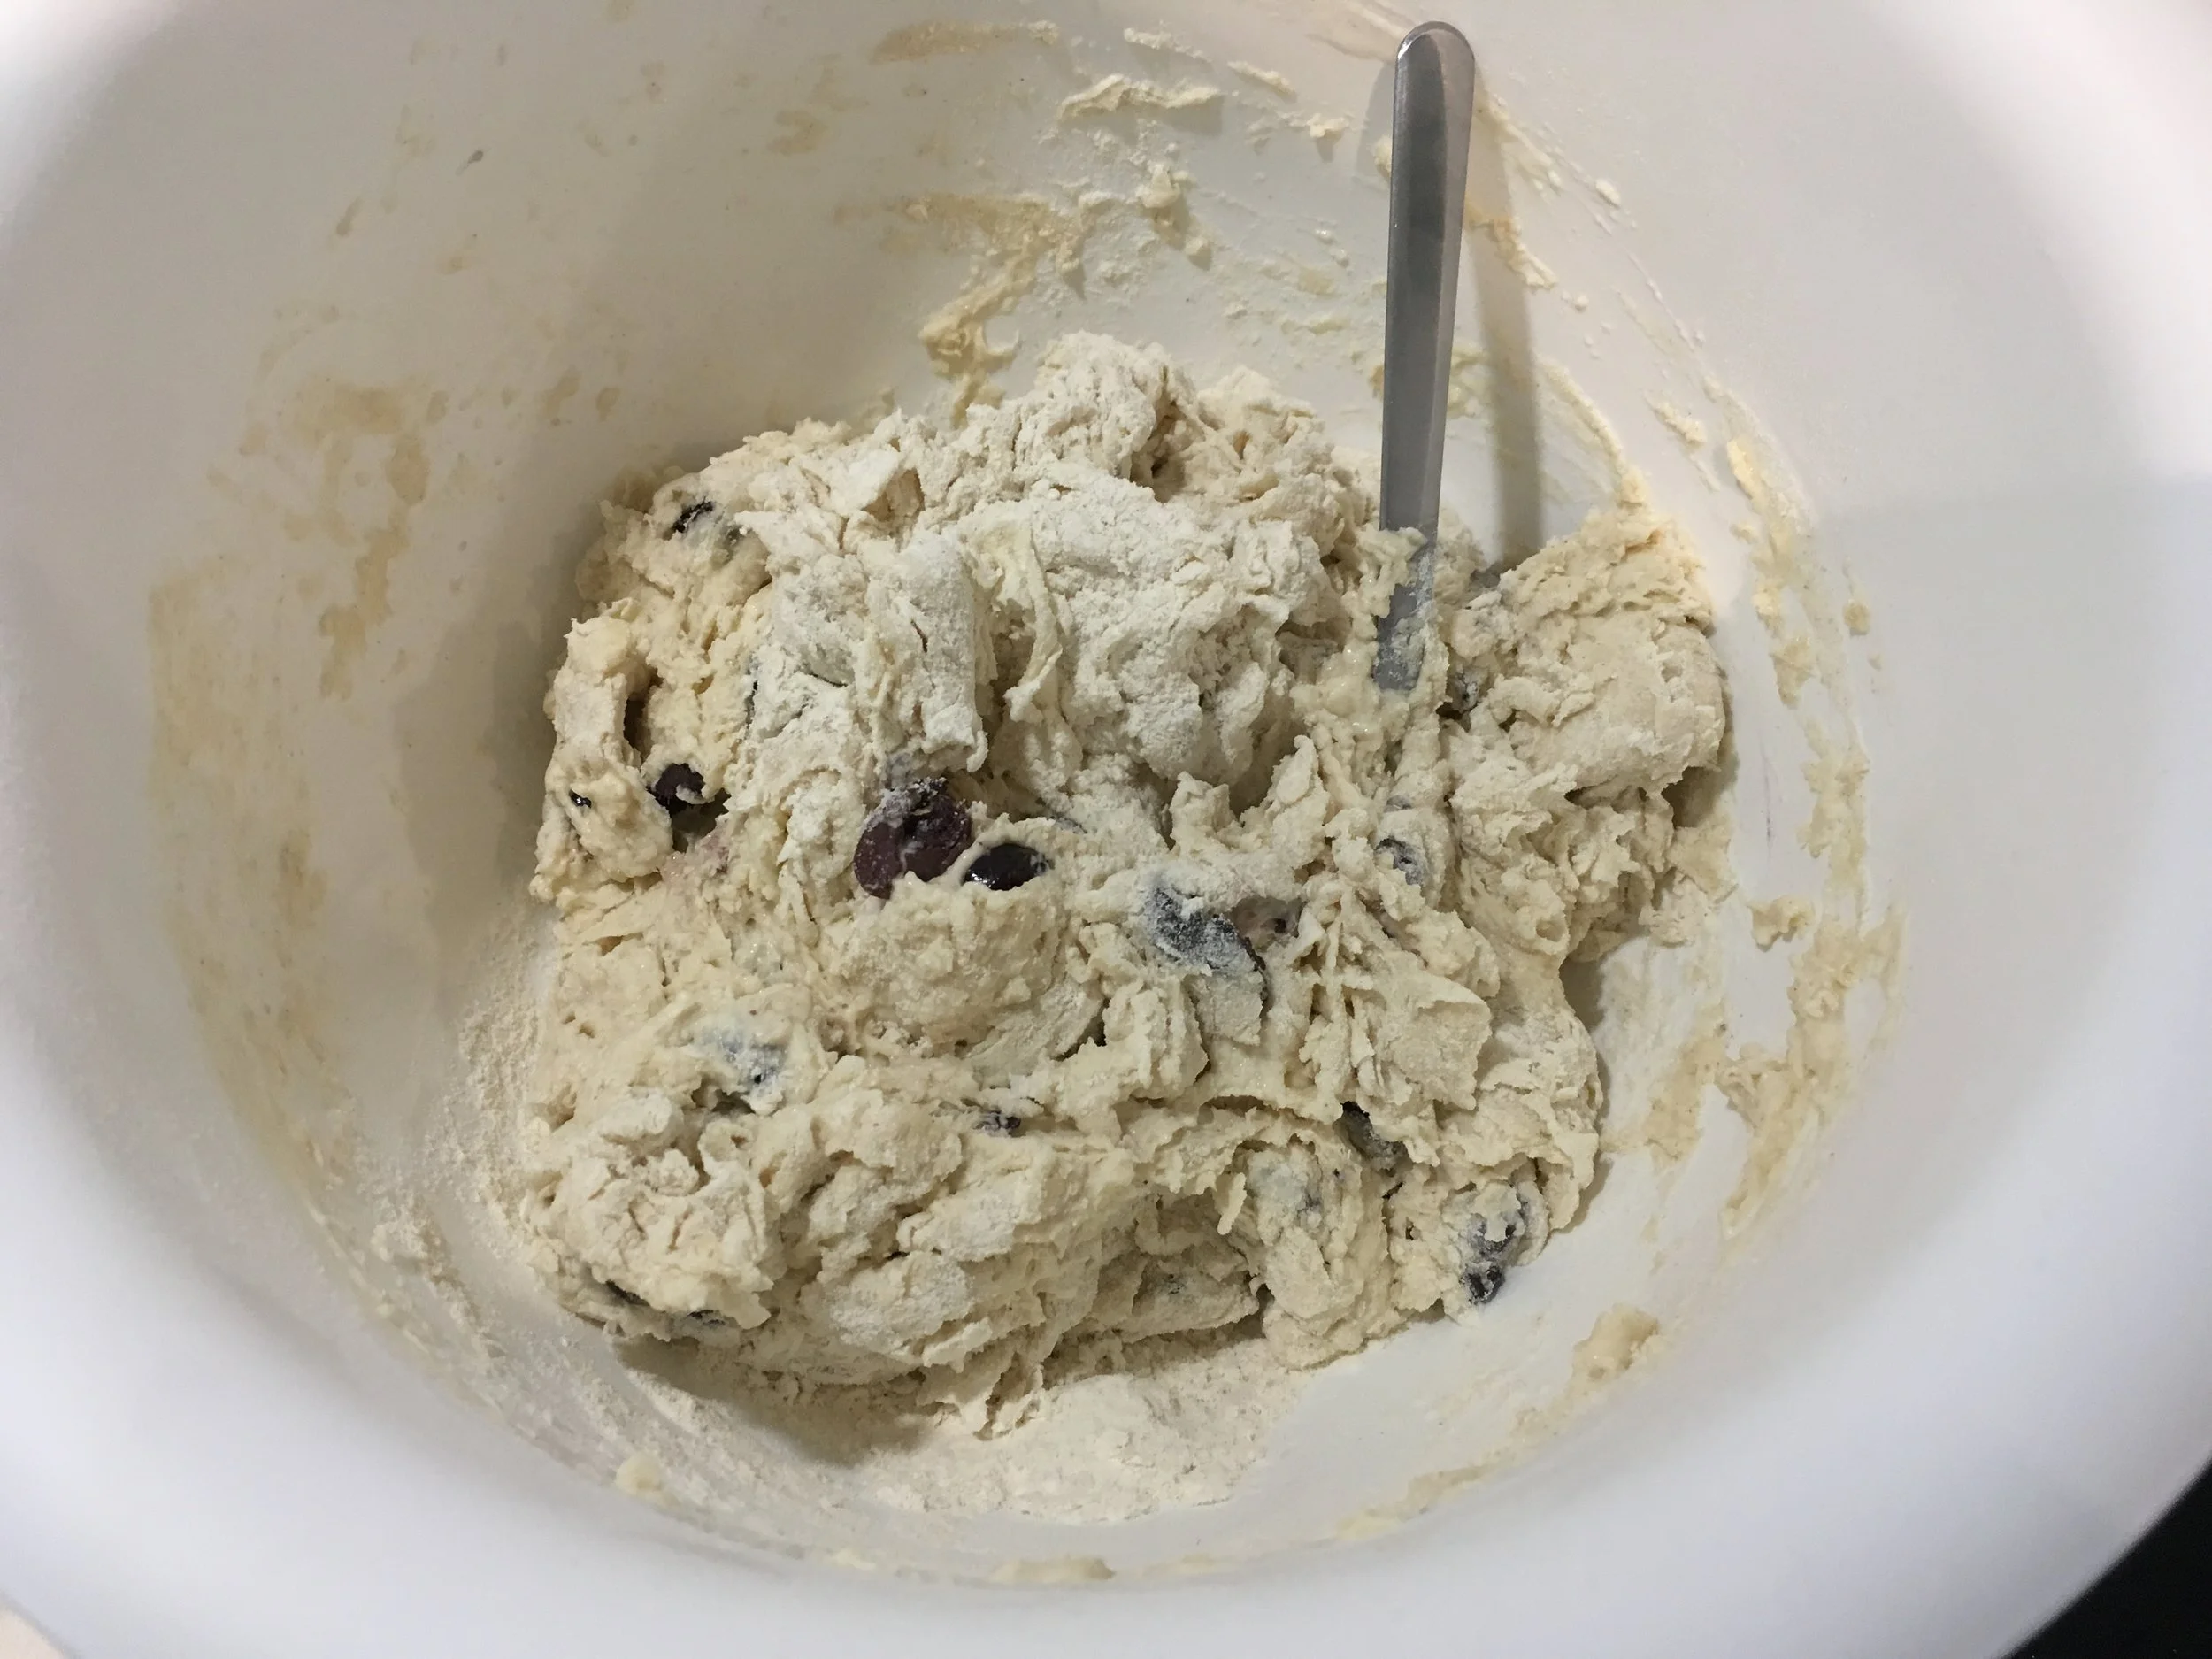
  4. In a bowl, cream together the butter and sugar for the cake.

  5. Add in the flour and a pinch of salt and mix in.

  6. Mix in the eggs and the pureed orange and mix until fully incorporated, then mix in the milk until it is a reasonable consistency.

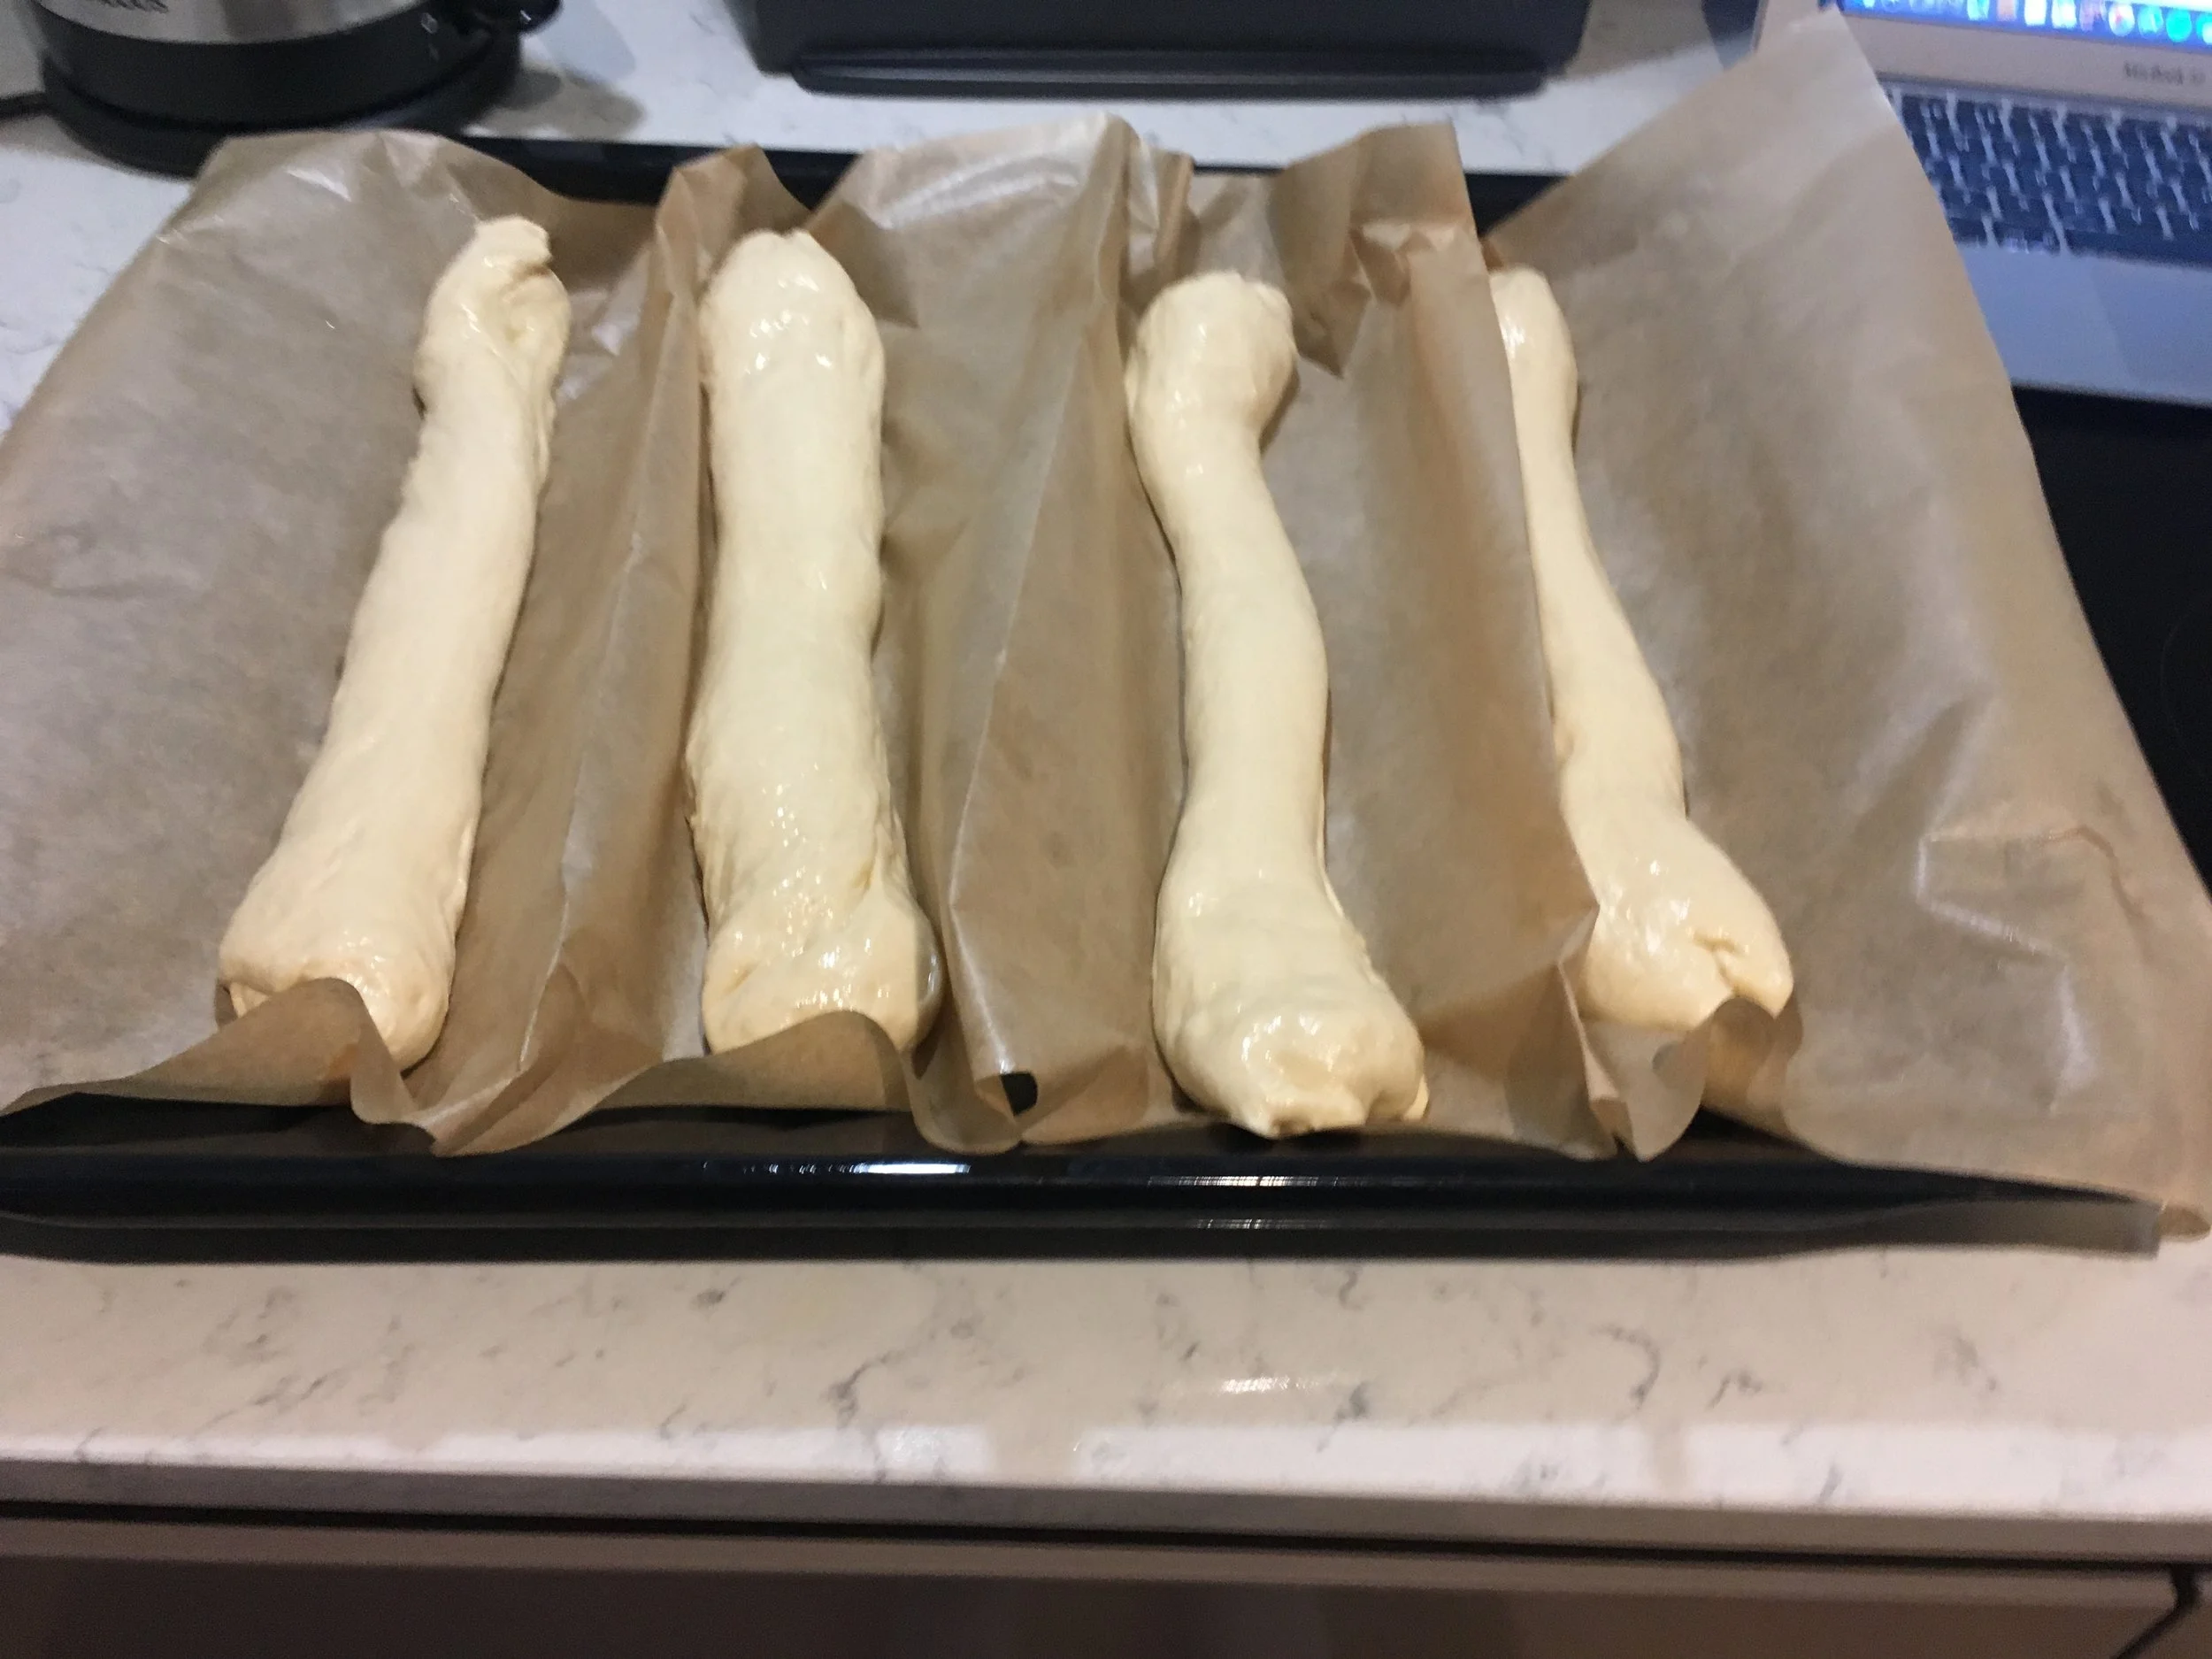
  7. Line a cake tin with greaseproof paper or butter it, and pour your mixture in.

  8. Bake for 40-45 minutes until golden on top and when skewered with a knife, the knife comes out clean.

  9. Allow to cool.

Candied Peel:

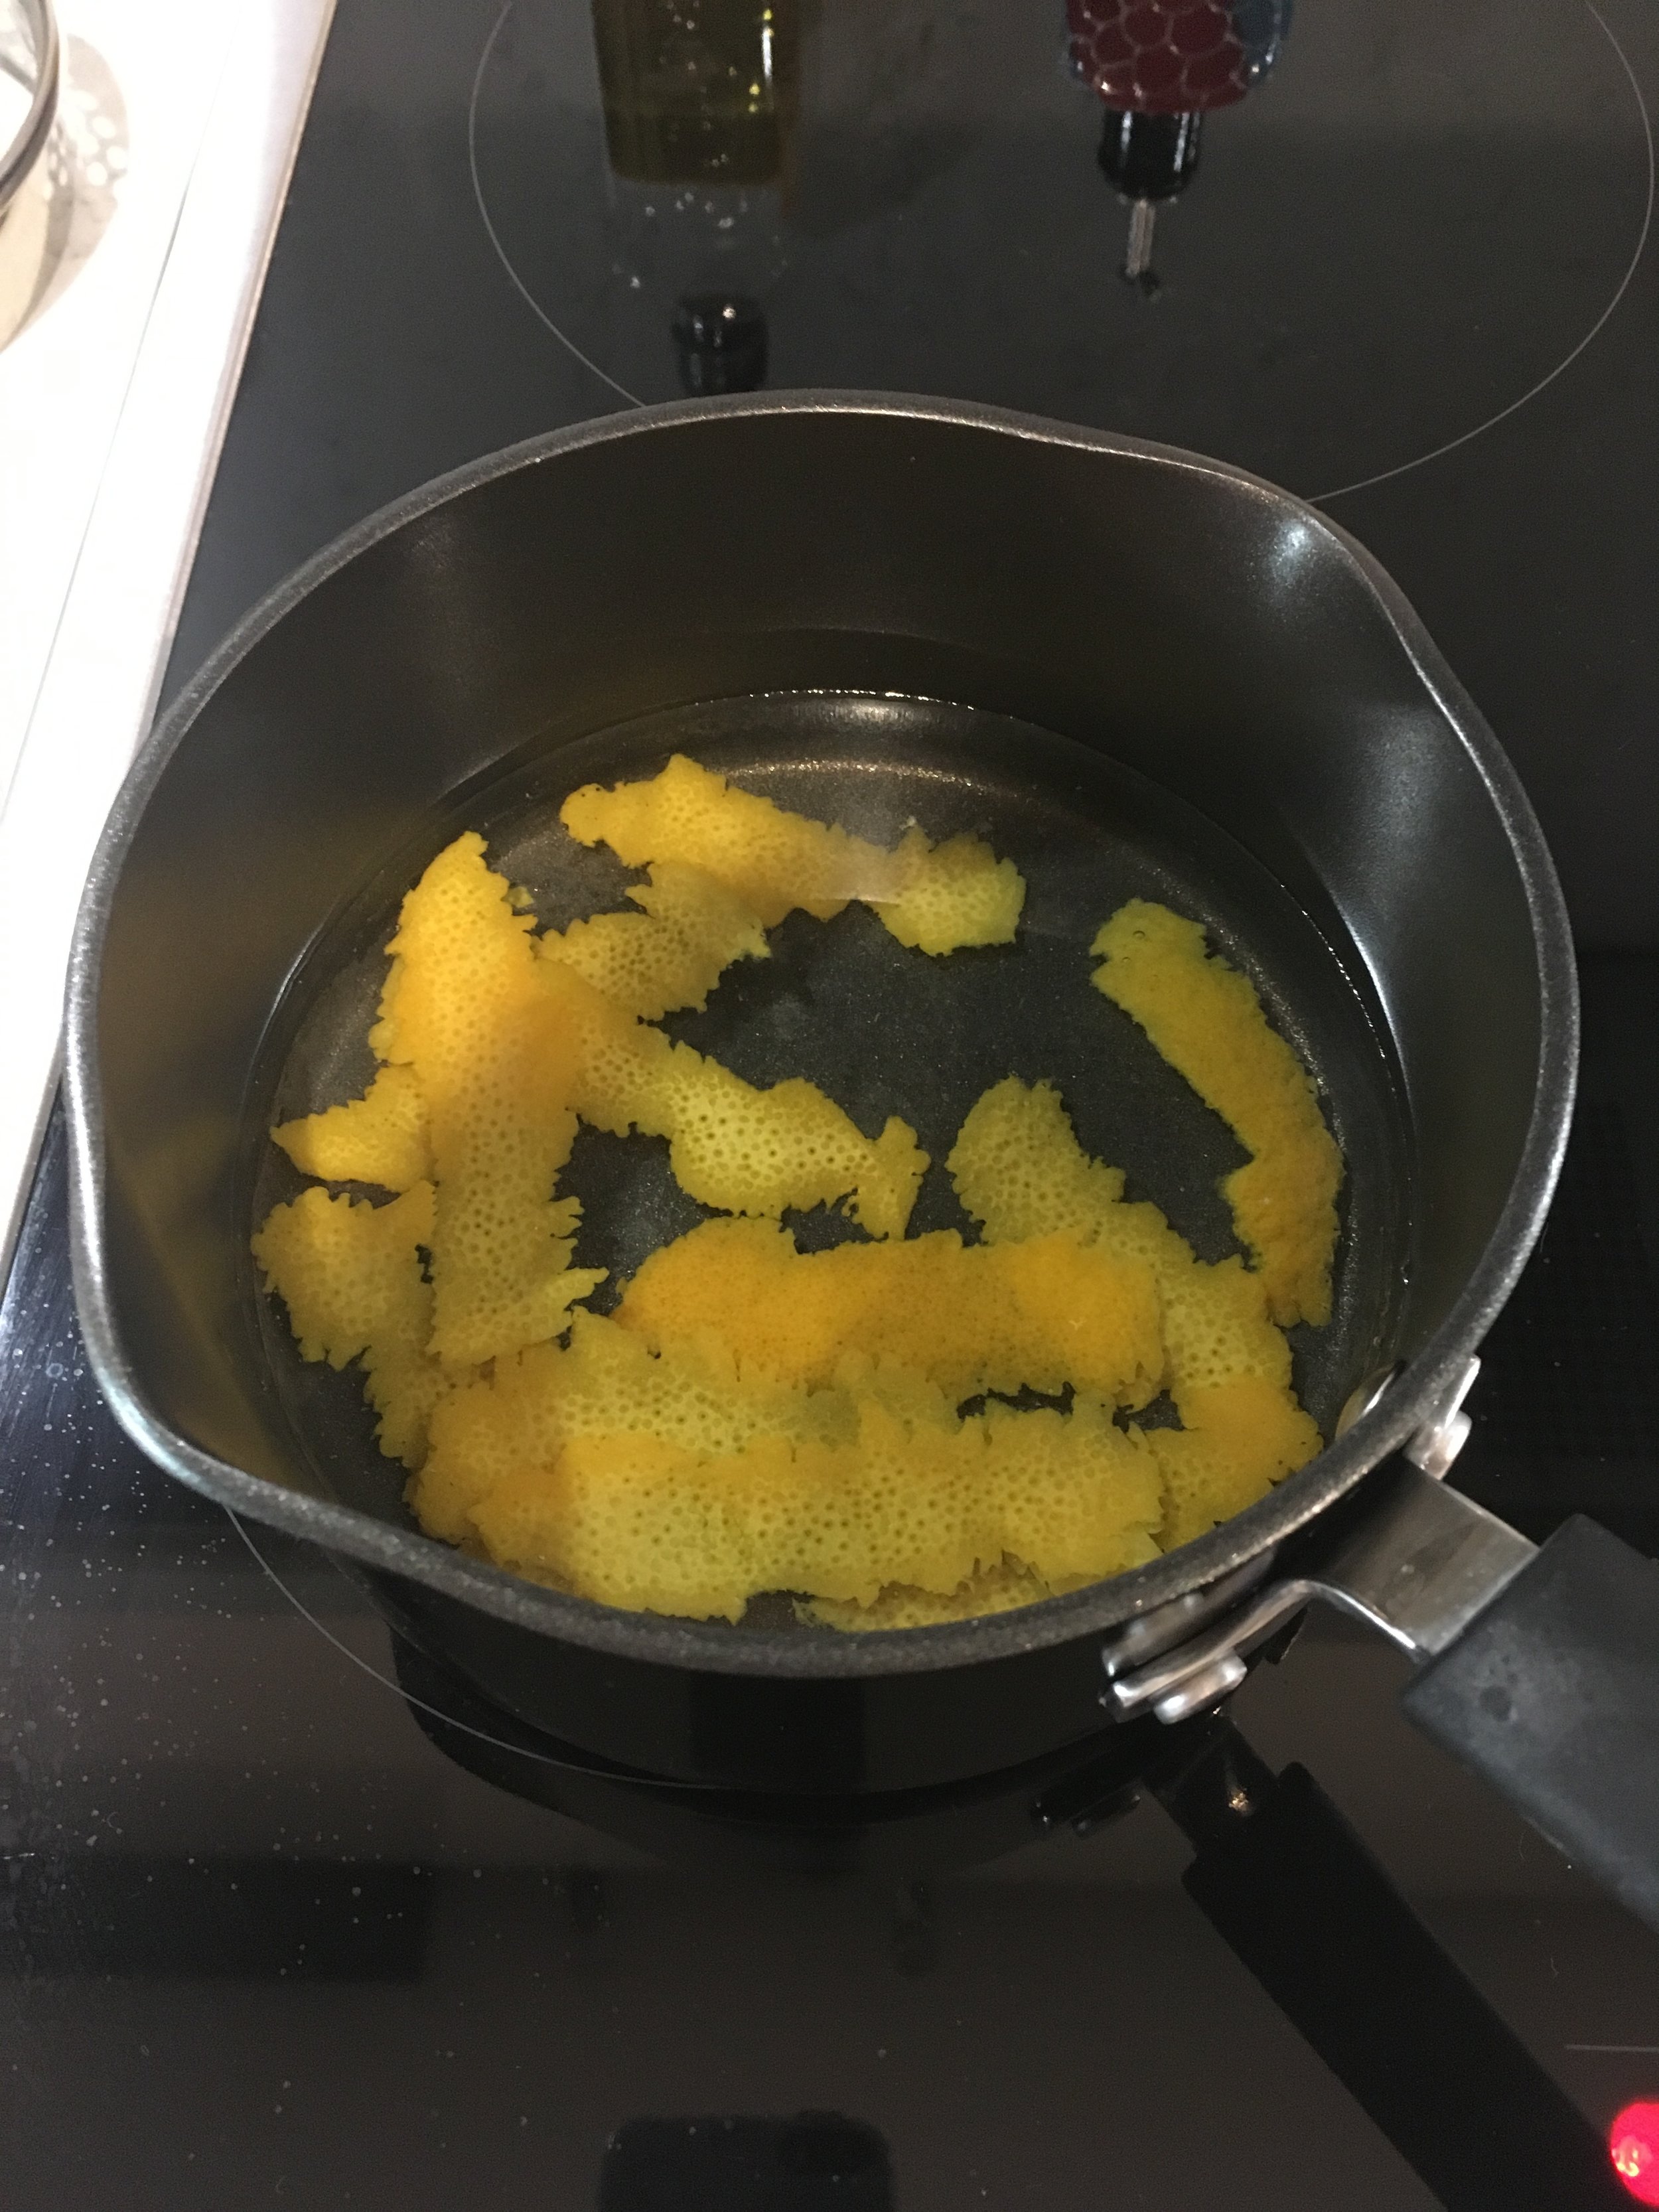
  1. Use a potato peeler to peel strips of zest off the orange, trying to get as little of the pith with it as possible. If any pith comes with your strips, scrape it off with the back of a knife or with the peeler itself.

  2. Place your strips in a pan of cold water and bring to the boil. Once boiling, drain the water out and replace with cold water. Do this a further 3 times. It will remove the bitterness from the orange peel.

  3. Place the strips to the side.

  4. In a pan, combine the 4oz caster sugar with 4oz water and bring to the boil. Boil until the sugar has completely dissolved and the water is clear again. Put your peel strips back in and let stand for 10-20 minutes.

  5. Take your strips out with a fork and allow to drain on some kitchen roll.

Italian Meringue:

  1. Whisk the egg whites to medium stiff peaks.

  2. Bring your sugar syrup mixture (what you have just removed your peel from) back to the boil and keep heating until it reaches 114C.

  3. Pour the sugar syrup into your egg whites WHILE WHISKING, and keep whisking for another 7-10 minutes until your egg white mixture has cooled completely

Assembly:

  1. Preheat your grill to high setting (unnecessary if you have a blowtorch)

  2. If your cake has risen a lot and created a dome, consider slicing the top off to make it level.

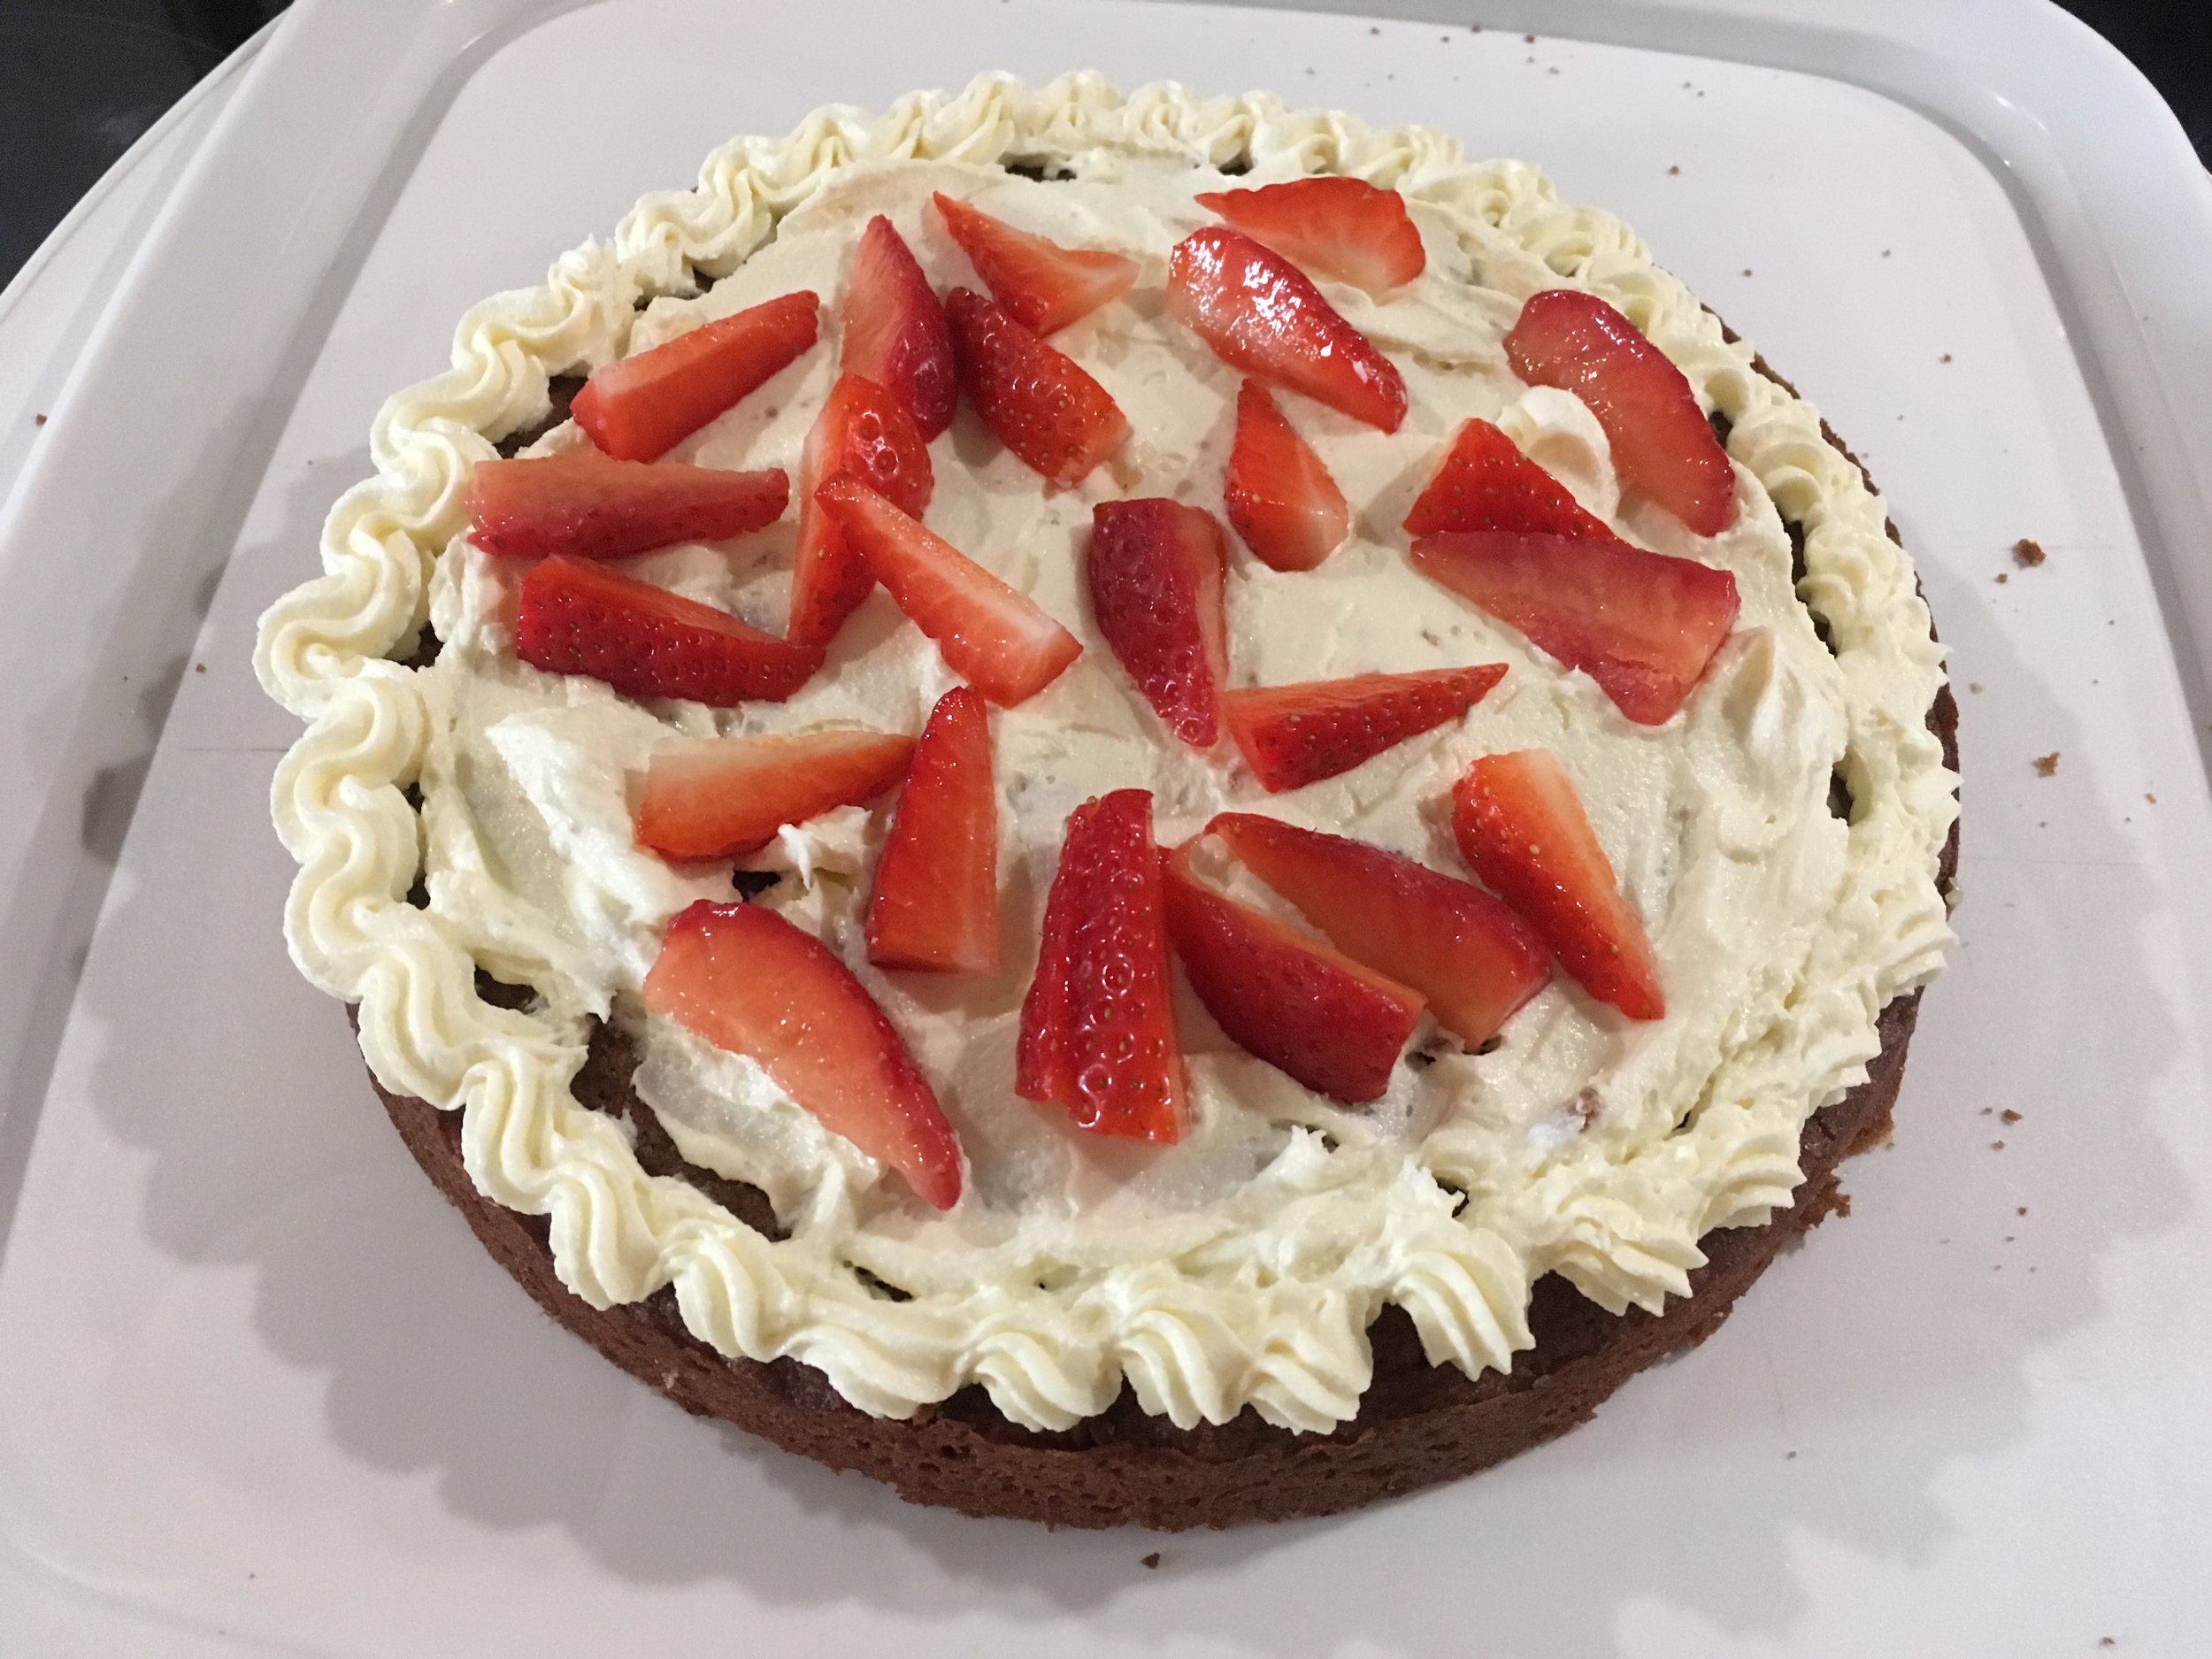
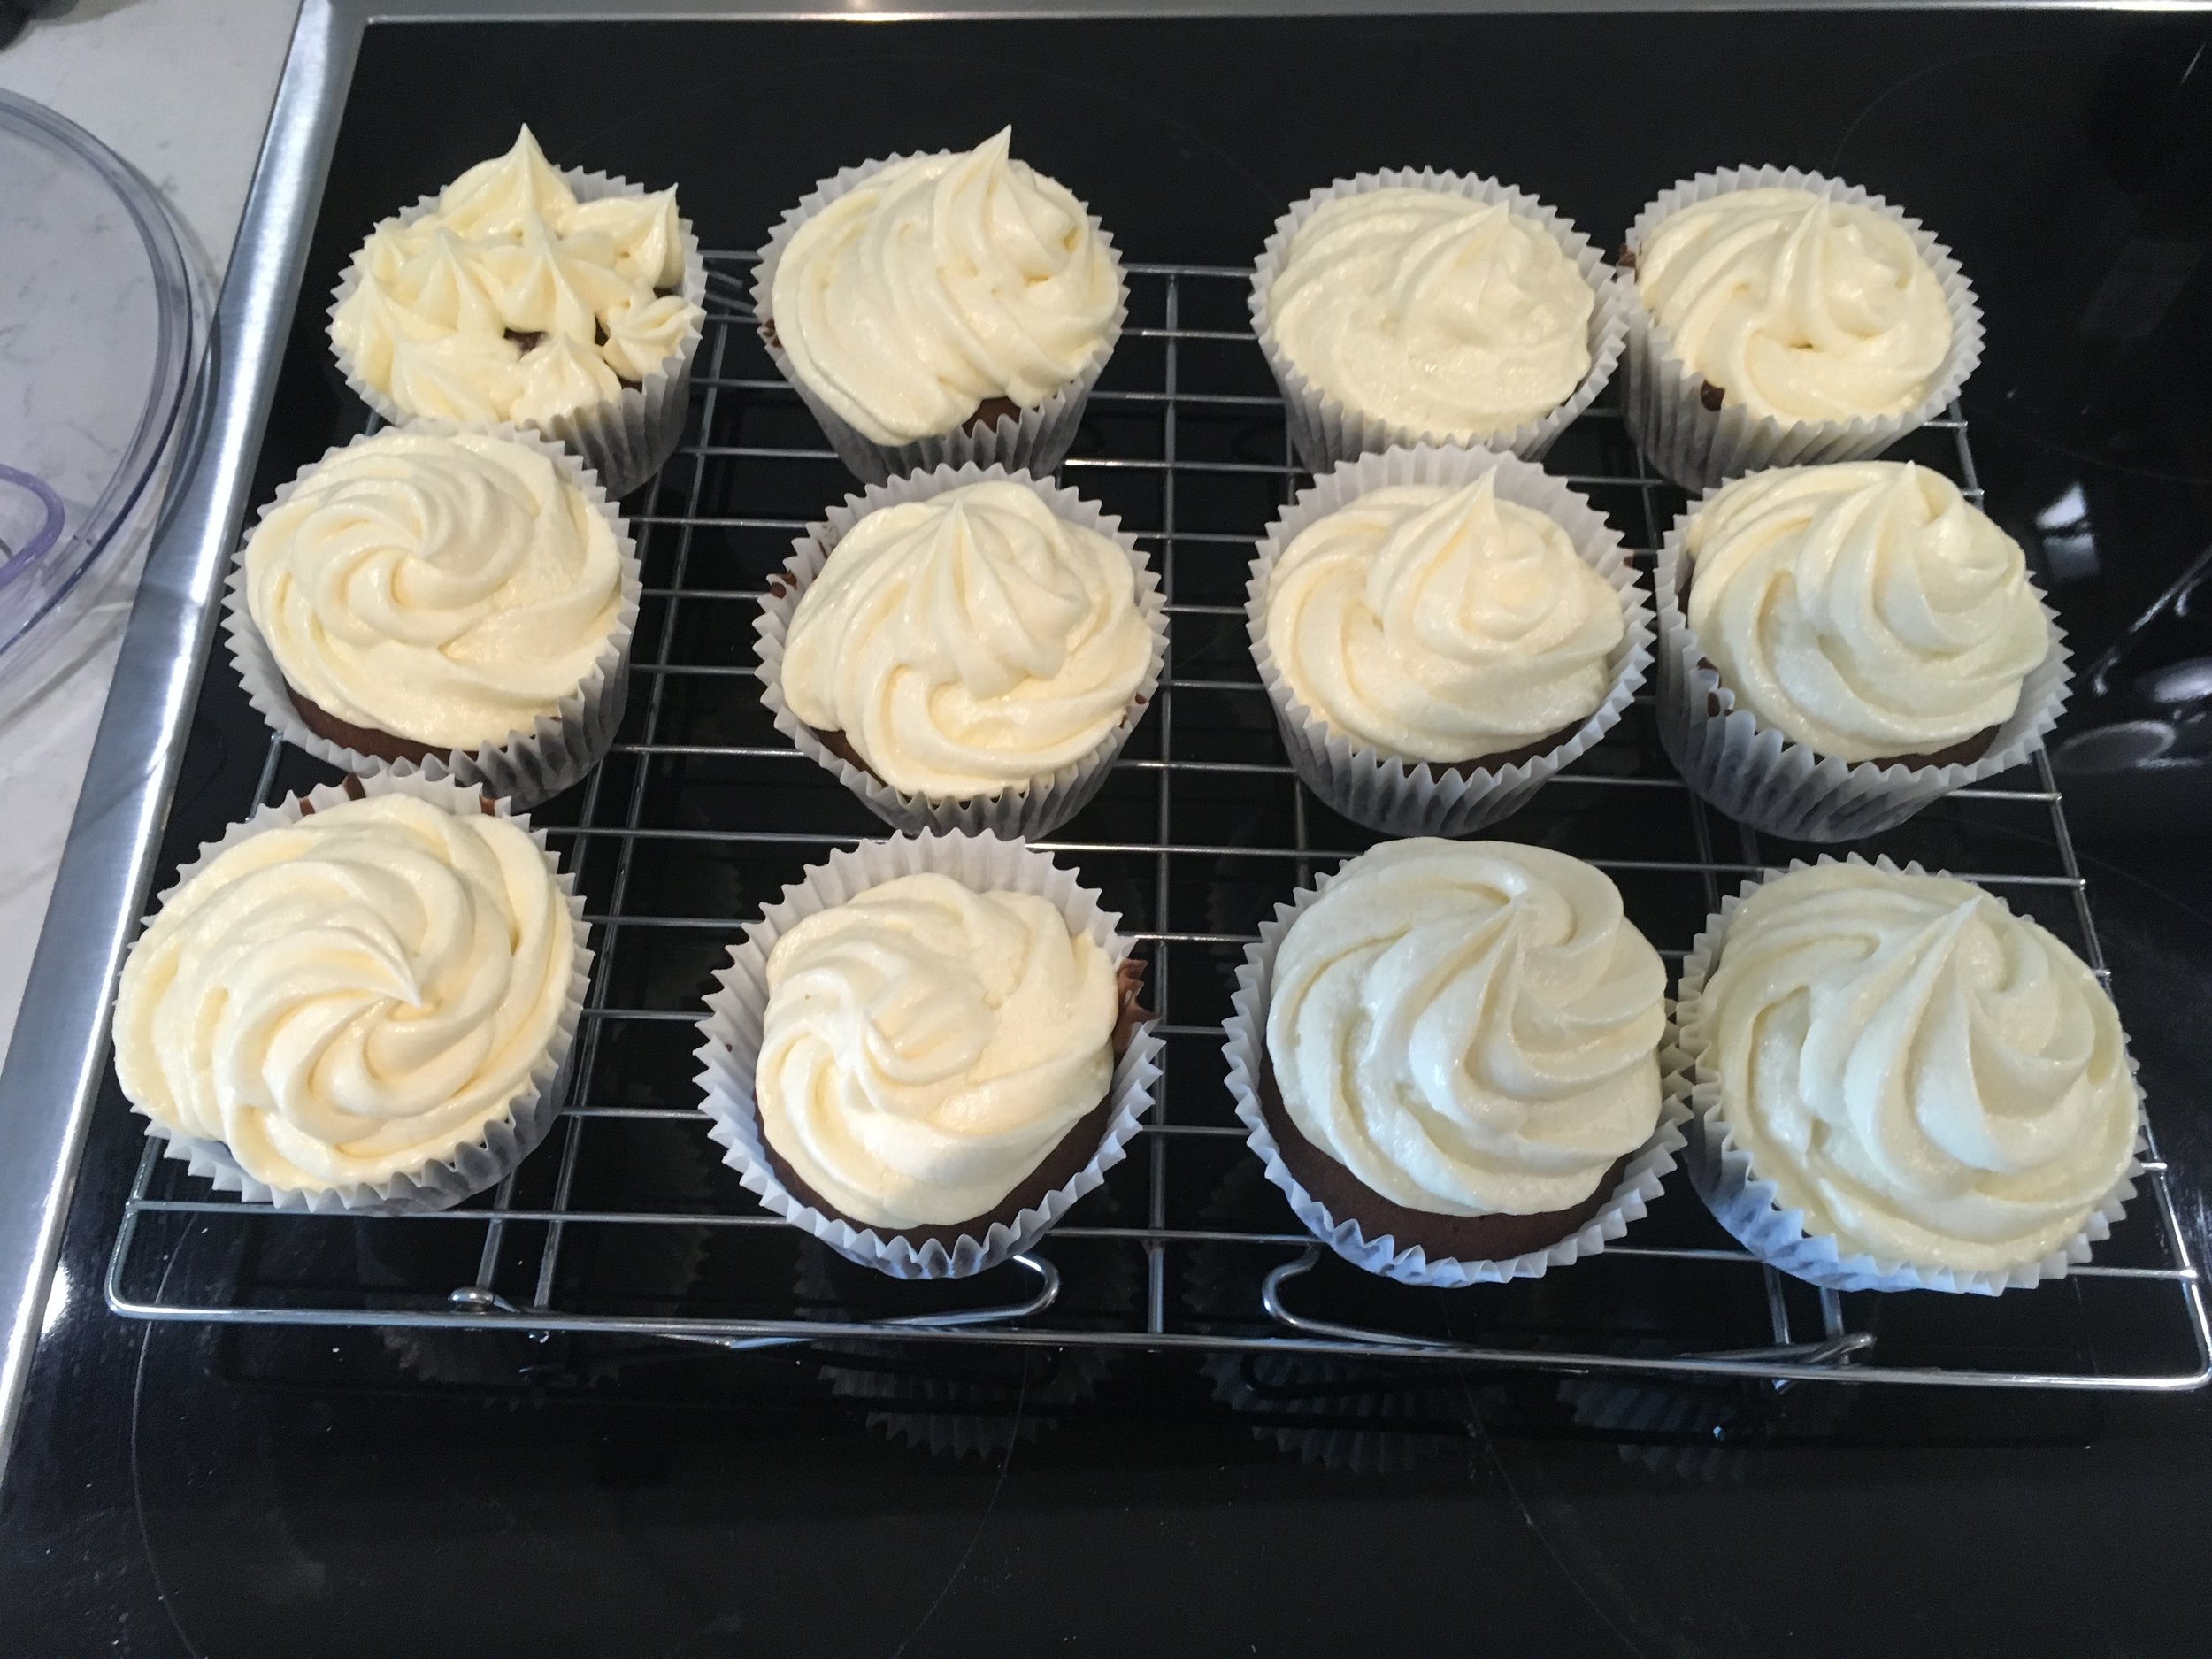
  3. Pipe your Italian meringue onto your cake using a star shaped nozzle to get lots of ridges.

  4. Place your cake under the grill for about a minute to get the edges of your Italian meringue to brown. If you have a blowtorch, use this so you can control where it is browning.

  5. Decorate the cake with your candied peel.
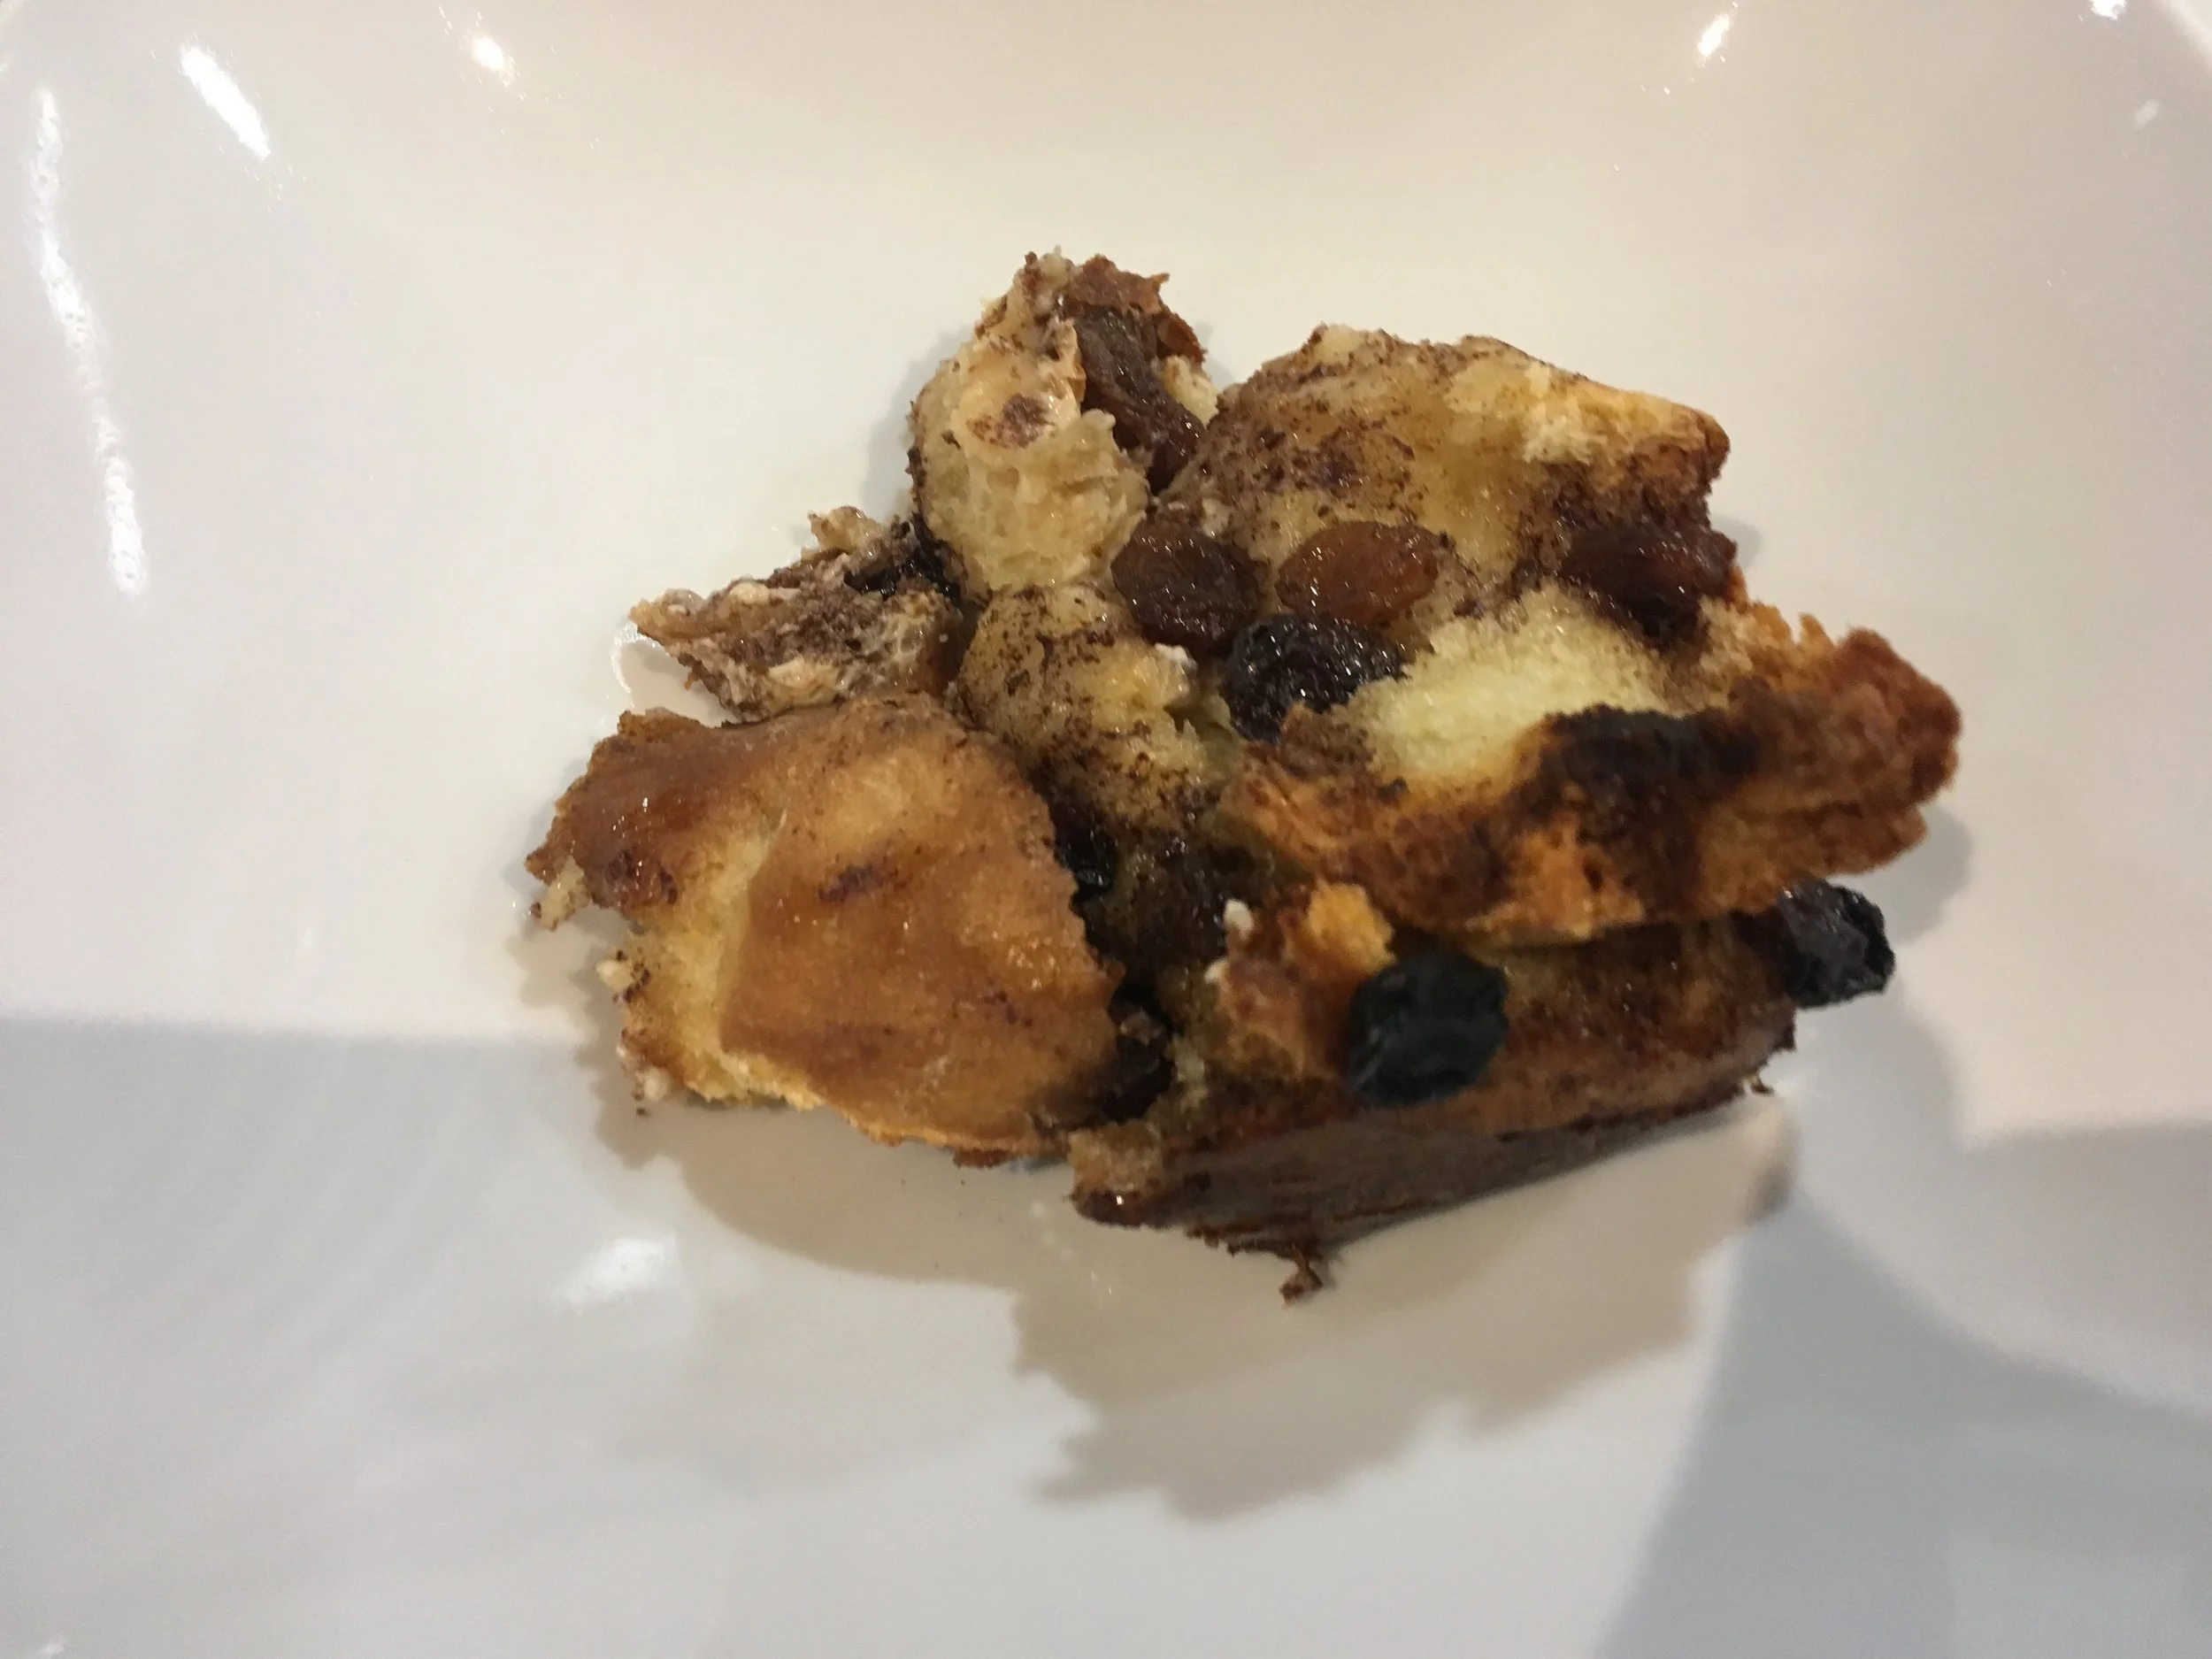
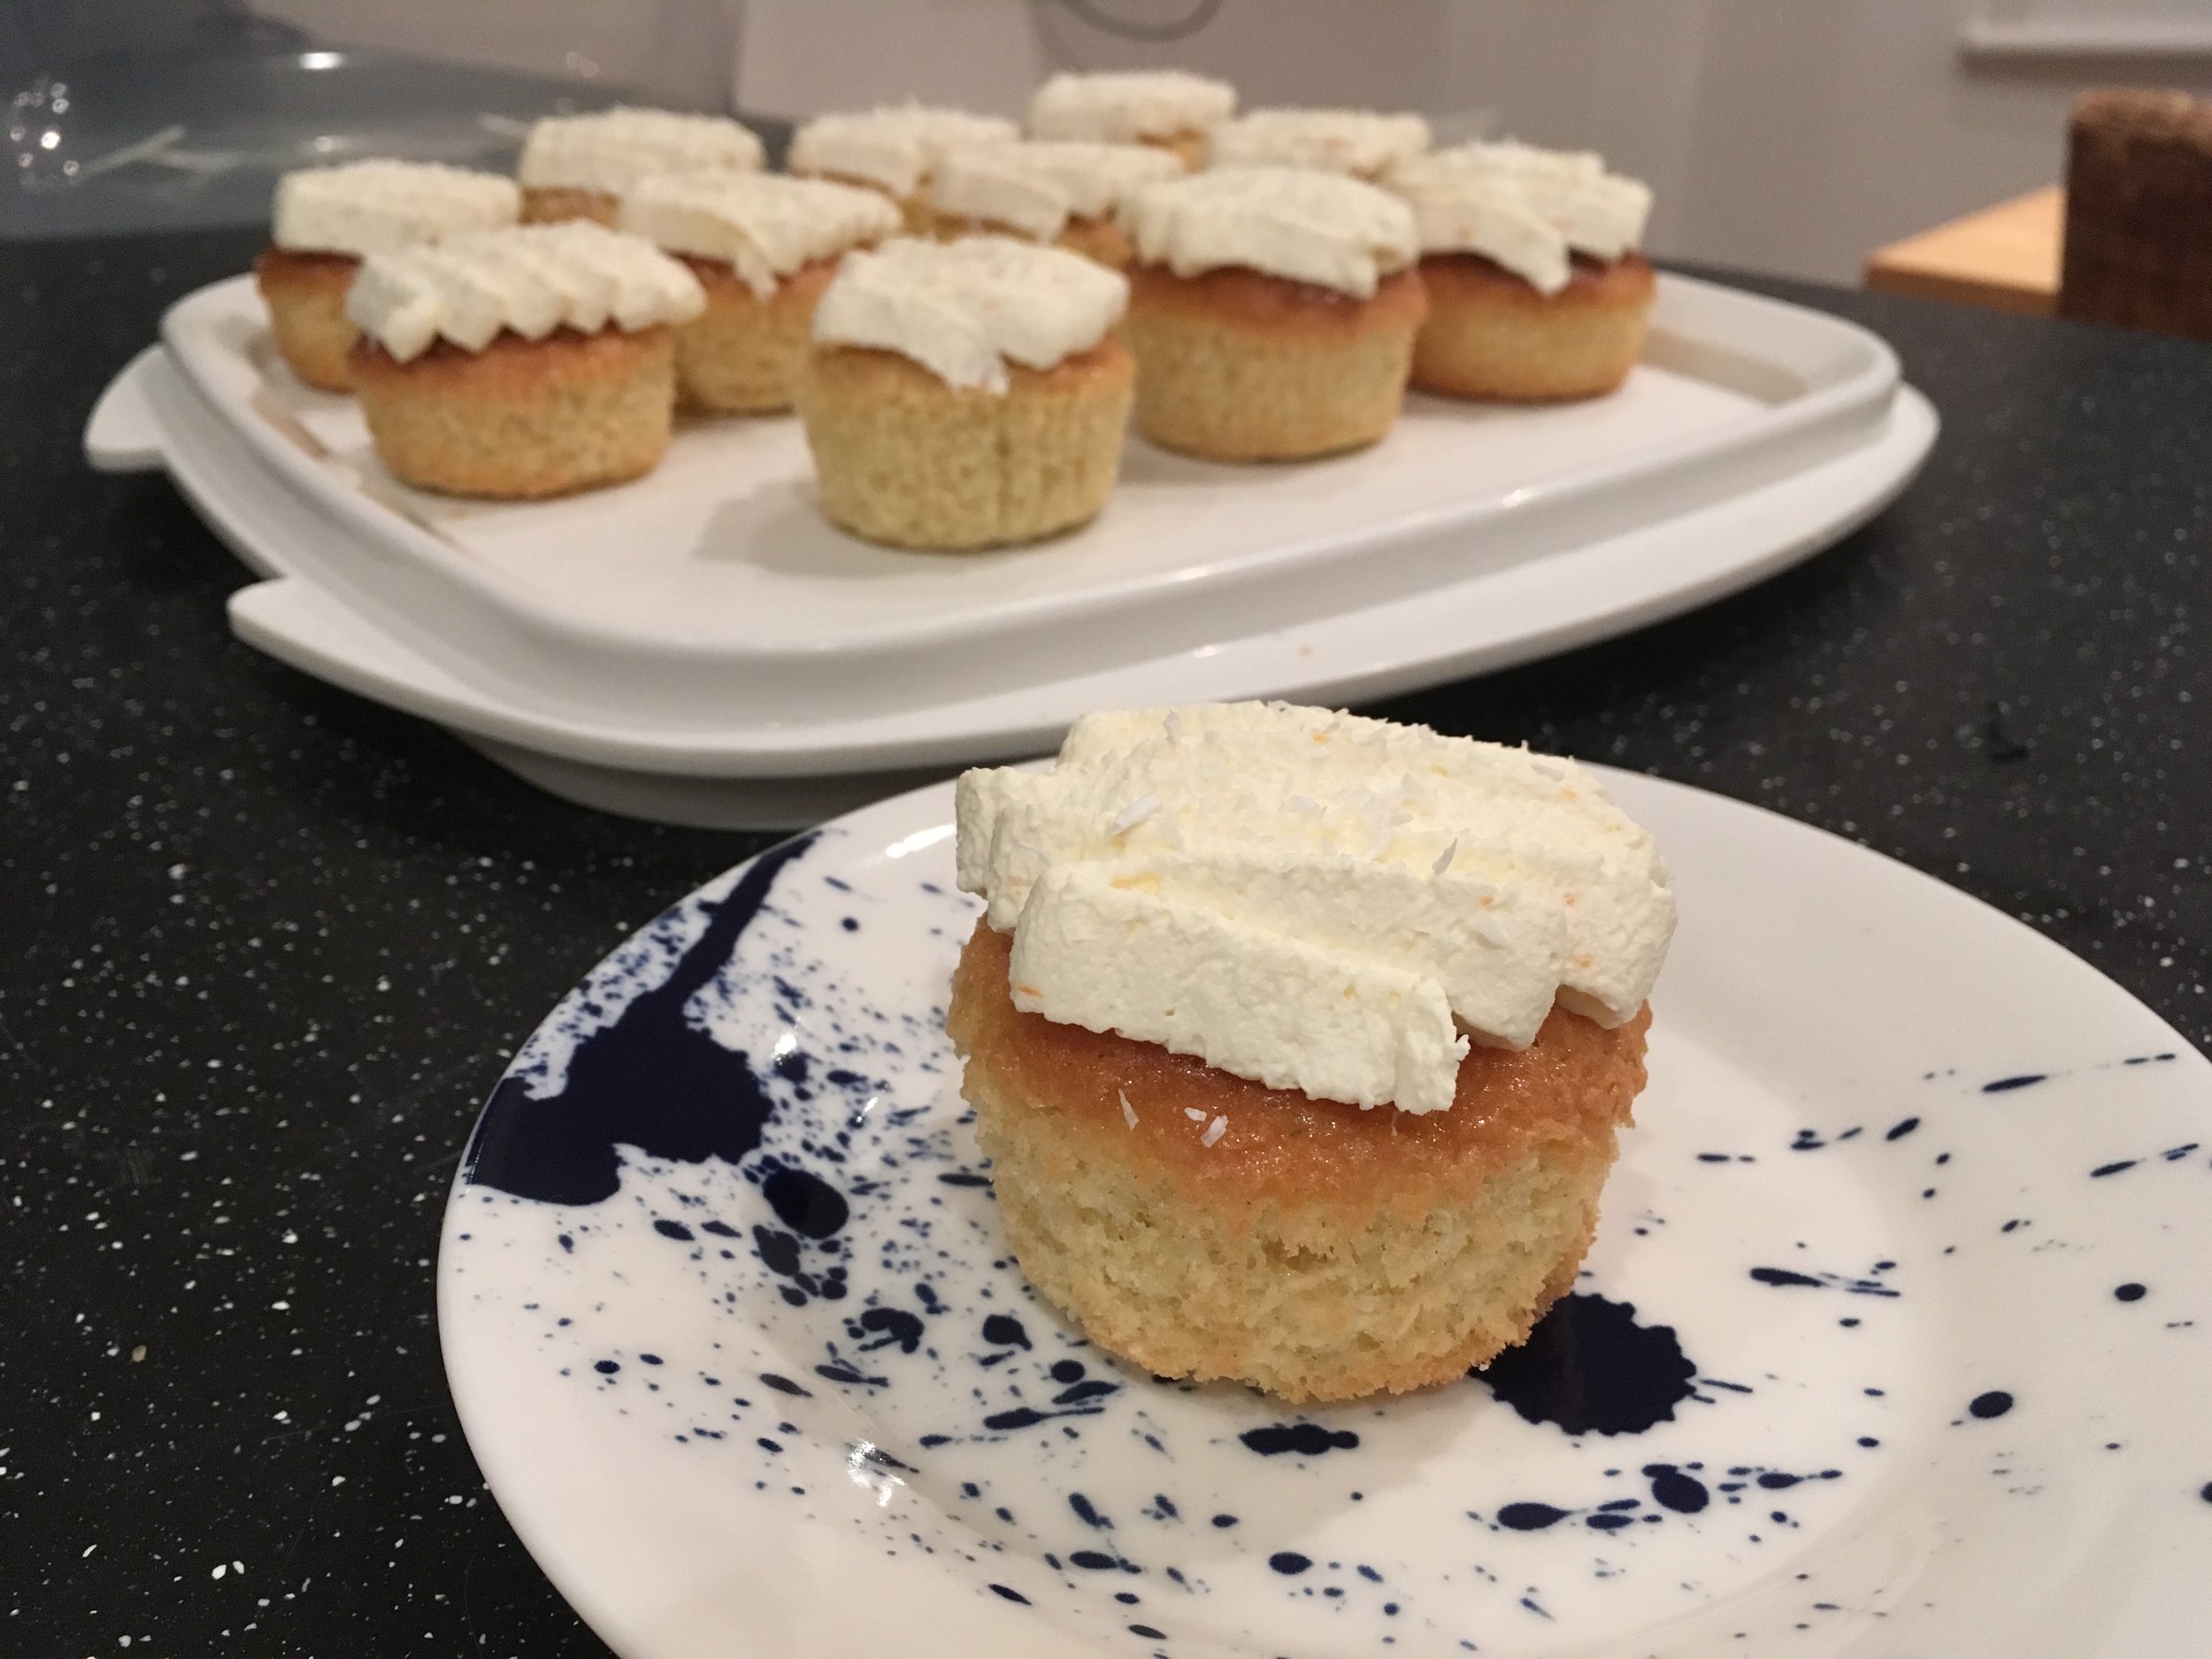
Enjoy!

View fullsize IMG_4119.JPG
View fullsize IMG_4124.JPG
View fullsize IMG_4126.JPG
View fullsize IMG_4127.JPG
IMG_4136.JPG
September 04, 2019 /Sophie Faulkner
cake, orange, italian meringue, Recipe, sweet
Recipe
Comment
IMG_3734.JPG

39. Shortbread (Lavender optional)

July 03, 2019 by Sophie Faulkner in Recipe

I think it goes without saying that I love shortbread. You can find a link to my chocolate chip shortbread here. The recipe is all but the same, except this time, I decided to use LAVENDER SUGAR. *audience oooohhh*. I know! That’s what I thought too when I saw it. I have had good experiences and bad experiences when it comes to lavender in food, but as Mum and I were staying extremely close to the Norfolk Lavender Farm on our holiday, it seemed rude not to give it a go.

IMG_3706.JPG

My first experience of lavender in food was a lavender muffin in a cafe in Poland. I was utterly confused by the concept, but thought I might as well try it. It was unforgettably good. I wanted more, but they’d sold out by the time I had finished my first! Every time I went back to that cafe they had sold out. They were so good I dreamt about them.

My second experience with lavender in food was a lavender macaron that tasted like soap and old people. I promptly dropped the idea of lavender in baked goods all together.

Until now anyway.

Now shortbread, shortbread has never done me wrong, so if there was something to try out my lavender sugar on it was shortbread. That simple 1:2:3 ratio of sugar, butter and flour was strong enough to withhold any flavour I through at it, and these turned out great! Would recommend.

Makes around 15 biscuits

Ingredients

  • 50g (1.75oz) sugar (lavender optional)

  • 100g (3.5oz) butter (cold and diced)

  • 150g (5.25oz) plain flour

  • a pinch of salt

Method

  1. In a bowl, rub together the flour sugar and butter with your hands until all rubbed in and you have no lumps of butter remaining. You may have lumps of dough, but you can tell whether they are lumps of butter or dough by the colour. Once there are no more lumps of butter, stop.

  2. Squeeze the dough together into a ball and roll out on a lightly sugared or floured surface ( I like to sugar mine) to about 6mm thick.

  3. Use a cookie cutter to cut out your biscuits and transfer to a lined baking tray. Stab with a fork to create a nice shortbread pattern.

  4. Cool in the fridge for 20 minutes so that the dough will keep its form.

  5. Preheat the oven to 180C.

  6. Bake for 12-15 minutes until golden.

  7. Enjoy!

View fullsize IMG_3708.JPG
View fullsize IMG_3710.JPG
View fullsize IMG_3712.JPG
View fullsize IMG_3713.JPG
July 03, 2019 /Sophie Faulkner
Recipe, sweet, Shortbread, Biscuit
Recipe
Comment
IMG_3727.JPG

38. Triple Chocolate Chelsea Buns

June 30, 2019 by Sophie Faulkner in Recipe

You know, I’m not sure these are even technically a chelsea bun. Chelsea buns are a type of currant bun, and I don’t think these buns would know a currant if they saw one.

BUT they are tasty. And use my previous chelsea bun recipe as a base for it’s chocolatey goodness.

I don’t really know why I was in the mood for baking these, but I was definitely craving chocolate, so that was a good starting point. After a couple of weeks of very little baking (bit hard to bake on holiday unfortunately!), I went all out this weekend, so you can expect a midweek recipe and plenty more coming up.

I hope the chocoholic in your life enjoys these as much as I did!

Makes 9 chelsea buns

Ingredients

For the dough

  • 400g (14oz) plain or strong white flour

  • 50g (1.75oz) cocoa powder

  • 14g (0.5oz) dried yeast (2 sachets)

  • 50g (1.75oz) caster sugar

  • Pinch of salt

  • 150ml warm milk

  • 1 egg

  • 50g (1.75oz) butter, melted

For the filling

  • 25g (1oz) butter, room temperature

  • 150g (5.25oz) assorted chocolate chips

  • 1 tsp cinnamon

  • 1 tsp nutmeg

  • 25g (1oz) caster sugar (or light brown sugar)

Method

  1. Mix all the dry ingredients for the dough together in a bowl. Make a well in the middle and add in the milk, butter and egg. Mix it together well, until it starts to form a dough and then use your hands. If once it has formed a dough it feels a bit dry, add a little splash of water, or if it feels too wet add a bit more flour.

  2. Knead the dough on a lightly floured surface until it starts to feel smooth and elastic. When done, form into a ball and set in a lightly oiled or greased bowl to prove. Cover with cling film and leave in a warm spot for an hour until it doubles in size.

  3. Knead the dough a couple of times to knock out the air and then form into a rectangle, about 30cm by 20cm. Spread over the butter and then sprinkle on the chocolate chips. In a bowl mic together the sugar and spices and then sprinkle that over the dough too.

  4. Roll the dough starting at the long edge to get a 30cm long sausage. Slice this into 9 equal sized rounds. Grease an 8”x8” square tin and arrange the slices in the tin. Cover with a damp tea towel and leave to prove for half an hour. Preheat the oven to 180C during the prove.

  5. Bake the buns for 10 minutes at 180C and then decrease to 160C and bake for another ten minutes.

  6. Allow to cool slightly before removing from the tin and serving warm or cold.

IMG_3704.JPG
IMG_3717.JPG
IMG_3718.JPG
IMG_3719.JPG
IMG_3720.JPG
IMG_3723.JPG
June 30, 2019 /Sophie Faulkner
Recipe, sweet, chelsea buns, Chocolate
Recipe
Comment
62596892_322704895325096_2568735483500691456_n.jpg

37. Chocolate Strawberry Cake

June 12, 2019 by Sophie Faulkner

So I am very late. I’m sorry! I’m not doing great at keeping on top of the blog at the moment, and I have no real excuse. Anyway, here is a simple, but impressive looking cake for those summer days when the sun is shining and you and your friends can sit out in the garden and chill.

I hope you enjoy!

Makes 1 cake

Ingredients

For the cake

  • 6oz butter

  • 6oz self-raising flour

  • 6oz sugar

  • 3 eggs

  • 2 tbsp cocoa powder

For the decoration

  • 580g butter

  • 240g icing sugar

  • 1 tsp vanilla extract

  • around 12-15 strawberries

Method

  1. Preheat the oven to 180C and line two sandwich tins.

  2. Cream together your butter and sugar until light and fluffy.

  3. Add in eggs, flour and cocoa powder.

  4. Divide the mixture between the two cake tins and spread out evenly.

  5. Bake for 20-25 minutes until they spring back when touched.

  6. Allow to cool on wire racks.

  7. Whip the butter until light and fluffy and pales in colour.

  8. Add in the icing sugar and vanilla extract. Fill a piping bag (or two if you want to use different nozzles).

  9. To construct, select 6/7 small strawberries to place on the top and decorate with. The remainder of the strawberries, slice into slithers. About eighths.

  10. Pipe icing around the edge of your bottom layer so that it looks neat. Fill the middle with strawberry slithers and icing.

  11. Stack on the top layer. Slice the tops off the decoration strawberries and pipe a little icing on to them so that they stick to the cake. Fill the rest of the top with small peaks.

  12. Serve and enjoy!

62268865_883277445398270_843062789843976192_n.jpg
64284600_477271303024259_2818044028497428480_n.jpg
64501066_852386135134826_7350951000867340288_n.jpg
62405984_448919949231455_974483901428793344_n.jpg
June 12, 2019 /Sophie Faulkner
IMG_3522.JPG

36. Summer Berry Muffins

May 25, 2019 by Sophie Faulkner in Recipe

Summer is well and truly on its way. Its been warm and sunny basically all week with blue skies most days. It has been absolutely gorgeous. Just a shame we’ve been stuck at work! Hopefully these muffins will help you bring a little bit of summer inside even if you, like me, end up stuck inside unable to enjoy the weather. Thanks to Susie for the inspiration, she made some summer berry muffins last week and they just looked so good I couldn’t resist having a go.

These are a ridiculously easy make. No fancy techniques involved, nothing complicated here. Just some good tasty muffins to enjoy the British summer time with. Summer berries are great aren’t they? For this recipe you can either select your own mix of your favourite berries, or cheat like I did and go to the frozen aisle and get a bag of mixed summer berries and just defrost the amount I need. There’s still half a bag left if I want to make these again or just have them with some yoghurt or something. Tasty.

These are so easy you basically have no excuse not to give them a go this weekend. Let me know how you get on and I hope you enjoy!

Makes 12 muffins

Ingredients

  • 120g butter, melted

  • 150g golden caster sugar

  • 240g self raising flour

  • 2 eggs

  • 140ml buttermilk (or 140ml milk and a tbsp of lemon juice mixed and left to stand for 15 minutes)

  • 160g mixed summer berries

  • 100g white chocolate chips/chopped white chocolate

  • 2-3 tbsp lemon juice

  • 70g icing sugar

Method

  1. Preheat the oven to 190C. Line or grease a muffin tray.

  2. In a bowl mix together the buttermilk and eggs. Add in the melted butter (cooled, don’t scramble your eggs with really hot butter!)

  3. Sift the flour and fold it into your wet ingredients. Fold in the sugar too.

  4. Gently fold in your berries and white chocolate chips.

  5. Fill your muffin tray evenly with your mixture and sprinkle a little extra sugar on the top of each.

  6. Bake for 25-30 minutes until golden brown.

  7. Allow to cool.

  8. Mix together the icing sugar and just enough lemon juice that it becomes drizzlable (is that a word?), but still a bit thick.

  9. Drizzle your icing over your cooled muffins and allow to set before you pick one up and get immensely sticky fingers!

  10. Enjoy!

IMG_3506.JPG
IMG_3515.JPG
May 25, 2019 /Sophie Faulkner
sweet, cake, Muffins, berry, summer, easy, Recipe
Recipe
Comment
IMG_3499.JPG

35. Strawberry Jam Tarts

May 19, 2019 by Sophie Faulkner

Isn’t it typical that the weather is gorgeous all week, blue skies, sunshine, nice and warm, and the the weekend comes along and it’s all murky grey? Sod’s law.

Still, the lovely weather earlier this week put me in the mood for something summery and fruity. I bought a ton of fruit in the hopes that I would be inspired and come baking day I was torn between making a tart filled with pastry cream and topped with freshly cut fruit or just stick with one fruit all the way. So I asked my Instagram followers (if you’re not following me on Instagram, you’re missing out on these kinds of polls!) and they overwhelmingly said stick with the strawberries. So I did.

This recipe is either really quick and easy if you buy shortcrust pastry and strawberry jam, or can take up a bit more of your time if you decide to make it all from scratch. Either way, it’’s going to be delicious!

Makes 12 tarts

Ingredients

For the shortcrust pastry

  • 200g (7oz) plain flour

  • 125g (4.5oz) butter

  • 50g (1.75oz) sugar

  • 1 medium egg

  • Pinch of salt

    OR about 400g (14 oz) ready made sweet shortcrust pastry

For the jam

  • 200g (7oz) strawberries, hulled

  • 200g (7oz) caster sugar

  • 1.5 tsp lemon juice

    OR some premade strawberry jam

For the cream (optional)

  • 120ml whipping cream

  • 1 tbsp icing sugar

  • 1/2 tsp vanilla extract

Method

  1. If making your own pastry, start by creaming together the pastry sugar and butter, before adding in the egg a bit at a time so that it doesn’t split. Then add in the flour and the salt and mix until it all comes together and there are no lumps of butter. Wrap in clingfilm and put in the fridge to rest for 20-30 minutes.

  2. If making your own jam, place a plate in the freezer. Cut your strawberries in half if they’re particularly large or leave whole if small. Place in a saucepan with the lemon juice and heat for a few minutes until they soften. Then over a medium heat, stir in the sugar until it has all dissolved. Boil steadily for about 6-7 minutes. Remove from the heat and spoon a little onto your chilled plate and leave for a minute. Run a finger through your jam and if it crinkles and doesn’t flood back into the gap you have just created, it’s ready. Mine didn’t flood back in, but didn’t quite crinkle and I was too impatient, so my jam hasn’t quite set. Still damn tasty though. If your jam fails the plate test, put it back on the heat and boil for another minute then try again. If it passes, leave to the side to cool.

  3. Grease a muffin tin. Preheat the oven to 180C.

  4. Take your dough out of the fridge and on a floured surface roll it to about 8mm thick. If your dough is too cold and stiff, let it warm up a little at room temperature until it’s easier to roll. Don’t leave it too long or it’ll go soft.

  5. Cut your dough using a large circular cookie cutter. Place your twelve dough circles into your muffin tin and press down gently with your fingers, making sure it sinks to the bottom and fills in the bottom corners. You want the sides to come about halfway up the muffin tin.

  6. Spoon the cooled jam into each case not quite to the brim.

  7. Cut some stars/hearts/whatever you like out of the remaining pastry and place on top of your tarts. Cute!

  8. Bake for 12-15 minutes until the pastry has turned a light golden brown.

  9. Leave to cool.

  10. OPTIONAL. Whip your cream to soft peaks and gently mix in the icing sugar and vanilla. Fill a piping bag with it and then pipe little rosettes onto your tarts, cause strawberries and cream are great.

  11. Enjoy!

View fullsize IMG_3481.JPG
View fullsize IMG_3484.JPG
View fullsize IMG_3485.JPG
View fullsize IMG_3489.JPG
View fullsize IMG_3492.JPG
View fullsize IMG_3500.JPG
IMG_3494.JPG
May 19, 2019 /Sophie Faulkner
IMG_3457.jpg

34. Cookie Sandwiches

May 11, 2019 by Sophie Faulkner in Recipe

You hungry? I’m hungry. And I have leftover icing. Let’s make cookie sandwiches.

I LOVE making chocolate chip cookies. I mean, they’re a classic for a reason. They’re quick, they’re easy, and they are DELICIOUS. I don’t know if there’s anything more moreish than a good chocolate chip cookie. Did you know that they were a completely happy accident? Someone was trying to make chocolate cookies (or cake, I forget which) and had run out of cocoa powder, so they decided to use chopped up chunks of chocolate, because they would melt and combine with the rest of the dough right? WRONG. The chocolate chip was born. Happy accidents exist!

Whilst cookies are great entirely on their own (don’t feel pressured to make the icing too, just eat these on their own for something just as yummy!), paired with Oreo buttercream icing to make a cookie sandwich? Amazing. Hits that sweet tooth so hard the dentist might suggest braces.

Makes 30 cookies or 15 sandwiches

Ingredients

For the cookies

  • 150g (5.25oz) butter

  • 80g (2.75oz) golden caster sugar

  • 80g (2.75oz) light brown sugar

  • 1 egg

  • 200g (7oz) plain flour

  • 2 tsp vanilla extract

  • 1/2 tsp baking powder

  • Pinch of salt

  • 150g (5.25oz) chocolate chips

For the icing

  • 400g (14oz) icing sugar

  • 200g (7oz) butter

  • 6 Oreos

Method

  1. Preheat the oven to 190C and line two baking trays with baking paper (You need two. Mine merged. I should know better by now.)

  2. Cream together the butter and sugars for the cookies. Add in the egg, flour, salt and baking powder and combine.

  3. Mix in the vanilla and chocolate chips.

  4. Roll a teaspoon worth of dough into a ball at a time, place on the baking tray and slightly flatten. (If you’re slightly more anal, like me, use 22g of dough for each cookie)

  5. Bake for 10-12 minutes until the edges start to go golden, then take out and leave to cool. (OR EAT THEM WARM BECAUSE THEY’RE TOO GOOD TO WAIT)

  6. Cream your butter, then add in the icing sugar a bit at a time, so it won’t go everywhere. If it doesn’t quite all combine, add in a teaspoon of milk or water.

  7. In a ziploc bag or similar, bash your Oreos to a fine crumb, then add in to your buttercream icing.

  8. Take a cooled cookie, and cover the flat side with icing, potentially using a piping bag with a pretty nozzle.

  9. Add another cookie on top for an excellent sandwich.

  10. ENJOY!

IMG_3439.JPG
IMG_3446.JPG
IMG_3448.JPG
IMG_3457.JPG
May 11, 2019 /Sophie Faulkner
sweet, Recipe, Cookies, Chocolate, Vanilla
Recipe
Comment
IMG_3419.JPG

33. Olive Bread

May 06, 2019 by Sophie Faulkner

Well, it’s been a minute…

Sorry that I have neglected this for the past two months. I’ve been working a fair amount of overtime recently, so while I’ve been able to bake, I’ve not had the time to blog about it! Sorry again, but the work is slowing down a bit more now, so I’m committing more to this. I’m planning on posting once a week, and if I don’t, feel free to yell at me. Nice yelling, but still. I don’t want to abandon this for so long again!

Anyway, that’s the apology, so… Moving on.

I went for a picnic with my Mum and boyfriend in the Yorkshire Sculpture Park this weekend. He was introduced to our usual picnic spread, while wrapped in a blanket against the wind. I was proud of him for braving the North! He seemed a bit surprised by our picnic choices though. Mum and I go BIG.

Our picnics always include:

  • Pork pies

  • Sausage rolls

  • Carrots/Peppers

  • Hummus

  • Ham

  • Pringles

  • Schloer/Orange juice/Lemonade

  • Brownies/Rocky Road bites

and ALWAYS ALWAYS includes Olive Bread.

There’s something so great about Olive Bread. The bread is great, but the little pockets of salty goodness, smothered in butter. It’s just the best.

So here you go Momma. Here’s my take on our favourite!

Ingredients

  • 500g strong flour

  • 1 packet of dried yeast (7g)

  • 2 tsp salt

  • 60-70g pitted olives

  • 300ml warm water

  • 2 tbsp olive oil

Method

  1. In a bowl, combine the flour, yeast and salt.

  2. Chop the olives roughly and mix them through the dry ingredients.

  3. Prepare another bowl by lightly oiling it.

  4. Make a well in the flour and pour in the olive oil and water. Mix until it all comes together.

  5. On a lightly floured surface, knead the dough for about 10 minutes until smooth.

  6. Place your dough in the oiled bowl and cover with a tea towel. Leave to rise for an hour until doubled in size.

  7. Once the dough has doubled in size, knock it back (a good time to get stress out, punch that bread in the face).

  8. Line a baking sheet with baking paper and form your dough into a ball. Leave it to rise on the baking sheet for another hour until it has doubled in size again.

  9. Preheat the oven to 220C.

  10. Sprinkle the dough lightly with some flour and slash a cross into the top with a sharp knife (I didn’t slice deep enough, so my loaf didn’t “burst” quite the way I wanted it to)

  11. Bake for 25-30 minutes until golden brown.

  12. Allow to cool a bit and serve with olive oil or smothered in butter.

IMG_3392.JPG
IMG_3394.JPG
IMG_3399.JPG
IMG_3404.JPG
IMG_3410.JPG
IMG_3416.JPG
IMG_3421.JPG
May 06, 2019 /Sophie Faulkner
IMG_3033.JPG

32. (Not Very) Red Velvet Cupcakes

March 08, 2019 by Sophie Faulkner in Recipe

I don’t often think about red velvet when making cakes. It’s not my go to in any way shape or form. If I was at a cupcake shop and had to choose what I wanted, I would most likely not choose red velvet.

BUT turns out that other people don’t feel the same way. When I asked my coworker if he had a preference what I baked and brought in, he almost immediately said red velvet. I am just a little torn as to why. It’s neither chocolate nor vanilla, just a sort of halfway point between the two. Based on flavour alone, why wouldn’t you go full chocolate or vanilla?

HOWEVER, red velvet gets its name from its velvety texture, created by using buttermilk and oil to make a smooth batter that stays moist and rich. And when paired with a vanilla cream cheese icing? Yeah, I guess I can kinda see why someone MIGHT pick a red velvet cupcake.

So I gave them a go. Unfortunately my red food colouring didn’t really do the trick and they turned out pretty brown, but they still tasted pretty great. Hopefully yours will be redder.

So with that in mind, for all you red velvet lovers out there, here’s your recipe.

Makes 12 cupcakes

Ingredients

For the cupcakes

  • 120g (4 1/4oz) butter

  • 300g (10 1/2oz) caster sugar

  • 2  eggs

  • 60ml olive/vegetable oil

  • 1 tbsp cocoa powder

  • 2 1/2 tbsp red food colouring

  • 1 tbsp vanilla extract

  • 350g (12oz) plain flour

  • 1 tsp bicarbonate of soda

  • Pinch of salt

  • 250ml buttermilk (OR 250ml milk with a tbsp lemon juice left for ten minutes)

For the cream cheese icing

  • 200g (7oz) cream cheese

  • 60g (2oz) butter

  • 250g (9oz) icing sugar

  • 1 tsp vanilla extract

Method

  1. Preheat oven to 175C and prep your cupcake tray.

  2. Cream the butter and sugar together until light and fluffy. Add the eggs.

  3. In another bowl, mix together the eggs, oil, cocoa powder, vanilla and red food colouring. Mix until well combined.

  4. Add the oil mixture to creamed butter and mix.

  5. Add the dry ingredients to the butter along with half the buttermilk and mix well. Once well combined, add in the remaining buttermilk.

  6. Transfer your batter to a jug and fill your cupcake cases about 3/4 full.

  7. Bake for 25-30 minutes and allow to cool on a wire rack.

  8. Beat together the cream cheese and butter until light and fluffy.

  9. Add in the vanilla and a third of the icing sugar and beat well.

  10. Add in another third of the icing sugar, mix and then add the final third in and beat until well combined.

  11. Fill a piping bag with your icing and ice your cooled cakes however you like.

  12. Enjoy!

IMG_3004.JPG
IMG_3010.JPG
IMG_3011.JPG
IMG_3024.JPG
IMG_3038.JPG
March 08, 2019 /Sophie Faulkner
Recipe, sweet, Vanilla, Chocolate, cupcake
Recipe
Comment
IMG_3021.JPG

31. Bread and Butter Pudding

February 25, 2019 by Sophie Faulkner

Why would anyone throw away stale bread when they can make this? The fools.

Bread and butter pudding is a classic British dessert, making the most out of what you’ve got. If that’s leftover baguettes (or babka, was amazing with babka) then work with what you have.

Not a lot of blurb on this, let’s get into it.

Ingredients

  • 1 baguette, torn up, or about 7/8 slices of bread

  • Butter for spreading on your bread and greasing your tin

  • Handful of raisins and/or chocolate chips

  • 350ml milk

  • 2 eggs

  • 25g (1oz) caster sugar

  • 2tsp cinnamon

Method

  1. Grease your 1 litre loaf tin or casserole dish with butter.

  2. Butter one side of your torn up baguettes or slices of bread and layer in your tin.

  3. After each layer, sprinkle on some cinnamon and raisins/chocolate chips.

  4. Keep going until there is no bread left.

  5. Heat the milk gently in a pan until it is steaming, don’t let it boil!

  6. Whilst the milk is heating, crack your eggs into a bowl and whisk with 3/4 of the sugar until pale.

  7. Pour the milk onto the eggs and whisk together. Make sure you whisk immediately after adding the milk so that the eggs don’t curdle.

  8. Pour your custard onto the bread and leave to soak for about half an hour. Or longer if you want to make it a few hours in advance.

  9. Preheat the oven to 180C.

  10. Sprinkle on the last bit of sugar and bake for 30-40 minutes until the custard has set and the top is golden.

IMG_2990.JPG
IMG_2991.JPG
IMG_2993.JPG
IMG_2995.JPG
IMG_2999.JPG
IMG_3014.JPG
February 25, 2019 /Sophie Faulkner
IMG_2954.JPG

30. Baguettes

February 23, 2019 by Sophie Faulkner in Recipe

Bread is just the best.

It’s such a staple of every day life. I mean, “give me this day our daily bread” is a line straight from the Lord’s prayer. Back in the day when only one out of a couple would go to work, they were the “breadwinner”. To “break bread with someone” means to share ANY meal with another person. And of course, something amazing is “the best thing since sliced bread”.

Unfortunately, this bread does not come pre-sliced. You will have to tear or cut off hunks of this to have with olive oil and balsamic vinegar yourself. Real shame that… (You could do the same with this focaccia recipe too if you wanted something slightly different.)

Having never made baguettes before, I didn’t have a recipe to use, so I went to the British king of bread (and Bake Off turncoat) Paul Hollywood. You can find his recipe and all his advice here. It might be a little more comprehensive than what I’m about to put below, but what I did turned out ok.

Makes 4 baguettes

Ingredients

  • 500g (17.5oz) strong white flour, plus some for dusting.

  • 10g (0.35oz) salt

  • 7g (0.25oz) yeast (1 packet)

  • 370ml water (cool/room temp. Not hot)

  • Olive oil

Method

  1. USE A DOUGH HOOK ON A STAND MIXER. Your arms will get very tired… Add in the flour, salt and yeast to a bowl on your stand mixer, not putting the salt directly on top of the yeast or vice versa.

  2. Add in about three quarters of your water and start it mixing. Once it has started to actually come together as a dough, add in the rest of your water.

  3. Leave the stand mixer to do its thing for 5-7 minutes until your dough is glossy and elastic.

  4. Lightly grease a square container with some olive oil.

  5. Tip your dough into the oiled container, cover with a tea towel and leave to prove for an hour.

  6. Whilst it’s proving, line your baking tray with some baking paper. I folded mine so that it would form little “beds” for my baguettes to keep them from spreading into each other.

  7. Once your dough has doubled in size, tip it out of the container onto a lightly oiled surface and divide it into four. Fold two of the edges in on each square to make a rectangle, trying to keep as much air in as possible. Roll this into a long sausage, with the join on the bottom.

  8. Start rolling each sausage to the length of your baking tray. Start with your hands in the middle and slowly work them outwards as you roll. DON’T pull your dough to the length of the tray. It seems like a shortcut, but will make your dough inconsistent and tough and your bread will not be as good.

  9. Put your baguettes on your tray and, if you have one big enough, put your trays inside a plastic bag to prove for another hour.

  10. When the hour is almost over, start preheating your oven to 220C and put a roasting tray/cake tin/something that will hold liquid and is oven proof, in the bottom of the oven to warm up.

  11. When your baguettes have finished their second prove, slash them three times with a sharp knife in the iconic baguette style, and dust them with flour.

  12. Fill your hot roasting tray at the bottom of your oven with water to make steam.

  13. Bake your baguettes for 25-28 minutes, until golden brown. Leave them to cool on a cooling rack.

  14. Enjoy with olive oil and balsamic vinegar, plenty of butter or even make your own bruschetta with chopped tomatoes.

  15. Or wait until tomorrow’s recipe to get the most out of your leftover baguettes!

IMG_2941.JPG
IMG_2943.JPG
IMG_2946.JPG
IMG_2950.JPG
IMG_2953.JPG
February 23, 2019 /Sophie Faulkner
Recipe, Savoury, bread, baguette
Recipe
IMG_2889.JPG

29. Vegan Chocolate Cupcakes

February 16, 2019 by Sophie Faulkner in Recipe

I’m finally settled in my new apartment, all the IKEA furniture has been built, the internet sorted, the kitchen reorganised and the oven broken in. Let’s bake.

I’d like to say I chose to make vegan cupcakes for a decent reason, but that would be an utter lie. I made vegan cupcakes because I didn’t have any butter in, so… still counts? Turns out that you can use olive oil instead of butter, swapping one fat for another. It gives you a more liquid batter, but that’s A ok. Still gives you a solid cake. The olive oil makes the chocolate taste richer than it actually is, which is extremely nice to be honest. My boyfriend had some and said they were great. Didn’t even know they were vegan. So not bad all around.

Wasn’t a big fan of the icing, but probably didn’t help that I didn’t wait for my buns to cool completely before icing. My icing melted just a little lot. Nevermind! Still tasty.

Makes 12 cupcakes

Ingredients

  • 280g self-raising flour

  • 200g sugar

  • 25g cocoa powder

  • 150ml olive oil

  • 300ml water

  • pinch of salt

  • vanilla extract (to taste)

  • 200g vegetable spread

  • 350g icing sugar

Method

  1. Preheat the oven to 180C.

  2. Combine the self-raising flour, sugar, cocoa powder and salt in a bowl.

  3. Add in the olive oil, vanilla extract and water.

  4. Line a cupcake tray and fill the cases about 2/3rds full.

  5. Bake for 15-18 minutes until they spring back.

  6. Mix together the non-dairy spread and icing sugar in a bowl to make an icing. Flavour with vanilla extract if desired.

  7. Pipe your icing onto your COOLED buns and enjoy!

IMG_2872.JPG
IMG_2878.JPG
IMG_2885.JPG
IMG_2887.JPG
February 16, 2019 /Sophie Faulkner
Chocolate, vegan, cupcake, Vanilla, Recipe
Recipe
Comment
IMG_2710.JPG

28. Coconut Orange Genoise Cupcakes

January 31, 2019 by Sophie Faulkner in Recipe

Who’s ready for an upper arm workout?!

Oh, no one? That’s a shame. Better hope you have an electric whisk then.

This week I decided to put it to an Instagram poll as to what to make. The categories were light/fruity vs spiced/chocolate, something big to share vs bitesized treats and vegan vs dairy. I slightly jumped the gun on the first poll which eventually had a close win with spiced/chocolate, but let’s be honest, I’ll likely do that soon anyway! So I though with light/fruity that I would veer away from my usual lemon based things and go a bit more exotic and combine coconut and orange as my flavours. Ooh it worked well. Would recommend.

I was also out of self raising flour this week, and rather slog to the shops to get some, I decided to make a genoise sponge mix instead, which made my arm very very sore from the whisking. Why I didn’t decide to use an electric whisk I do not know. I should hit the gym more. Genoise sponges only get their raise and lightness from the air trapped inside from whisking, which is why it is so important to whisk A LOT. Worth it though. They’re gooooood.

Makes 12 cupcakes

Ingredients

For the genoise sponge

  • 4 eggs

  • 125g (4.5 oz) caster sugar

  • 110g (4oz) plain flour

  • 50g (1.75oz) butter, melted

  • 20g (0.75oz) dessicated coconut

For the orange sugar syrup

  • 50g (1.75oz) caster sugar

  • 30ml water

  • juice of one orange

For the chantilly cream

  • 300ml double cream

  • 15g (0.5oz) icing sugar

  • zest of one orange

  • dessicated coconut to sprinkle

Method

  1. Preheat the oven to 180C

  2. On a simmering bain marie, whisk your eggs and sugar together until pale and thick, almost mousse like. Once thickened, take off the bain marie and whisk until the ribbon stage is reached and the mixture has cooled. (The ribbon stage is where if you take the whisk out and dribble a figure of 8 onto the mix, the 8 stays there for a couple of seconds before sinking back in).

  3. Sieve and fold in the flour a bit at a time. Be careful not to knock out too much air when folding! Fold in the dessicated coconut too.

  4. Pour in the melted butter around the edges of the bowl and fold that in gently.

  5. Line a cupcake tin and fill with your mixture.

  6. Bake at 180C for 18-20 minutes until golden and they spring back.

  7. Leave to cool.

  8. Put all the ingredients for the sugar syrup in a pan and bring to a boil, then remove from the heat, providing that the sugar has all dissolved.

  9. Brush the sugar syrup onto the cupcakes while still in the tin and liners so they can really soak in the syrup.

  10. Whisk the cream and sugar together until it forms soft peaks, then add in the orange zest.

  11. Remove the cupcakes from the tin and liners, if so desired.

  12. Pipe the cream onto the cupcakes and sprinkle over the dessicated coconut.

  13. Enjoy!

IMG_2686.JPG
IMG_2688.JPG
IMG_2691.JPG
IMG_2695.JPG
IMG_2699.JPG
IMG_2705.JPG
IMG_2706.JPG
IMG_2711.JPG
January 31, 2019 /Sophie Faulkner
cupcake, Recipe, sweet, orange, coconut, genoise sponge
Recipe
Comment
IMG_2289.JPG

Review 5: Hartland Pies & Scotch Eggs

January 27, 2019 by Sophie Faulkner in Review

Well it’s been a little while since I did a review! Three months actually… oops. I wasn’t sure if people were keen on the reviews, but a friend of mine said that she liked reading them because they read like I speak, which was frankly just a really nice thing to hear. Please enjoy this extremely belated review mate.

Anyone who knew me towards the end of my year in Germany probably knows that one of the things I truly missed the most about the UK was a good solid pork pie. I spent days craving pork pies and being completely unable to satisfy the craving. Turns out Germans don’t really know what a porkpie is, and I think they are missing a massive trick, but all I could do was wait to eventually come back to England and be greeted by pork pie upon pork pie. Some of my friends even went to local farm shops to get me specialty pork pies for my birthday. The pork pie love is strong.

IMG_2281.JPG

As you can probably tell from the photo, I went to the Hartland Pies & Scotch Eggs stall just before Christmas. Santa’s elf was extremely friendly and lovely and she had plenty of pies to keep a Northerner in the South happy. So many different porky fillings to choose from and everything sounded just delicious. Hartland Pies is, unsurprisingly, a family run business that the Hartland family have been running from their Nottighamshire village for over fifty years. Plenty of time to figue out what makes a good pie!

All the fillings for their pies come from local farms and each pastry is made specifically to suit each pie, very much NOT a one pastry fits all kind of deal. Their passion for pies really shines through in their product and I cannot recommend a pork pie to any other homesick Northerners enough.

IMG_2308.JPG

I eventually chose the pork and black pudding pie (£3), which was amazing. I love black pudding. The pastry, the pork pie filling sandwiched between two thick pieces of black pudding, and all the gaps filled in with that delicious pork pie jelly? Incredible. Exactly what I needed to sustain me until I could get back up to Yorkshire for Christmas. Just gorgeous.

Review:

Item: Pork and Black Pudding Pie, £3
9/10 for taste, 6/10 for cost (I’m a stingy Yorkshire lass, what can I say?). Will buy when homesick.

Hartland Pies & Scotch Eggs (King’s Cross) Details:

Hours: Wed-Fri: 10:00am-6:00pm

Address: Kings Cross Square, in front of the station, along Euston Road N1C 9AL

Website: http://www.hartlandpies.co.uk/index.php

January 27, 2019 /Sophie Faulkner
review, Savoury, pork pie, pie
Review
Comment
IMG_2629.JPG

27. Dairy Free Ginger and Cinnamon Cake

January 23, 2019 by Sophie Faulkner

Who doesn’t love just a good old cake once in a while hey?

With the first snow of the year this week and the cold snap well and truly sinking into my bones, I decided to make yet another winter spiced cake. It’s cliche I know but ginger and cinnamon are two of my favourite things at this time of year and they make me feel so warm and toasty when combined with a hot chocolate and a massive slice of cake.

Not many of you will probably know that I am actually lactose intolerant, so quite often when baking for myself I won’t use dairy much, or I will take some lactase tablets so that I am able to eat my finished product. However, I’m currently running low on the tablets, so dairy free it was.

I often use Italian meringue as “icing” instead of buttercream or similar as it is just so light and fluffy and yummy, without any of the dairy content. It is just like eating a cloud really, only sweeter. And you can still pipe it and grill or blowtorch it to get that toasted marshmallow look. Dreamy!

Makes 1 cake, serves 8-12. Or one extremely hungry Sophie.

Ingredients

For the cake

  • 6oz (170g) Margarine/Vegetable oil spread

  • 6oz (170g) light brown sugar

  • 6oz (170g) self-raising flour

  • 3 eggs

  • 2 tsp ginger

  • 2 tsp cinnamon

For the Italian meringue

  • 2 egg whites

  • 4oz (110g) caster sugar

  • 110ml water

  • Orange peel and vanilla pods (optional)

Method

  1. If you want a flavoured Italian meringue, start with the sugar syrup. Put the water and sugar in a pan with your flavourings, such as orange peel and vanilla pods, and heat until all the sugar has dissolved. Leave on a gentle heat and allow the flavours to infuse your syrup. If you don’t want to have a flavoured Italian meringue, skip this step.

  2. Preheat oven to 180C.

  3. Cream together the light brown sugar and butter for the cake until light and fluffy.

  4. Add in the eggs and mix well.

  5. Add in the self-raising flour, cinnamon and ginger and then pour into a lined cake tin.

  6. Bake for 35-40 minutes, until golden brown and springs back. Leave to cool.

  7. If you have already made your sugar syrup, strain it into another pan to remove your orange peel/ vanilla pods.

  8. If you haven’t made your sugar syrup, combine the water and sugar in a pan and heat it gently until all the sugar has dissolved.

  9. Turn the heat up on your sugar syrup and leave to bubble away whilst you prepare your egg whites.

  10. In a clean bowl beat your egg whites to soft - medium peaks. Potentially best to do in a stand mixer or with an electric beater if you have one.

  11. Once your sugar syrup hits 114C (also called soft ball stage), pour this into your egg whites whilst mixing them slowly to disperse the syrup. The heat of the syrup will cook the egg whites. Keep mixing until it has cooled completely.

  12. If you don’t have a blowtorch, turn the grill on high.

  13. Put your meringue in a piping bag with a star shaped nozzle and pipe to your heart’s content on top of your now cool cake. Put on a baking tray and under the grill to brown off the meringue for a couple of minutes. KEEP AN EYE ON IT, or it will burn and go black. If you have a blowtorch, use that and do it by hand to get the exact effect you want.

  14. ENJOY

IMG_2611.JPG
IMG_2616.JPG
IMG_2614.JPG
IMG_2620.JPG
IMG_2623.JPG
IMG_2628.JPG
IMG_2642.JPG
January 23, 2019 /Sophie Faulkner
IMG_2562.JPG

26. Chocolate Orange Chelsea Buns

January 12, 2019 by Sophie Faulkner

I’m back!!!!!!

Sorry for the delay in any recipes, reviews, life updates, blogging in general. Christmas was a bit manic and I have just started a new job which is taking up nearly all my waking hours at the moment, so not a lot of extra time for baking unfortunately! I hope you all had a good Christmas and are surviving the cold.

Here’s a hearty winter warmer to help. Slightly spiced chocolate orange chelsea buns, based on my Chelsea Bun recipe. Filling and delicious. Enjoy!

Makes 9 buns

Ingredients

For the dough

  • 400g (14oz) plain or strong white flour

  • 50g (1.75oz) cocoa powder

  • 14g (0.5oz) dried yeast (2 sachets)

  • 50g (1.75oz) caster sugar

  • Pinch of salt

  • 150ml warm milk

  • 1 egg

  • 50g (1.75oz) butter, melted

For the filling

  • 25g (1oz) butter, room temperature

  • 100g (4.5oz) raisins

  • 50g (1.75oz) chocolate chips

  • Zest of one large orange

  • 1 tsp cinnamon

  • 1 tsp nutmeg

  • 25g (1oz) caster sugar (or light brown sugar)

Method

  1. Mix all the dry ingredients for the dough together in a bowl. Make a well in the middle and add in the milk, butter and egg. It can help to beat the egg before you add it, but it’s not really much more work if you don’t. Mix it together well, until it starts to form a dough and then use your hands. If once it has formed a dough it feels a bit dry, add a little splash of water, or if it feels too wet add a bit more flour.

  2. Knead the dough on a lightly floured surface until it starts to feel smooth and elastic. When done, form into a ball and set in a lightly oiled or greased bowl to prove. Cover with cling film and leave in a warm spot for an hour until it doubles in size.

  3. Knead the dough a couple of times to knock out the air and then form into a rectangle, about 30cm by 20cm. Spread over the butter and then sprinkle on the raisins and chocolate chips. In a bowl mic together the sugar, spices and zest and then sprinkle that over the dough too.

  4. Roll the dough starting at the long edge to get a 30cm long sausage. Slice this into 9 equal sized rounds. Grease an 8”x8” square tin and arrange the slices in the tin. Cover with a damp tea towel and leave to prove for half an hour. Preheat the oven to 180C during the prove.

  5. Bake the buns for 10 minutes at 180C and then decrease to 160C and bake for another ten minutes.

  6. To make the glaze mix the caster sugar together with a tablespoon of water. Once the buns are out of the oven, brush on the glaze immediately. Allow to cool a bit before serving warm or leave them to cool and serve cold. Store in an airtight container at room temperature.

View fullsize IMG_2548.JPG
View fullsize IMG_2551.JPG
View fullsize IMG_2552.JPG
View fullsize IMG_2558.JPG
January 12, 2019 /Sophie Faulkner
Comment
IMG_2393.jpg

25. Gingerbread Sleigh

December 22, 2018 by Sophie Faulkner in Recipe

What is a more quintessentially Christmassy bake than a gingerbread house? With all the windows and roof tiles piped on with care, the roof dusted with icing sugar snow, chocolate fingers lining the doorway, maybe even some sweets as Christmas decorations.

I didn’t do that.

Who has time to make a house? Why not a sleigh that I could fill with “presents” (read, chocolates) instead? I cut out my own stencils from sheets of A5 paper, so it wasn’t huge, but I didn’t really want it to be, as I had to transport it up North.

Honestly, was pretty pleased with how this turned out, and the gingerbread is thoroughly tasty. Even after a few days sat holding chocolates. My only issue was that it was so pretty I didn’t want to break into it!

Merry Christmas!

Makes 1 gingerbread… whatever you like really. Only a small one though!

Ingredients

  • 125g butter

  • 100g demerara sugar (or other brown)

  • 4 tbsp golden syrup

  • 300g plain flour

  • 1 tsp bicarbonate of soda

  • 3 tsp ground ginger

  • 1 tsp cinnamon

  • 1 egg white

  • 200g icing sugar

  • 50g cocoa powder

  • 100g white chocolate, melted (optional)

Method

  1. Preheat the oven to 180C.

  2. In a pan, melt the butter, demerara sugar and golden syrup together.

  3. Mix the flour, bicarb, ginger and cinnamon together in a large bowl.

  4. Pour the melted wet ingredients into the flour bowl and mix well. If it doesn’t come together, add a splash of water. It should be quite a firm dough.

  5. Make/cut out your stencils while the dough firms up a little and cools down.

  6. On a piece of greaseproof/baking paper, roll out the dough to about 6-8mm thick. Cut your shapes out and remove the excess dough from the paper. Transfer the sheet of baking paper onto a baking tray.

  7. Bake for 12-14 minutes until firm and the edges have darkened a little.

  8. Allow to cool and firm up for a few minutes, and then using your stencil, cut around the edges again to make them neat. (I left this a little too long, so my sleigh wasn’t as neat as I would have liked.)

  9. Allow to cool completely.

  10. Prepare an icing bag with a medium nozzle, star shaped or plain, for the “cement”.

  11. Mix together the egg white, icing sugar and cocoa powder in a bowl, to a smooth paste. Fill your piping bag with this and pipe down the edges of your gingerbread pieces to stick them together.

  12. As you assemble your gingerbread house/sleigh/city, use a bowl or kitchen utensils to prop up the pieces as you go, as the icing will not set immediately.

  13. Once your house/sleigh/whatever is completely set, you can decorate with melted chocolate or anything else you like!

IMG_2376.JPG
IMG_2377.JPG
IMG_2383.JPG
IMG_2385.JPG
IMG_2389.JPG
December 22, 2018 /Sophie Faulkner
Ginger, gingerbread, Biscuit, Christmas, sweet, Recipe
Recipe
Comment
IMG_2162.JPG

24. Chocolate Tart

December 19, 2018 by Sophie Faulkner in Recipe

Christmas is almost here!!!!!

Anyone else excited? I’m so ready for the break from London life and going back home to see my family. Or rather, doing the rounds around all the different friends and family members who want to see me over the holidays, meaning I don’t really spend all that much time at home. Christmas is fun, but it’s definitely not restful!

I’m not a fan of Christmas pudding, or Christmas cake, so Christmas desserts to me have nearly always been chocolate based. A roulade, a black forest gateau, or just some chocolate ice cream, chocolate is a dominant Christmas time treat. That’s why I decided to make this chocolate tart in the lead up to Christmas. Maybe you guys have fussy family members like me who don’t like Christmas pudding? If so, this one’s for you!

Makes 1 tart

Ingredients

For the shortcrust pastry

  • 200g plain flour

  • 125g butter

  • 50g sugar

  • 1 medium egg

  • 2 tsp cinnamon (optional)

  • Pinch of salt

    OR about 400g ready made sweet shortcrust pastry

For the chocolate ganache

  • 300ml double cream

  • 50ml milk

  • 50g butter

  • 200g chocolate (preferably dark)

  • 1 tsp sugar

  • Pinch of salt

Method

  1. Cream together the butter and sugar for the pastry. Slowly add in the egg a bit at a time, mixing the dough together as you do so it doesn’t split. Add in the flour, cinnamon and salt and mix until the dough all comes together.

  2. Flatten the dough and wrap in clingfilm and chill in the fridge for half an hour.

  3. Preheat the oven to 180C.

  4. Roll out the chilled dough and line your tart tin. Mine is 14” diameter. Make sure that you push the dough into the corners so that it won’t shrink like mine did!

  5. Roll the top off using your rolling pin, then push the dough into the sides to make sure it is all lined evenly. Use the back of a knife to get rid of any excess. Put back in the fridge to rest for 5 minutes.

  6. Pierce the base of your tart several times using a fork, all the way through! This will stop the bottom from rising as it bakes. Line the tart with either greaseproof paper or clingfilm and fill with baking beans, rice or something else suitable to hold up the edges of the tart as it bakes.

  7. Blind bake the tart with the beans in for 10-15 minutes until the edge is golden. Then remove the beans and bake the tart for another 15-20 minutes until the base is golden as well.

  8. Take out of the oven and allow to cool before removing from the tin.

  9. In a pan bring the cream, sugar and salt to the boil and immediately remove from the heat. Add in the butter and then chocolate in chunks and stir until they have completely blended in. Once the mixture has cooled a little, stir in the milk.

  10. Pour the chocolate ganache into the tart once the tart has cooled and leave to set at room temperature. If you put it in the fridge it may seize. (Mine has a slightly paler patch as my jug had some residue milk in the bottom. Oops.)

  11. Enjoy! Decorate with icing sugar or white chocolate.

IMG_2142.JPG
IMG_2144.JPG
IMG_2147.JPG
IMG_2156.JPG
IMG_2157.JPG
IMG_2163.JPG
December 19, 2018 /Sophie Faulkner
Tart, Recipe, sweet, Christmas, Chocolate, pastry
Recipe
Comment
IMG_2274.JPG

Week 11: Debrief and Certificate

December 18, 2018 by Sophie Faulkner in Weekly update

Last Le Cordon Bleu update and it’s a short one. Sorry! I hope you enjoyed hearing about my time at patisserie school. Would you like me to keep doing updates on baking related life or just go back to recipes and reviews? Let me know in the comments!

Last week I “graduated” from Le Cordon Bleu with my Basic Patisserie Certificate. We went in on Monday for a personal debrief in which one of our chefs broke down how we had done in our exams. It was basically a five minute conversation where they told you your grades. Truly thrilling. I cleaned out my locker and headed home, knowing that the next time I would be in that building would be the last time. For a while anyway.

On Thursday we had the certificate “ceremony”, which to be perfectly honest wasn’t very exciting. We turned up, there was a short speech, drinks and the chefs took a section of certificates each to give out. It wasn’t a graduation ceremony where you walk across a stage or anything, just a big group of people mingling and chatting, going to get a piece of important paperwork. It was lovely to get to say goodbye to my group and a few others, but that’s all it was really. Not much more to it. Months of baking with quite an abrupt ending. I feel at a bit of a loss to be honest. I absolutely loved Le Cordon Bleu and am pretty proud of myself for how I did, but it was never going to last forever!

Nevermind, on to other things now.

New recipe up later this week!

IMG_2283.JPG
IMG_2285.JPG
December 18, 2018 /Sophie Faulkner
update, le cordon bleu
Weekly update
Comment
IMG_2270.JPG

23. White Bread Rolls

December 13, 2018 by Sophie Faulkner in Recipe

A new recipe! Finally!! Hopefully one that you could serve at a dinner party before the meal, class it up and give it that fancy restaurant feel! Full disclosure, I did learn this recipe at school, but they made us do complicated knots with them, which frankly was a little unnecessary! What’s wrong with just a good honest bread roll?

I’m so sorry that it has been so long since I posted a new recipe. The end of term at Le Cordon Bleu has had me pretty busy! And, I’ve been feeling a little lazy too to be perfectly honest. When you’re in school baking during the week it doesn’t always appeal to you when you get home. But, I’m back on the baking horse now, so hopefully you’ll be getting some more recipes and reviews in the lead up to Christmas!

Before we go into the recipe, I would like to just take a minute to tell you about why I decided to make bread rolls. My friend Zen, otherwise known as @greedygirlgourmet on Instagram (check her out, she does some amazing food, not just desserts), challenged me to take part in #foodbloggerschristmas. The idea behind #foodbloggerschristmas is that as food bloggers we often have food left over, especially when we are making recipes to serve 10 or more people. I don’t know about you, but I can’t eat a whole lemon tart or three tier cake in one sitting! So rather than give this extra food to our friends, housemates, family etc, OR let it go stale and have to throw it away, we would hit the streets and offer it to the homeless. However, when you make mostly cakes, tarts and biscuits, that’s not exactly what you want when living on the street. So, I decided to make bread rolls and a big pot of hot jambalaya and hit the streets with that. I thought something a little more filling would be better.

If you want to help the homeless in your area by trying to give them food, make sure you ask first. The people I spoke to were for the most part just grateful I asked, even those who turned it down. A lot of people who are in this situation do already have access to food, whether it’s through soup kitchens and shelters, or other people who have done the same thing you are trying to do.

If you want to help out without hitting the streets, there are a load of charities you can donate to, such as Crisis and Shelter, who also have a lot of information on how else you can help. You can also help by using an app called StreetLink, where you can send in information about a rough sleeper you are worried about, and they will send out someone to connect them to the local outreach service and provide them with help. If you aren’t sure if that is the right thing to do, if you think that the rough sleeper is already aware of these services and you don’t want to bother them, or whatever else you might be worried about, ASK them. They’re normal people, mostly just down on their luck, they’ll generally be happy to talk to you, especially if you’re offering help in some form. Don’t be offended if they turn the help down, but you won’t know if they need that help until you ask!

One final note before we dive into the recipe, I met a lovely Scottish man called James last night who is currently sleeping rough, but is about to start a cookery course, which ends in June and will give him certification of his skills. If anyone knows of a London based restaurant or cafe that would like to hire someone like James in June, please let me know so that I can get him in touch with them!

Makes 20 small dinner rolls

Ingredients

  • 500g plain flour

  • 30g melted butter

  • 20g sugar

  • 10g salt

  • 7g dried yeast (one packet)

  • 300ml water

Method

  1. In a large bowl, mix together the flour, sugar and salt.

  2. Make a well in the middle and pour in the water and melted butter. Mix this a couple of times to start combining it all together.

  3. Add in the yeast and then keep mixing until it is all well combined. I like to use my D Scraper, which is really just a piece of stiff plastic to chop and mix, as it makes me feel like I’m in control.

  4. Once the dough has come together, turn it out onto your work surface. DON’T flour the surface. Your dough may well be sticky, but it will get less sticky as you knead it. You can flour your hands a little, and then start kneading. You want to knead for 8-10 minutes until it is all smooth and elastic.

  5. Once you have kneaded, put the dough back in the bowl and cover with clingfilm or a tea towel and leave to prove at room temperature until it has roughly doubled in size. This could take up to an hour, depending on your yeast and the temperature of your room.

  6. Turn the dough out and knock it back a bit. I like to just cut into quarters and slam the heel of my hand into each piece to flatten it. It’s pretty therapeutic.

  7. Start dividing your dough into equal sized pieces. If you are a perfectionist like me, you can weigh them to make sure they’re all even. Roughly 45-50g is a good guideline for a small dinner roll. Cover the pieces you aren’t using with clingfilm or a tea towel so they don’t dry out.

  8. Preheat your oven to 50-60C.

  9. Roll the pieces into balls. I do this by moving my hand with my fingertips tucked underneath in a sort of claw shape in a quick circular motion.

  10. Place on a lightly greased or lined tray and allow to prove in the oven at 50-60C for about 8-10 minutes.

  11. Take the rolls out and raise the temperature of the oven to 190C. They will keep proving a bit at room temperature, so don’t forget about them! Once your oven is heated, bake the rolls for 12-15 minutes until golden brown and nicely crusted on top.

  12. Enjoy warm with a slather of butter. Yum!

IMG_2259.JPG
IMG_2262.JPG
IMG_2265.JPG
IMG_2266.JPG
December 13, 2018 /Sophie Faulkner
Recipe, bread, Savoury
Recipe
Comment
  • Newer
  • Older

Powered by Squarespace